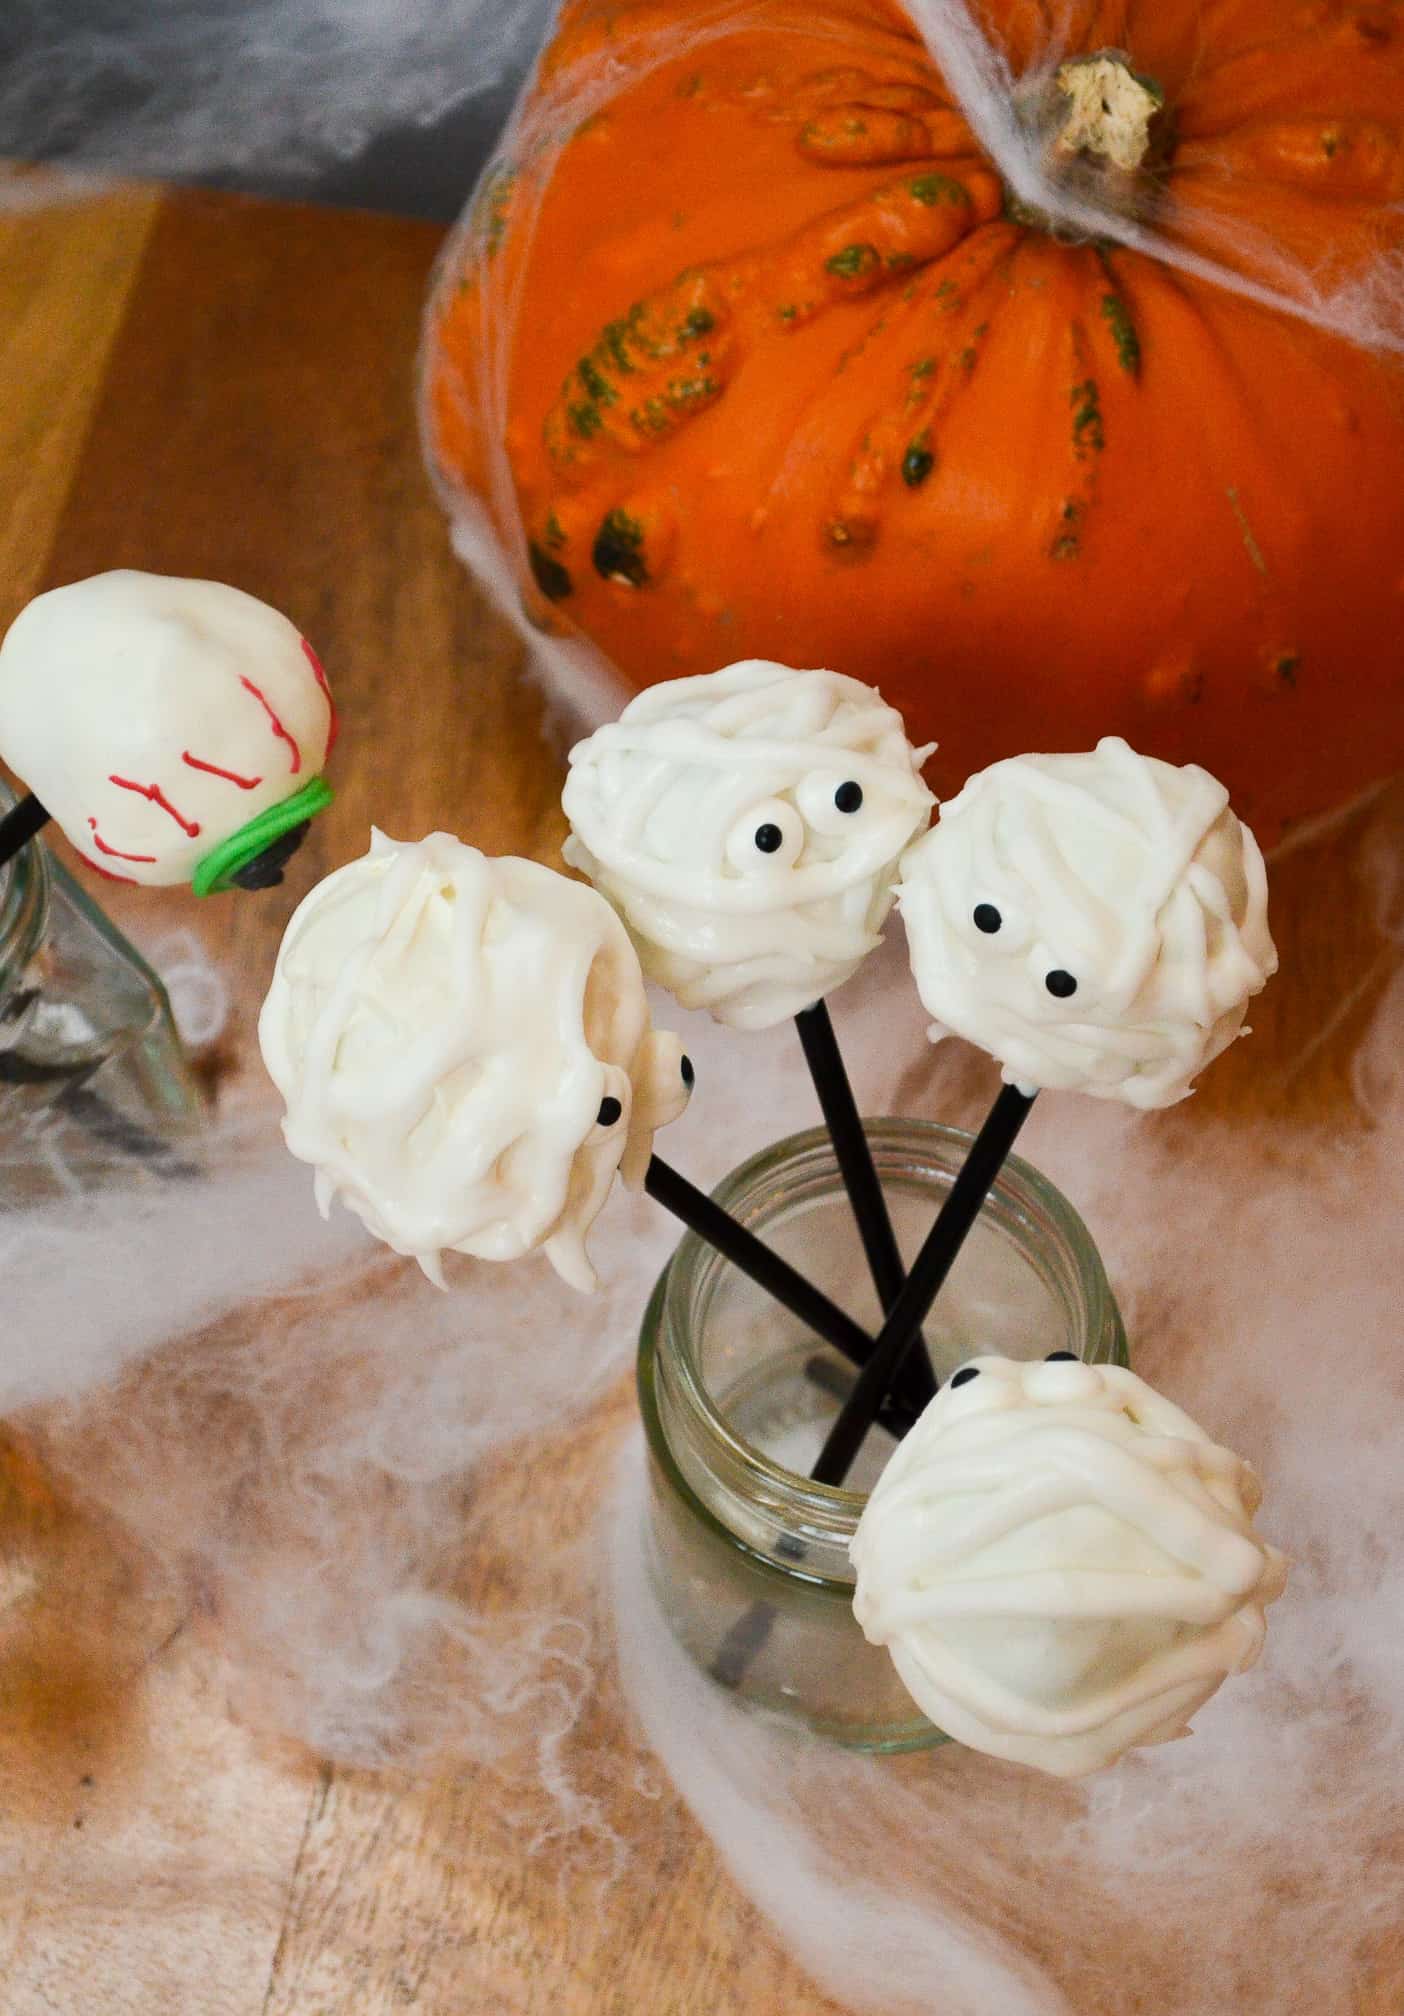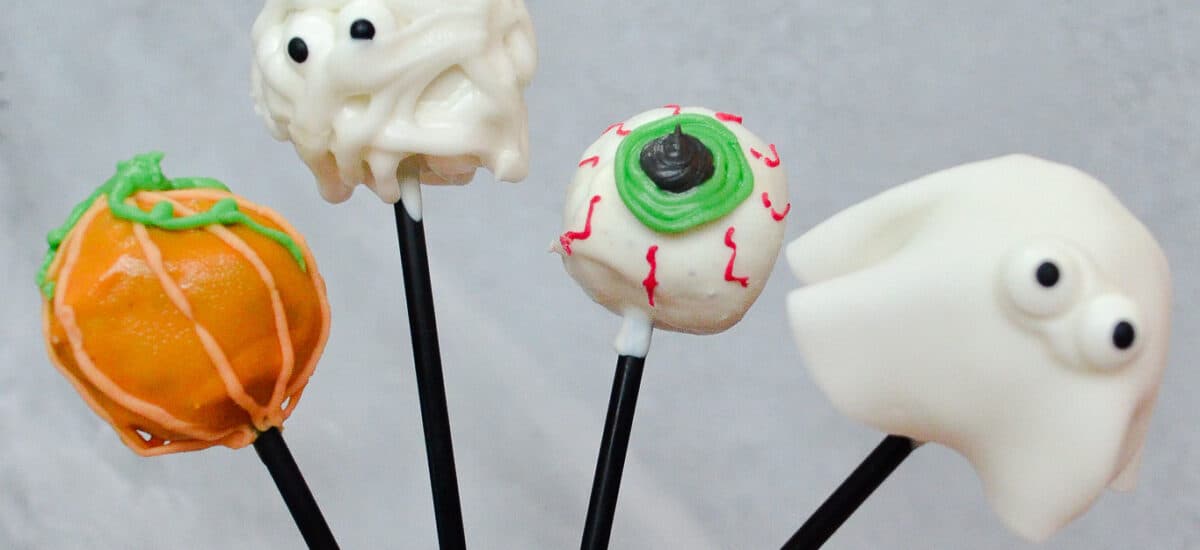
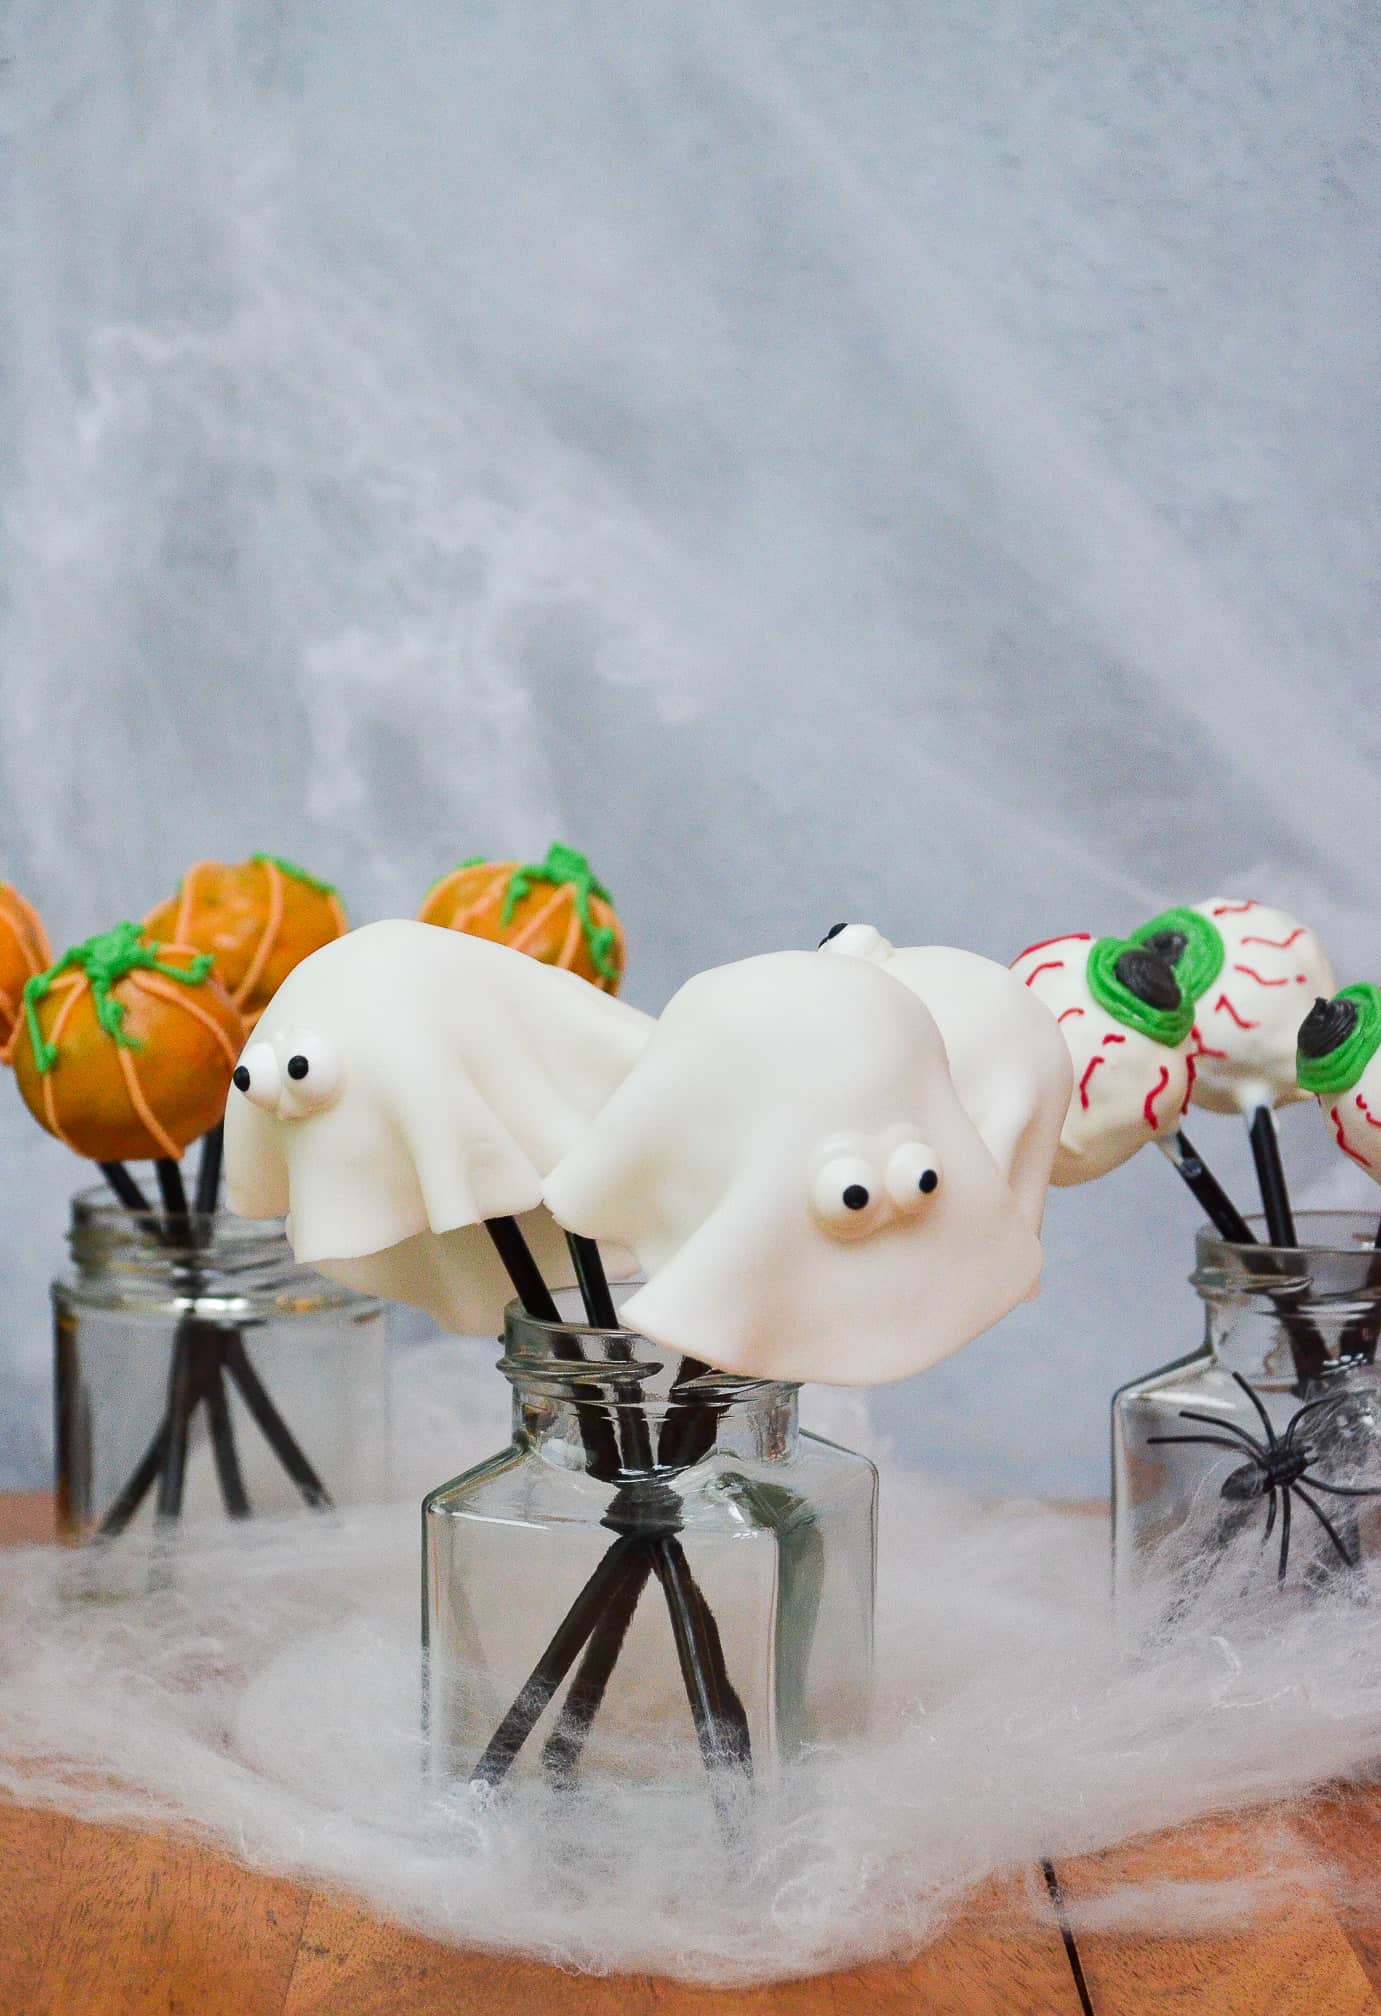
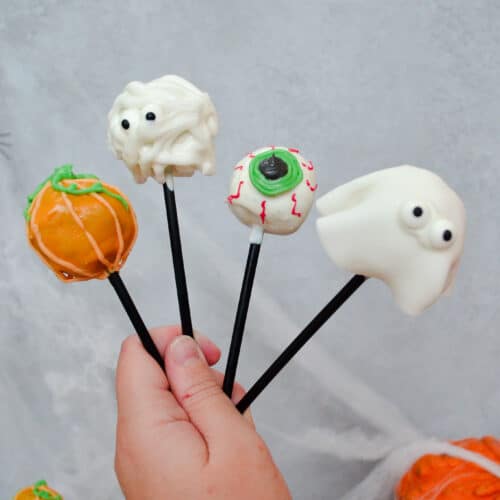
Halloween is all about the cute and spooky treats, and these Halloween Cake Pops will be the star of your party spread! Moist chocolate cake, wrapped in chocolate shells that look like ghosts, mummies, eyeballs and pumpkins!
Halloween treats are some of the most fun and creative to make, and these cake pops are no exception! They do take a little time to decorate, but they’re a really fun way to spend an afternoon with a Halloween film on the tv. The cake itself is super moist, as you mix crumbled chocolate cake with vanilla buttercream, and the decorations deliciously sweet! They’d also make a great gift to bring to a Halloween party!
Key Ingredients You’ll Need
- Chocolate Cake – Now I’m not usually one to advise you use a box cake mix, but when it comes to cake pops I think its the best option! Cake pops are made up of crumbled cooked cake, combined with buttercream and rolled into a ball. With the decoration being the most important aspect, especially in these Halloween cake pops, you want to simplify the cake process as much as you can. So use the best chocolate cake mix you can get, and get it baked in advance. I used the Wrights Chocolate Fudge Cake Mix, as it’s genuinely SO delicious – you’d never know its a cake mix!
- Candy Melts – For dipping the cake pops, candy melts are by far the easiest option to use. If you’ve never heard of them before, they’re a coloured flavoured confectionary that is predominately melted and used as a coating for cake pops, truffles, biscuits etc. They make the process really simple as they come in so many different colours, including bright white! If you’ve ever melted white chocolate before, you’ll know it has a yellow tinge, which doesn’t work for our mummies or ghosts at all! You can get candy melts from amazon, or cake decorating websites.
- Royal Icing – For all the details on the cake pops I mixed up small batches of royal icing, in different colours. You will need quite a few different piping bags for each colour! But royal icing works so well here, as its a really stiff icing that dries hard. Perfect for adding all the details to make the cake pops perfect for Halloween!
How to make halloween cake pops
There are quite a few steps to make these cake pops, but most of these are down to the decoration which is the FUN part! You don’t need to stress about it, and actually the weirder the cake pops look the more ‘halloweeny’ in my opinion! So let’s get going!
Making the cake pop balls
As I said above, I’d recommend using a box cake mix for the cake pop balls as it just makes your life a lot easier. I’d also recommend making the cake the night before you want to make the cake pops. As you’re crumbling the cake up, it’ll help if the cake is a little firmer so it doesn’t turn to mush.
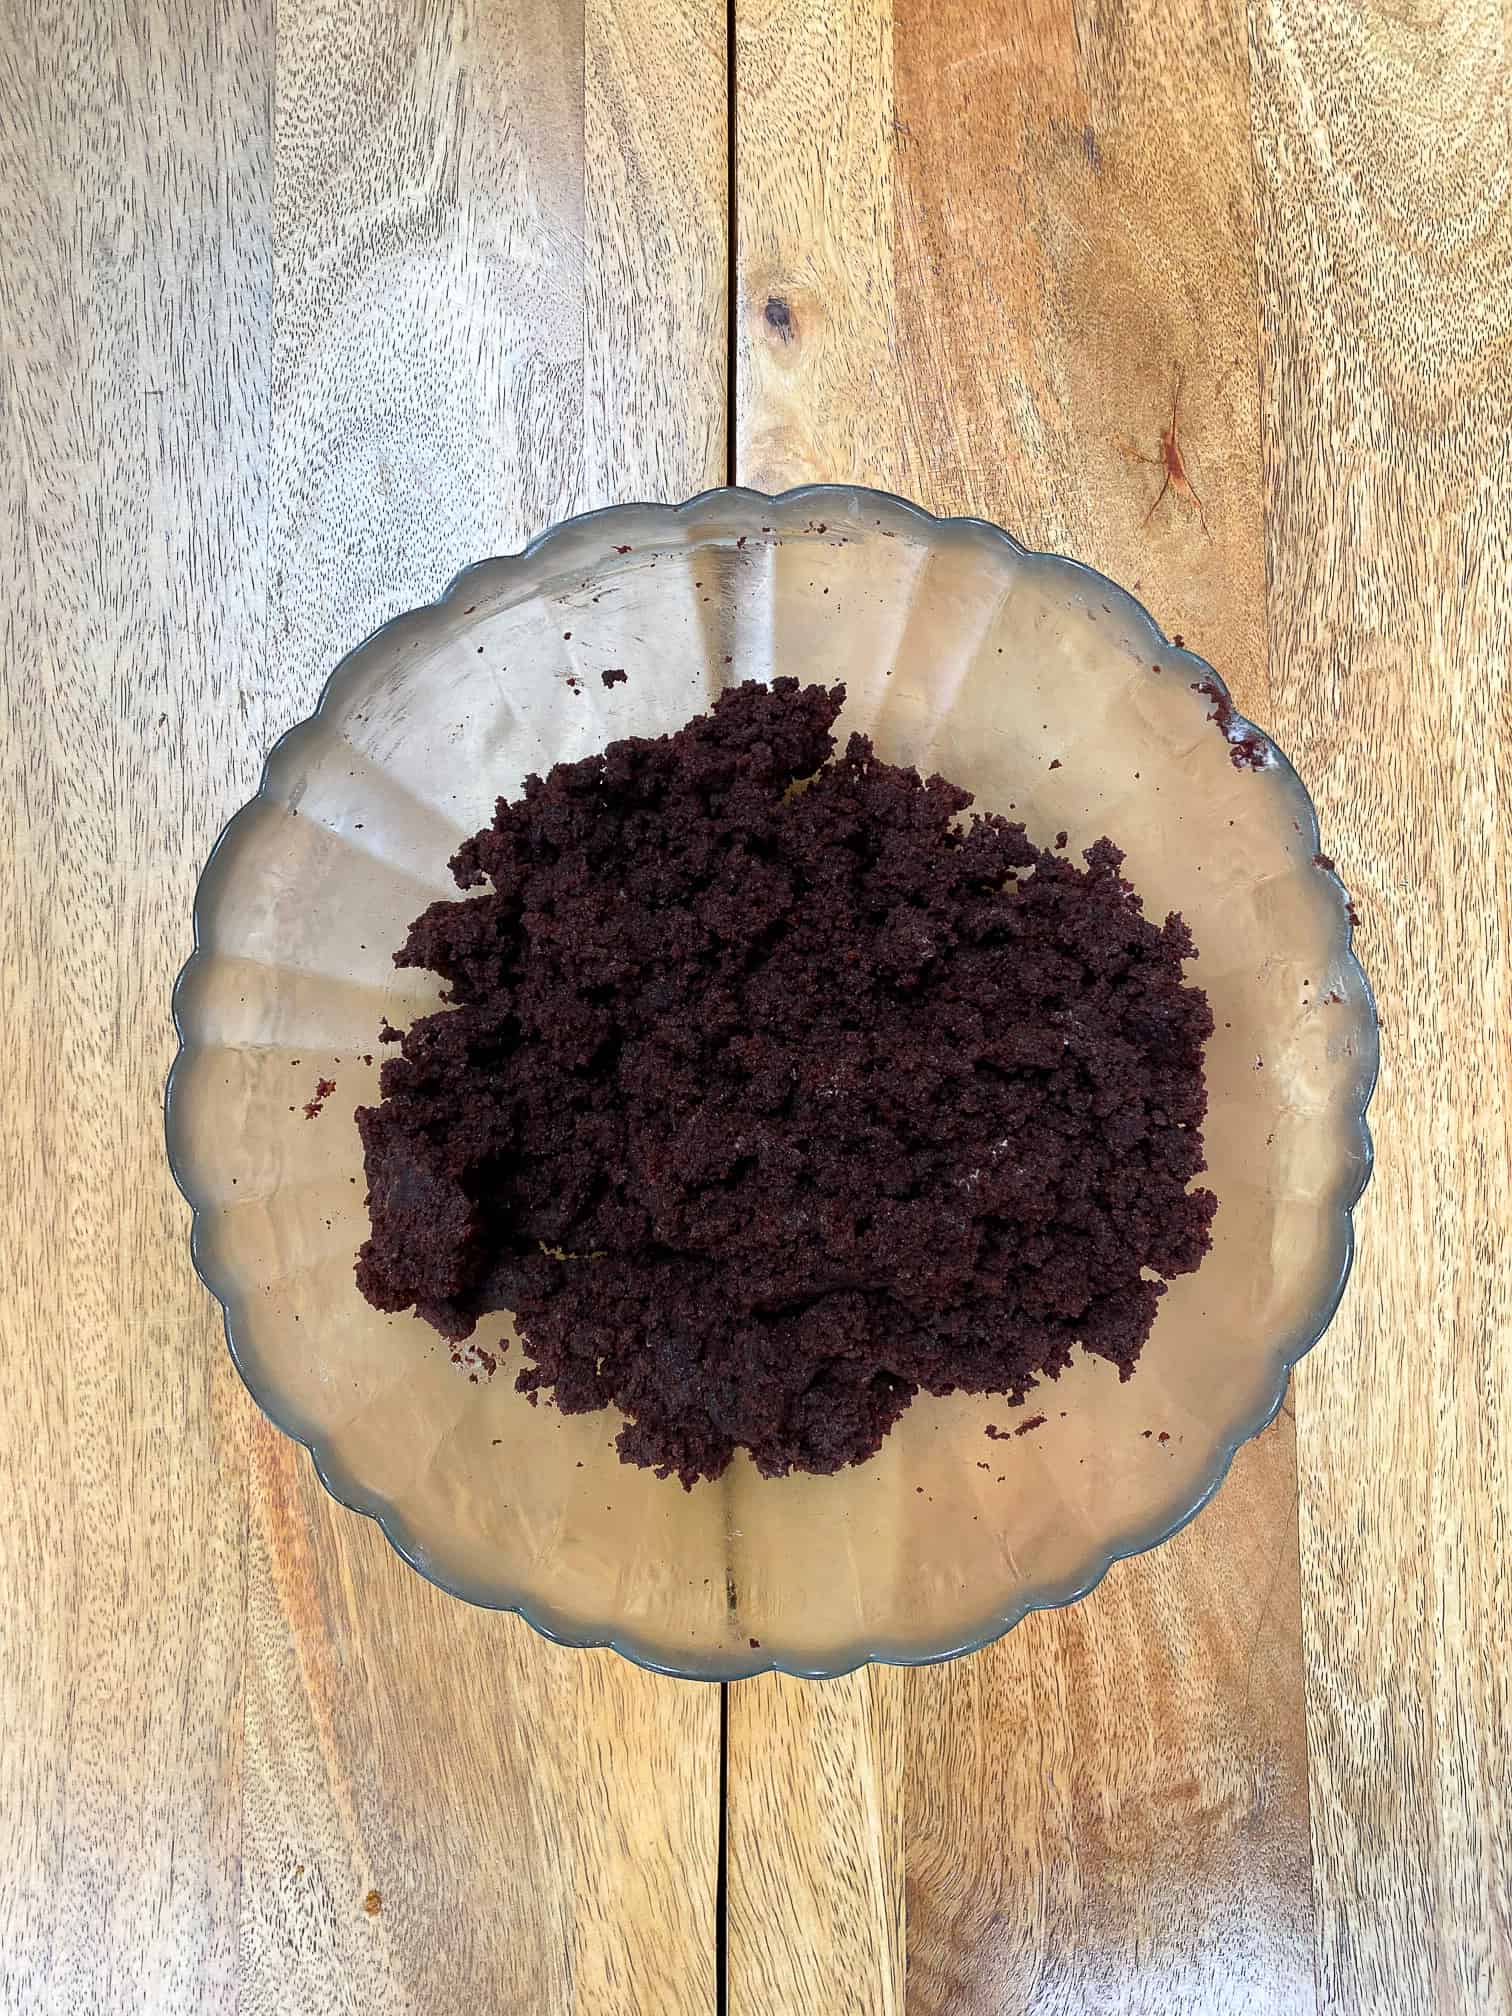
So, on the day of your cake pop making, firstly crumble the cake into a large bowl. You want it to look like breadcrumbs. Then make up a quick buttercream frosting (you could also buy this pre-made, but personally I’m not a fan of them! Box cake mixes are the only thing I condone!) and mix this into the crumbled cake. The mixture should be just moist enough, that you can squeeze a small handful and it will stick together.
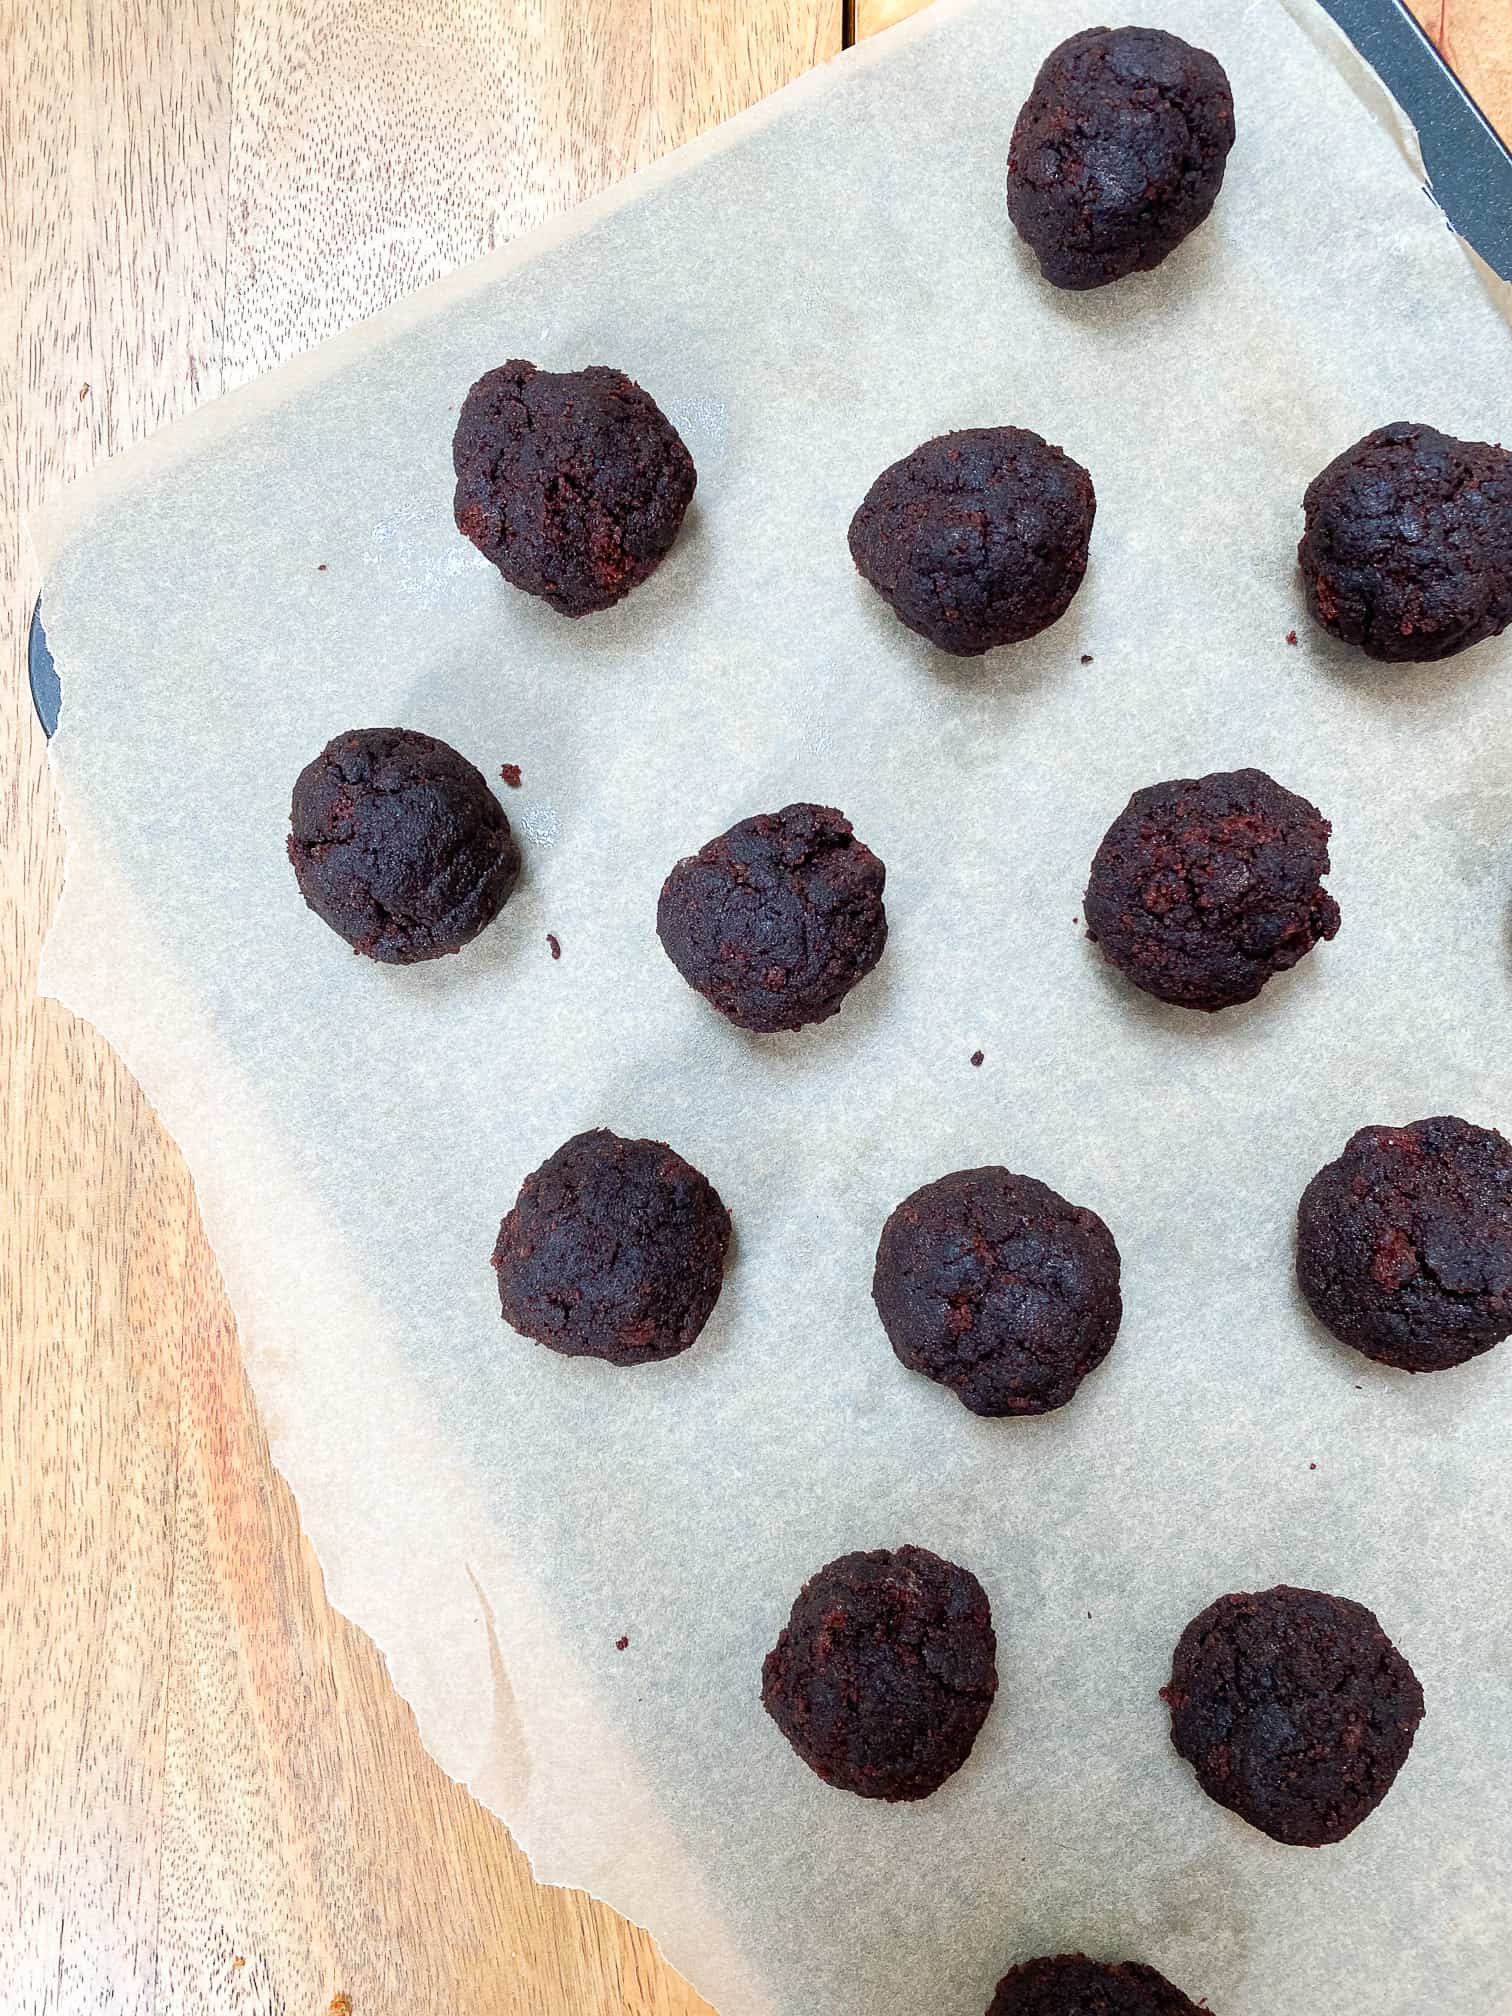
Then you can make your balls. I made 20 balls, about 30g each or 2 tablespoons. You could make yours smaller if you want, but I wouldn’t go any larger than that. Once you have your balls, place them on a baking tray and pop them into the freezer. You want them to be nicely chilled when you dip them into the candy melts, so they don’t just fall apart.
Dipping the cake pops
Once your balls have chilled in the freezer for 20 minutes, I like to take them out and re-roll between your hands to smooth the ball shape. This can be a little tricky to get completely perfect, but as we will be decorating the cake pops it doesn’t matter too much for this recipe. Then pop them back in the freezer for another 5 minutes.
In that time, you want to melt your candy melts in preparation. Ideally you’d melt them in a heat-proof jug, but if you don’t have a microwave you can heat them over a bain-marie in a heat-proof bowl. If you are melting in a bowl however, I would then pour the mixture into a jug. A jug is a better vessel for dipping, as the melted candy melts are in a a smaller concentrated area.
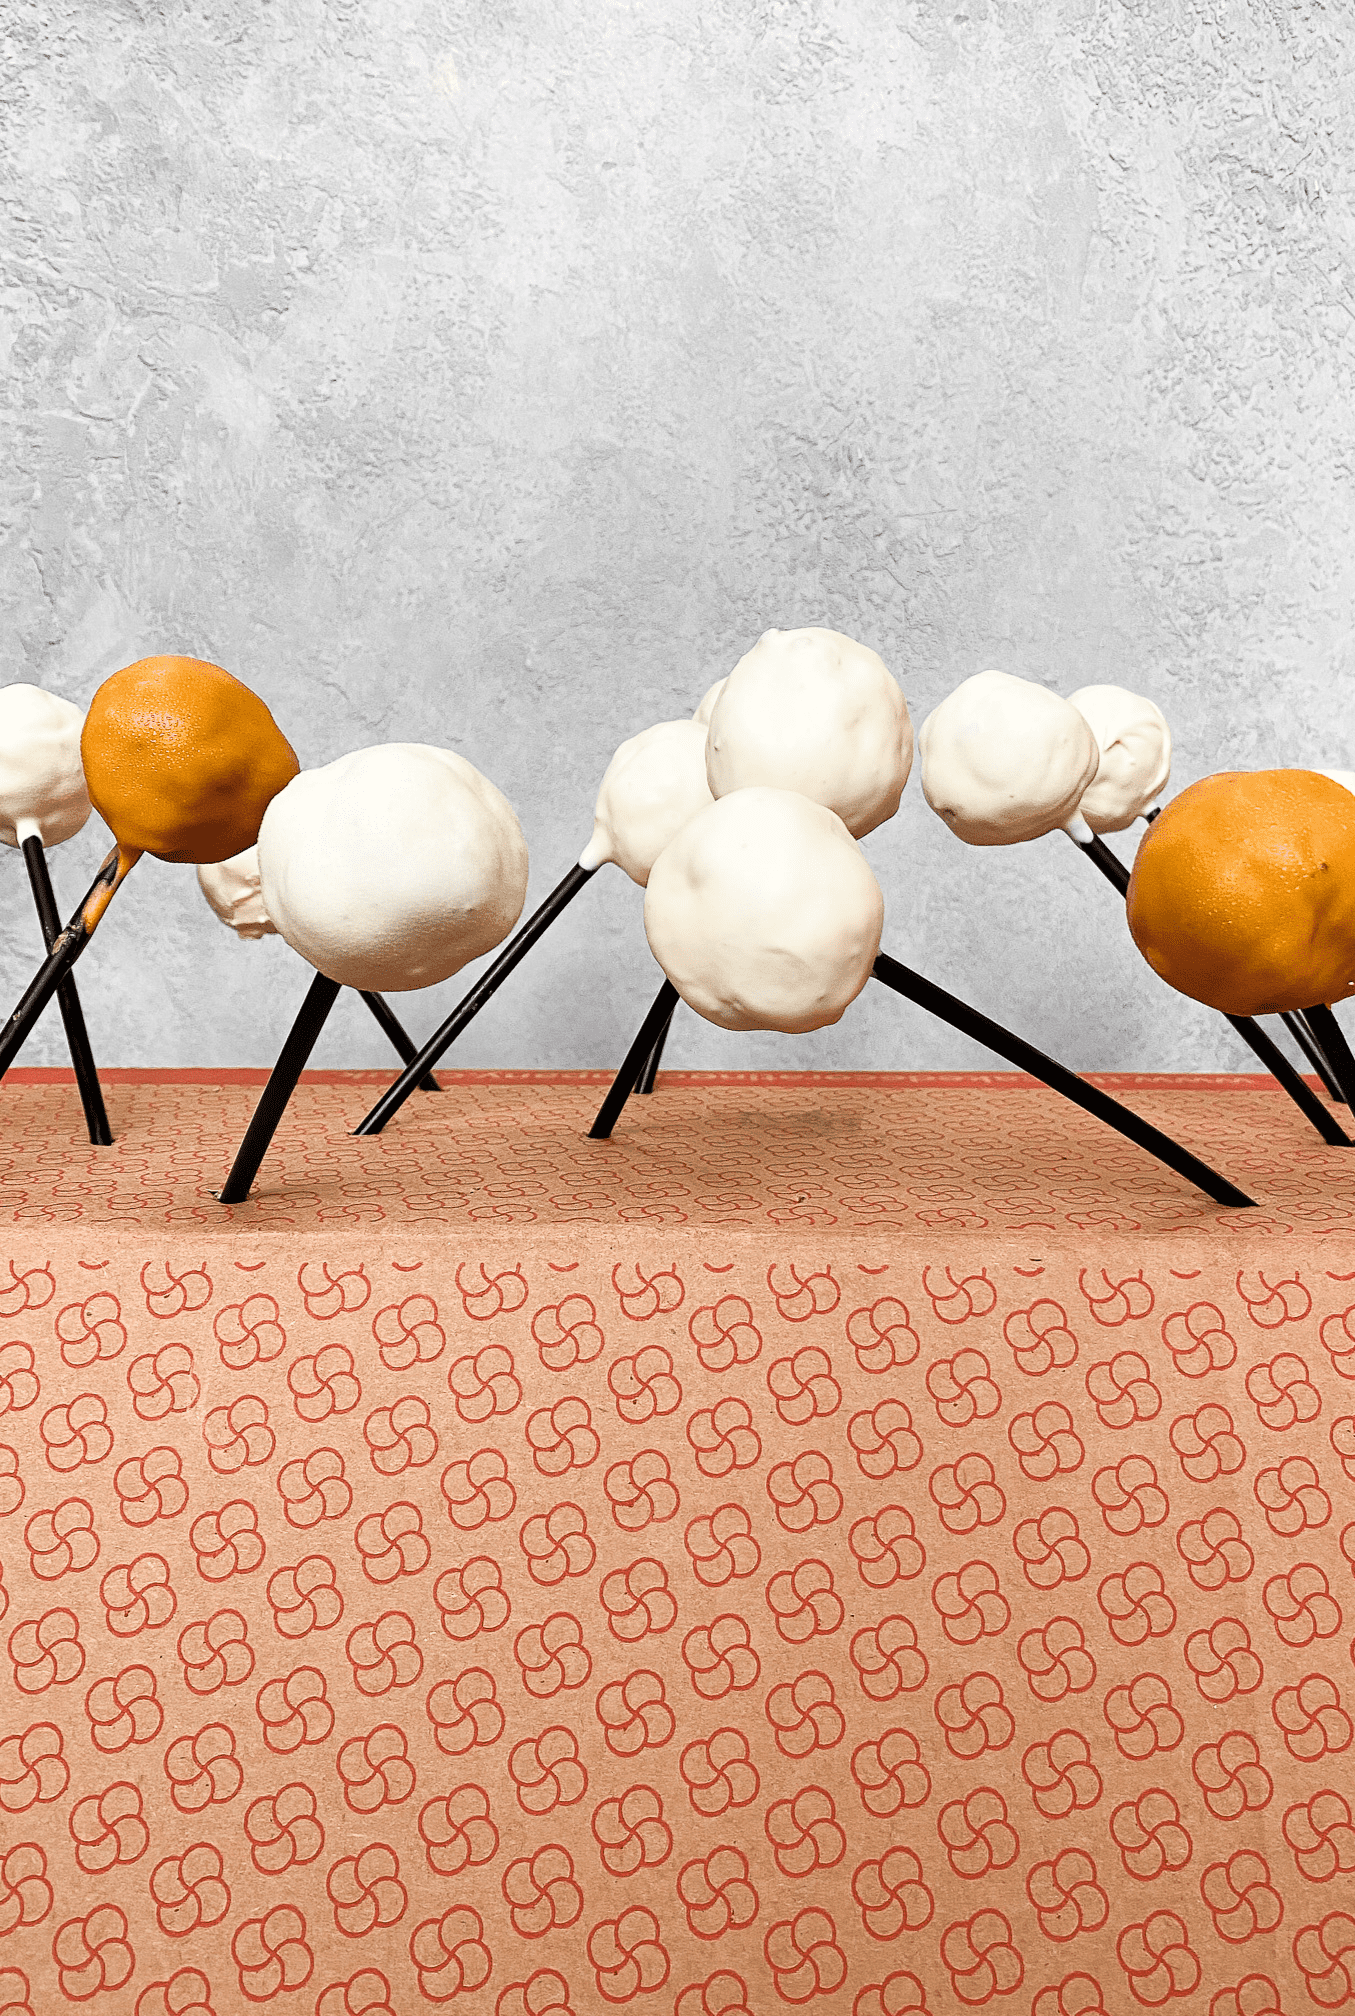
Before you start dipping, you need to have your cake pop sticks ready, and something to stick them in for the cake pops to dry. I used a leftover cardboard box and made small holes in one side, so I could push the sticks in and leave to dry. They don’t take long until they’re set, but you do want to make sure you don’t touch them while they’re still wet.
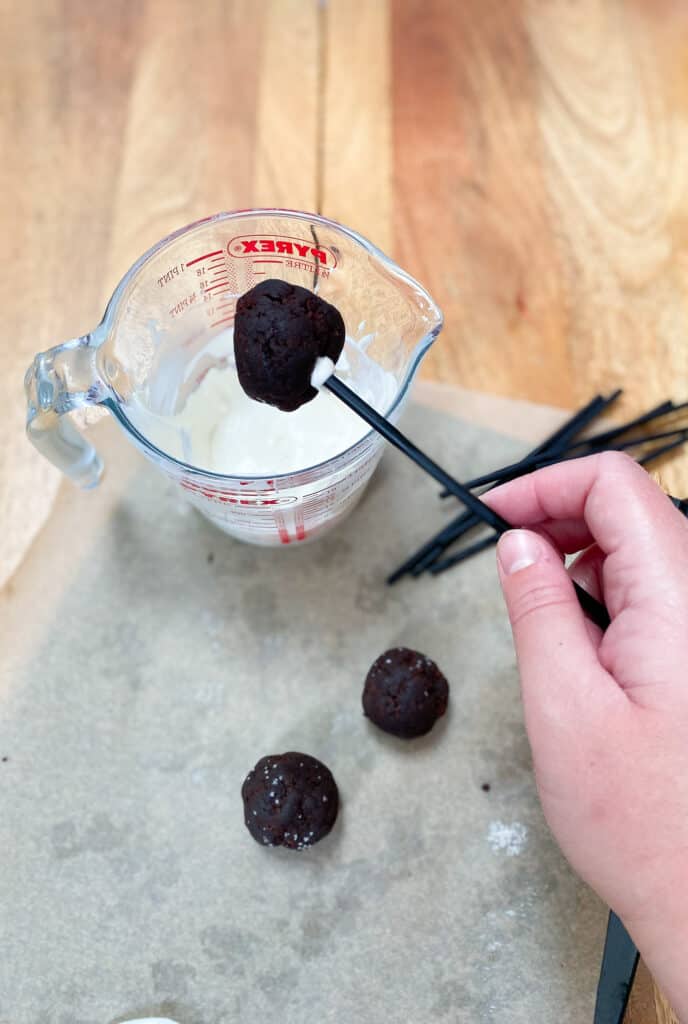
The best technique to dipping, is first to dip the stick into the melted candy melts, then push this into the middle of a cake pop. Then swirl the cake pop in the melted candy melts until fully coated, and then gently tap the stick on the side of the jug to shake off any excess. Repeat that process for all the pops, making sure to coat four of them in the orange candy melts instead! Then just leave them all to set.
Decorating the halloween cake pops
To decorate the cake pops you’ll need royal icing, fondant icing and edible eyes – I got these from the supermarket, but you can also get them on Amazon. I did want to say though; I will take you through how to decorate the pops how I’ve done them, BUT you can totally decorate these how you want! Or do more of each style if you prefer a particular pop, there’s no rules here!
First, make up a batch of royal icing without any colourings, then get started;
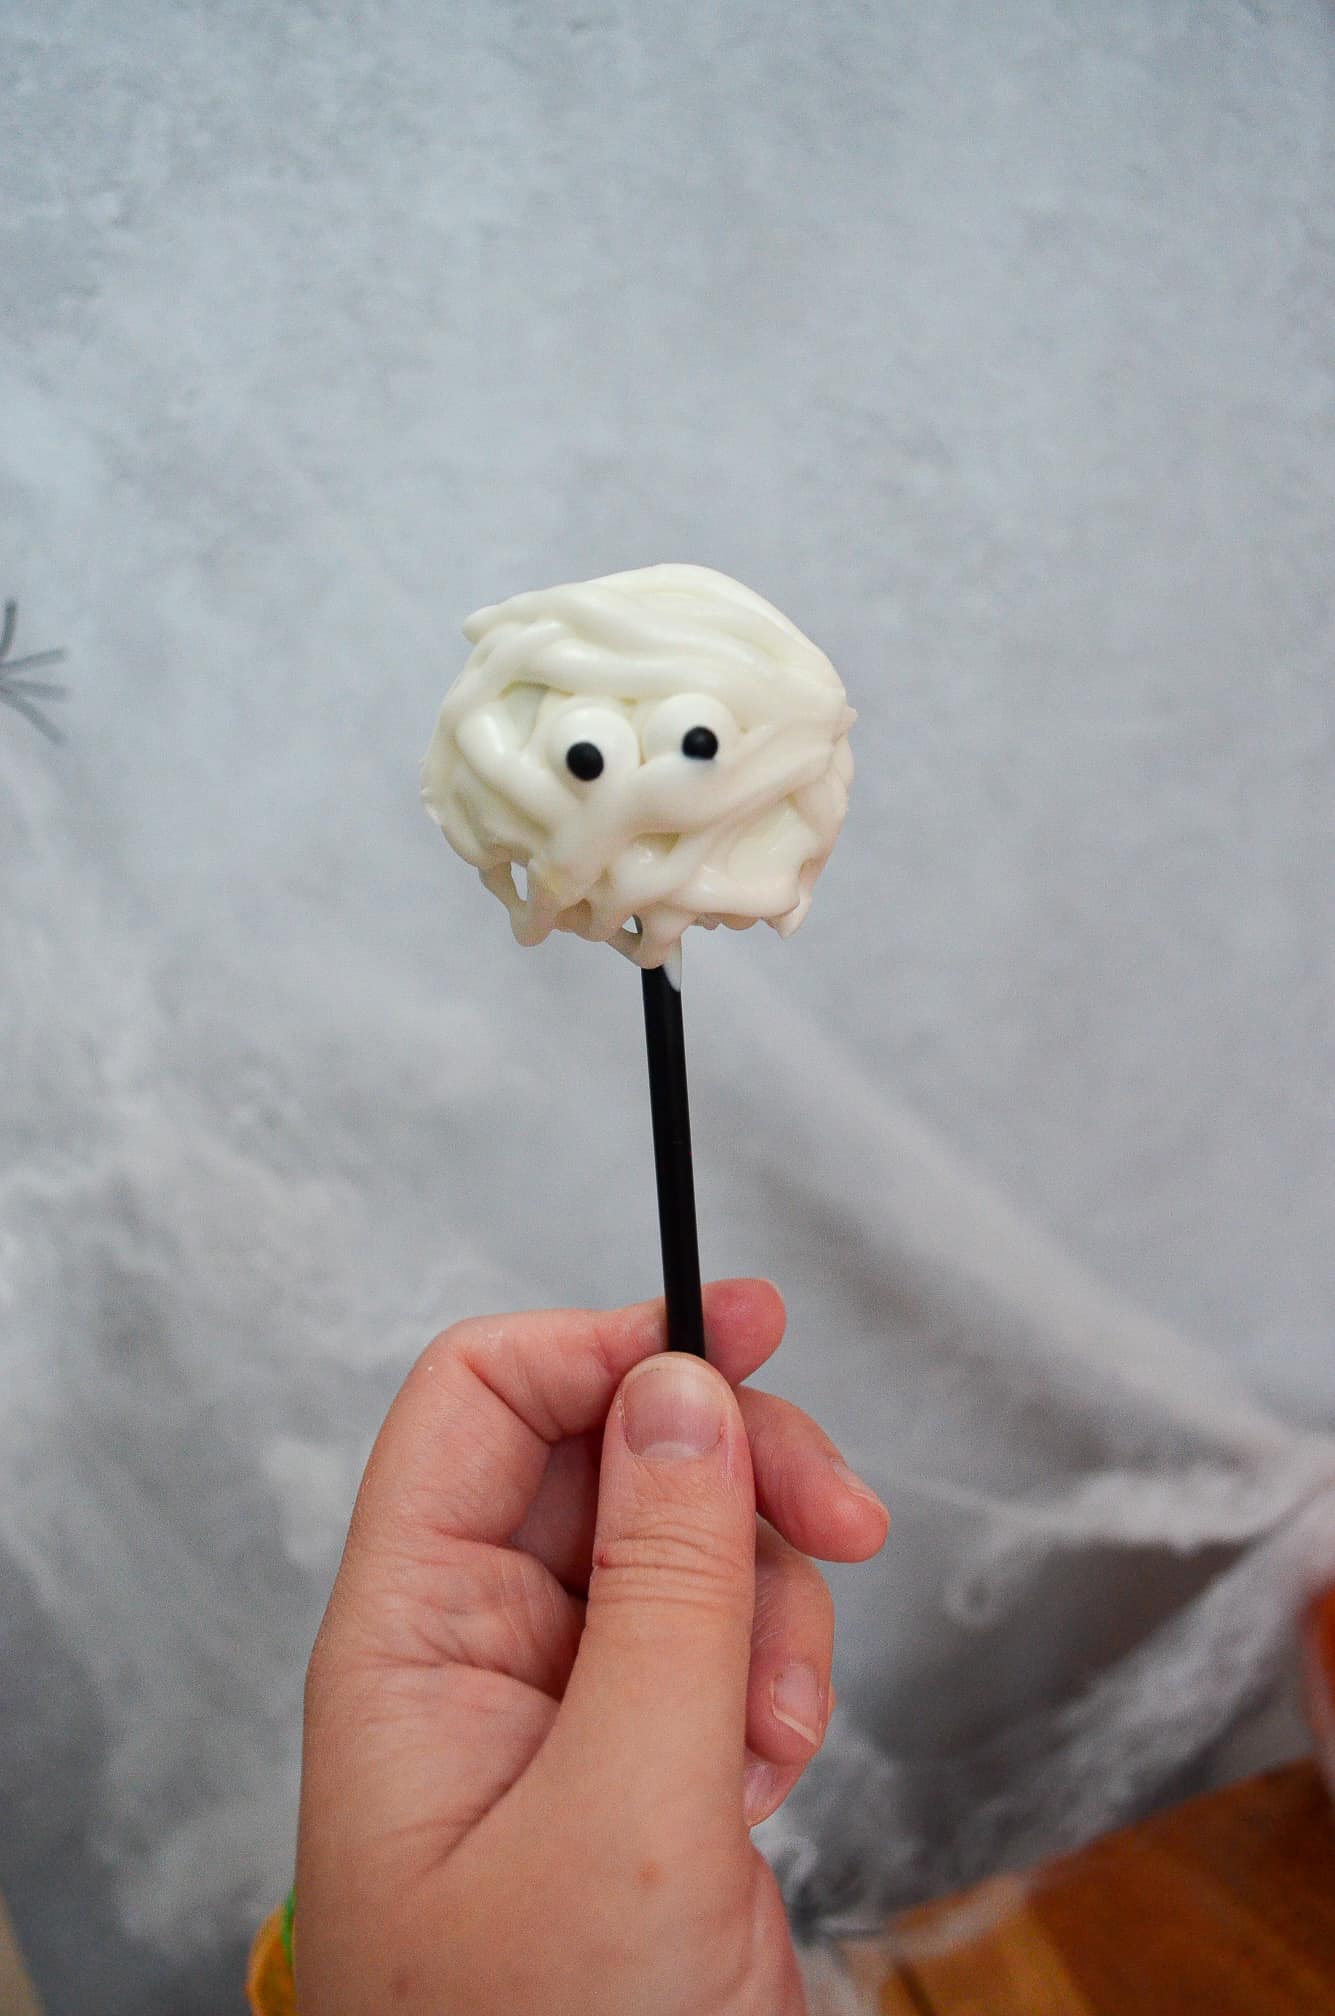
- Mummy – Start with the mummy as you’ll only need to use white royal icing. The icing should be quite stiff, and you’ll need it in a piping bag with a medium hole cut or tip used. Firstly, pipe two small blobs and press two of the edible eyes on until secure. Then pipe the icing in strips, randomly all across the pop, covering the eyes partially to give the ‘mummy’ look. Then set aside to dry.
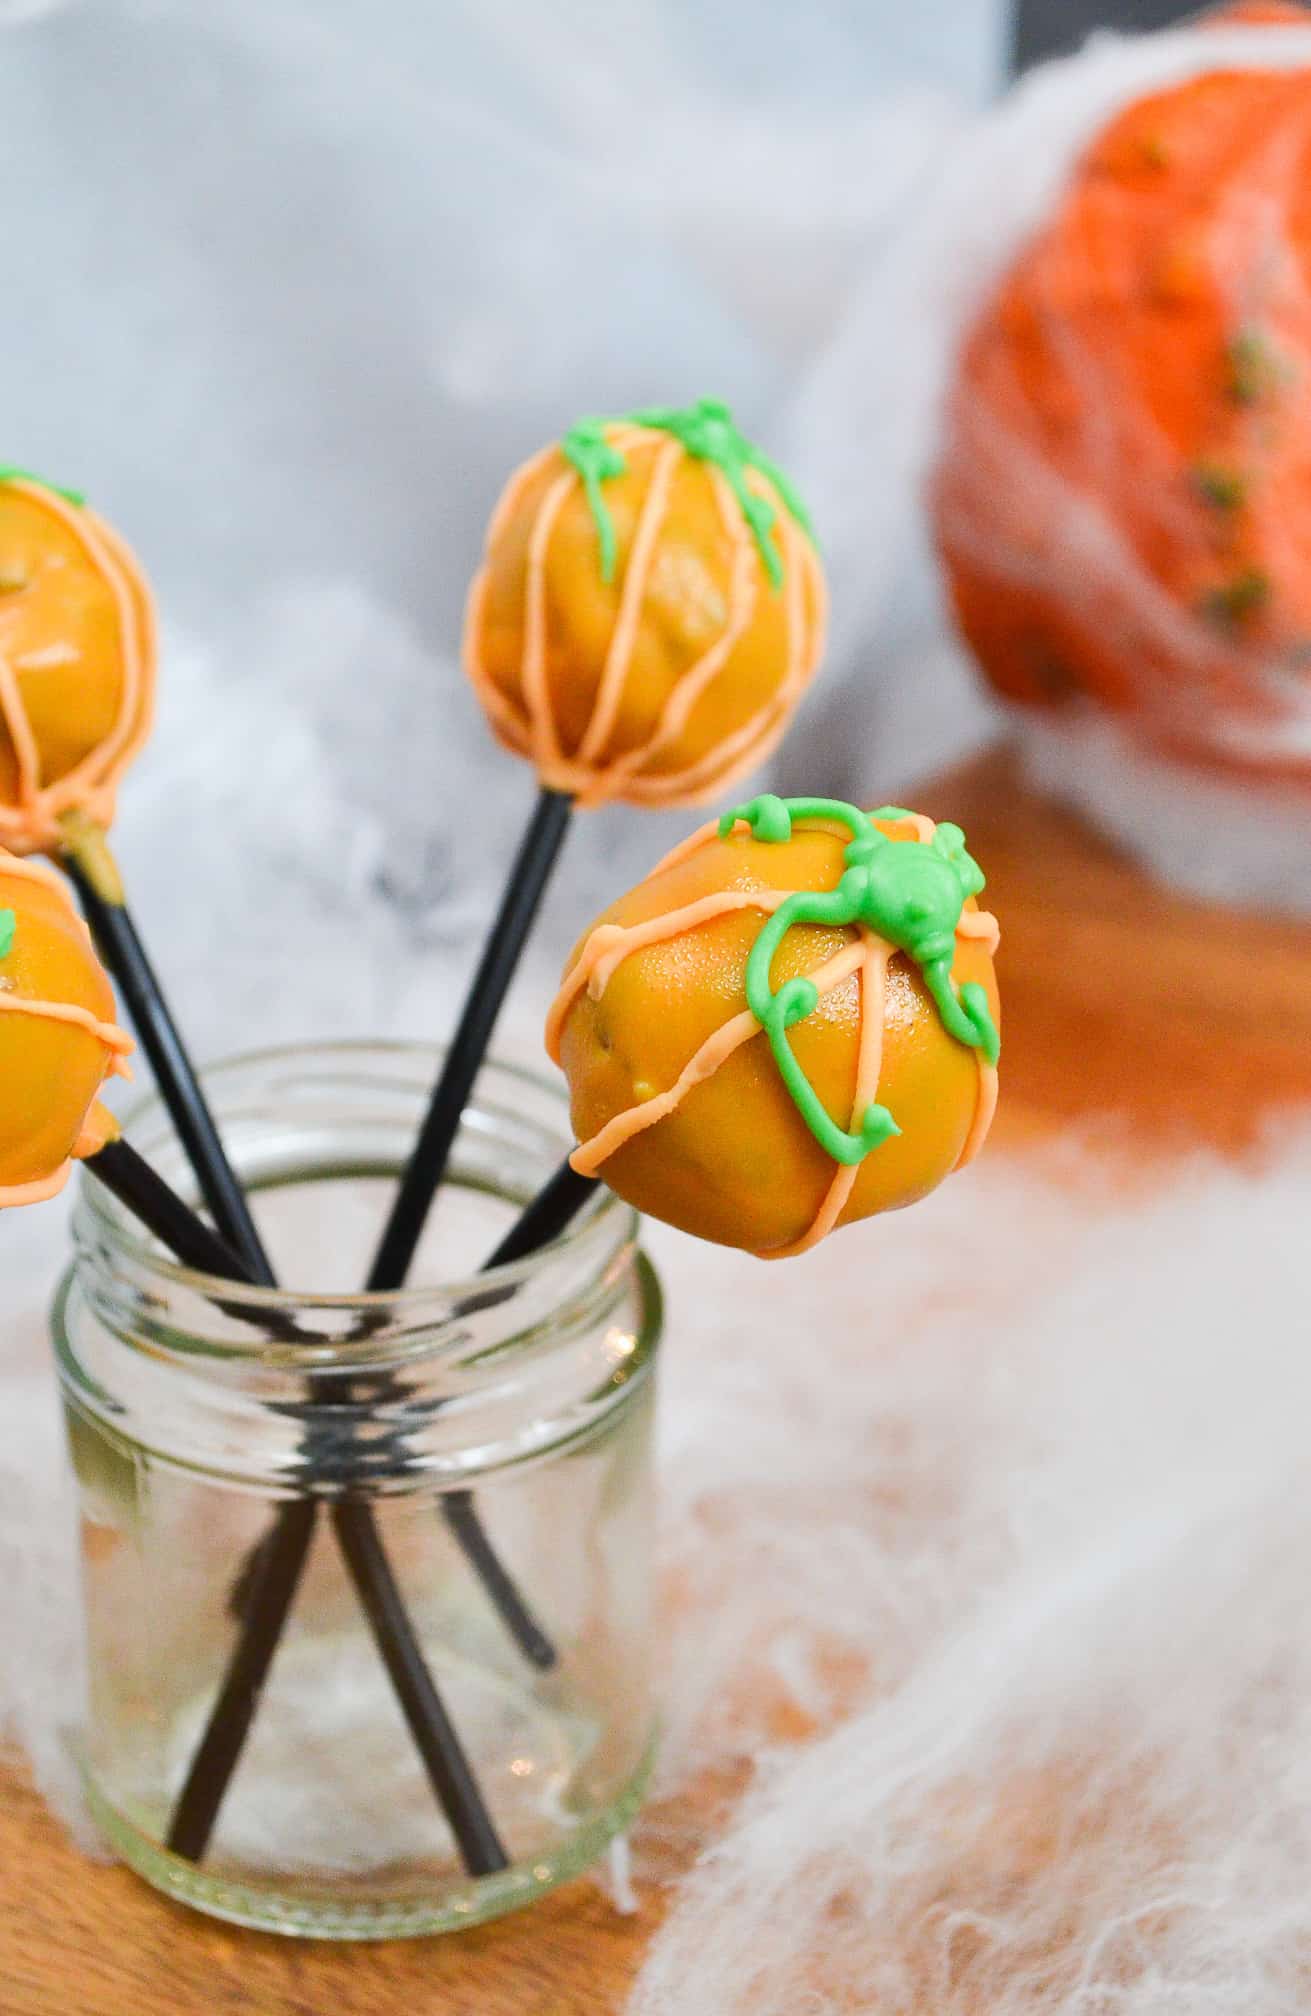
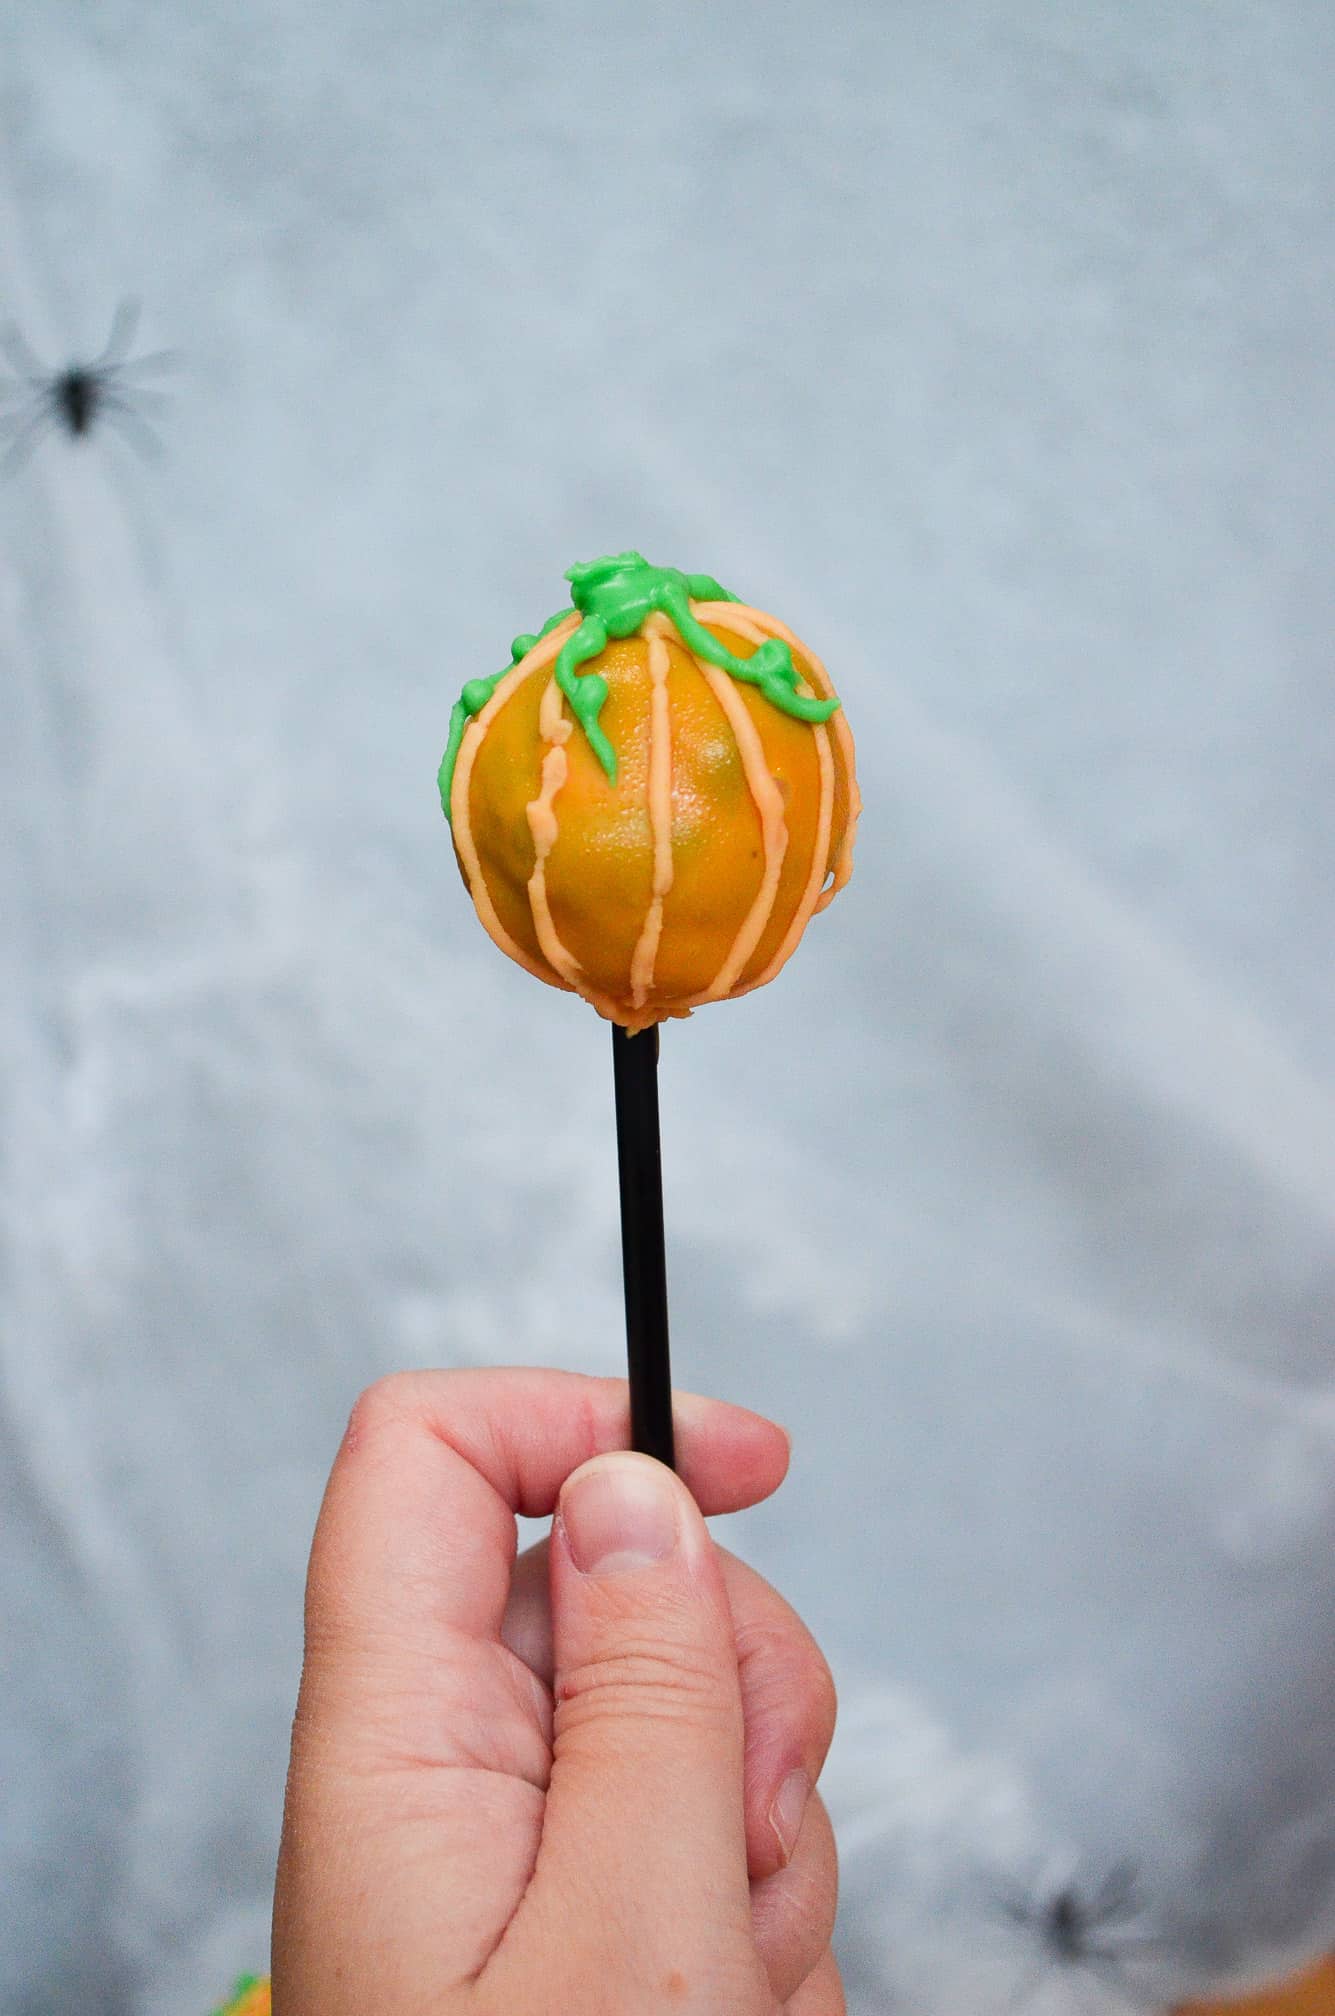
- Pumpkin – For the pumpkins you’ll need to colour some of the remaining white icing, orange and green. You need to use some of the green icing for the eyeball next, so make this a bigger batch than the orange. Pop both colours into separate piping bags with a very small hole cut or tip used. With the orange icing, pipe thin lines up the sides of the cake pop, to emulate the pumpkin ribs. Then using the green icing pipe the stalk and stem, and set aside to dry.
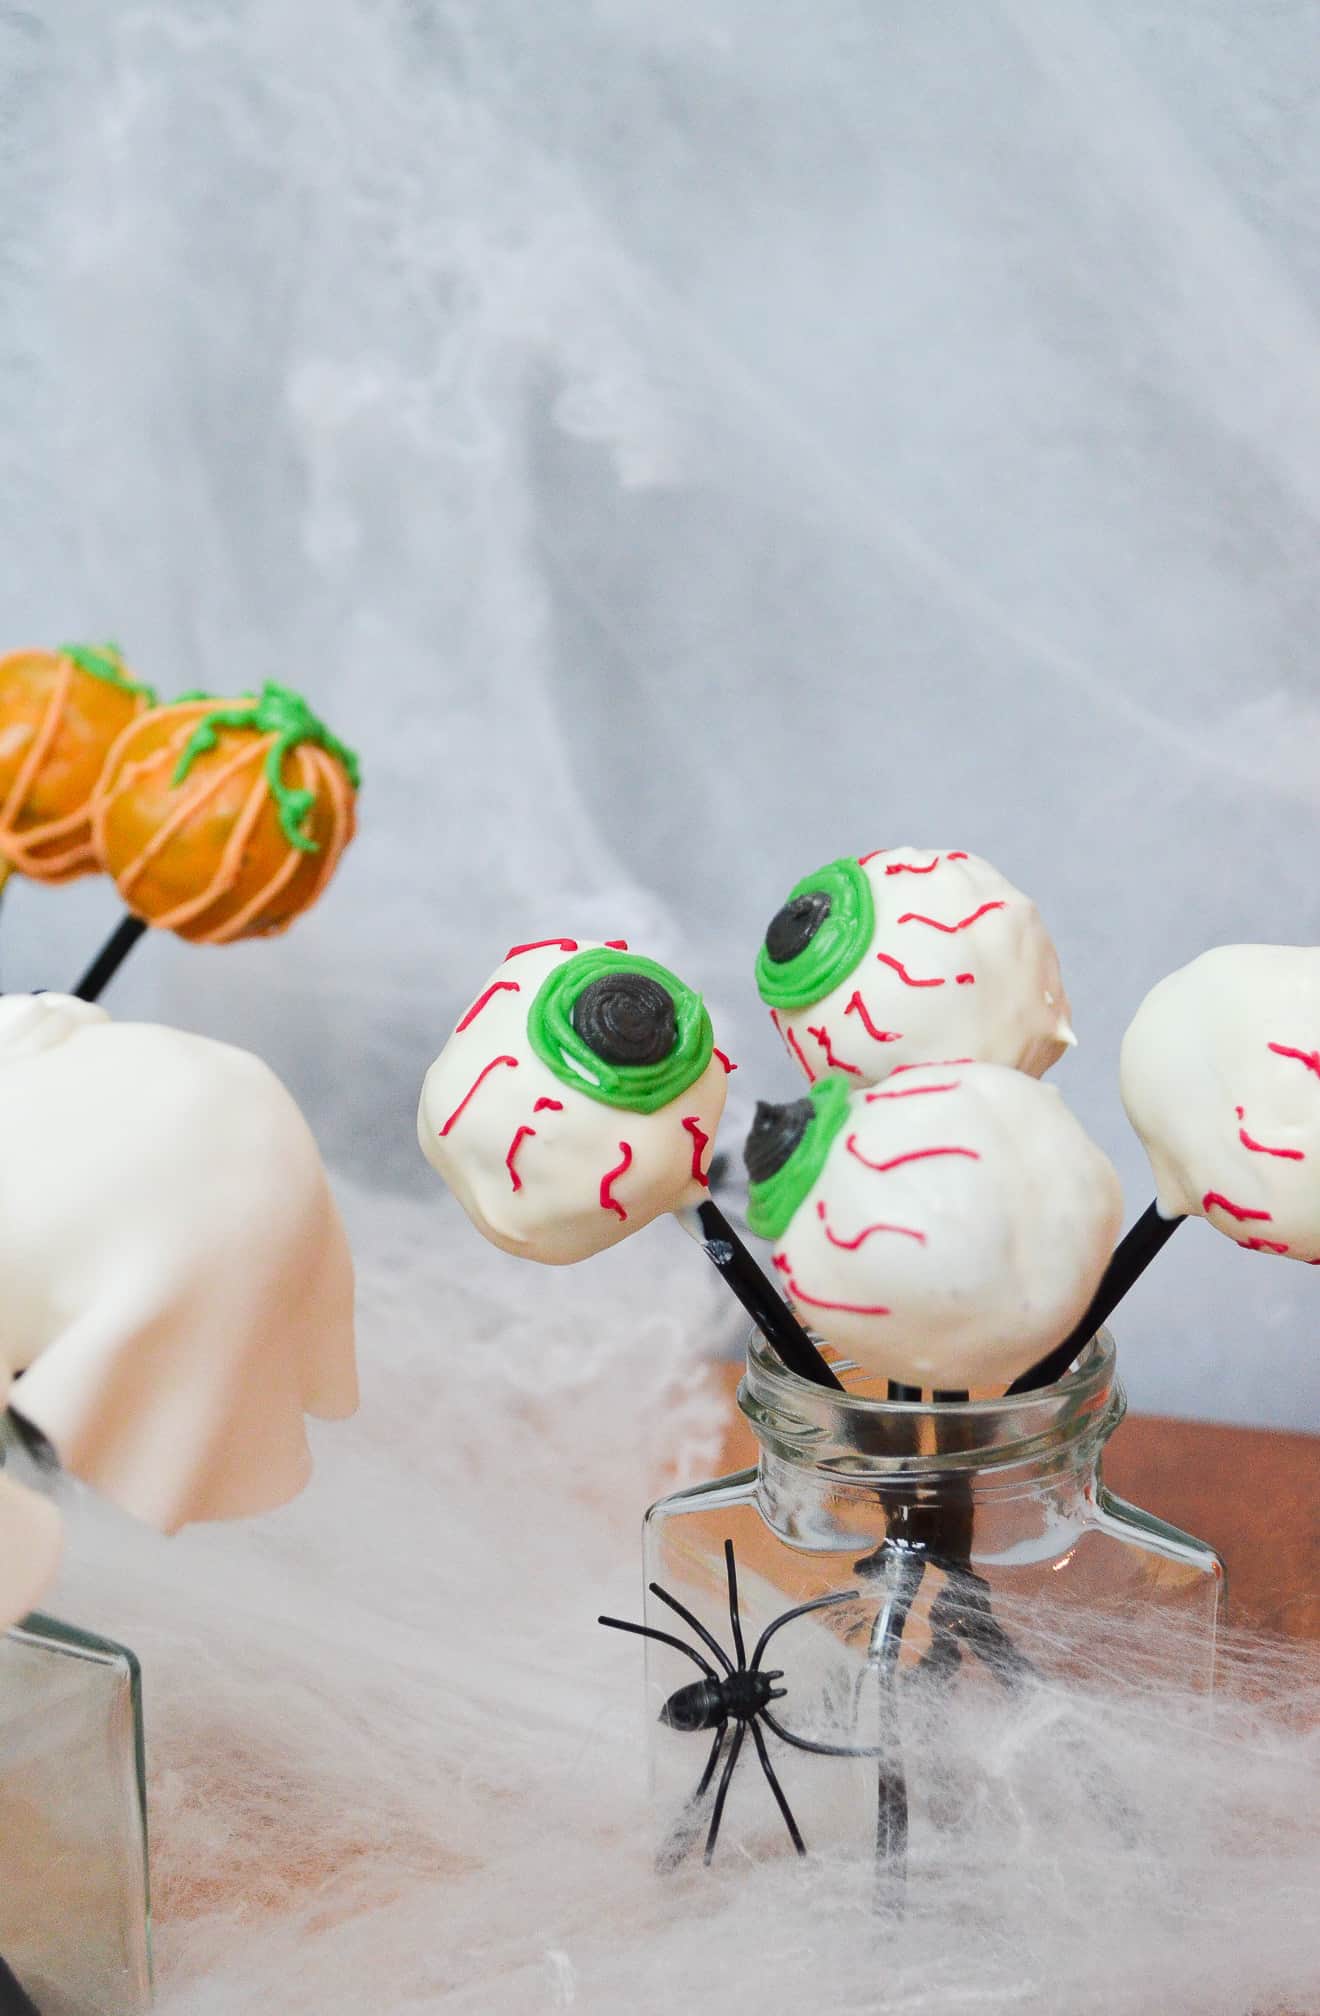
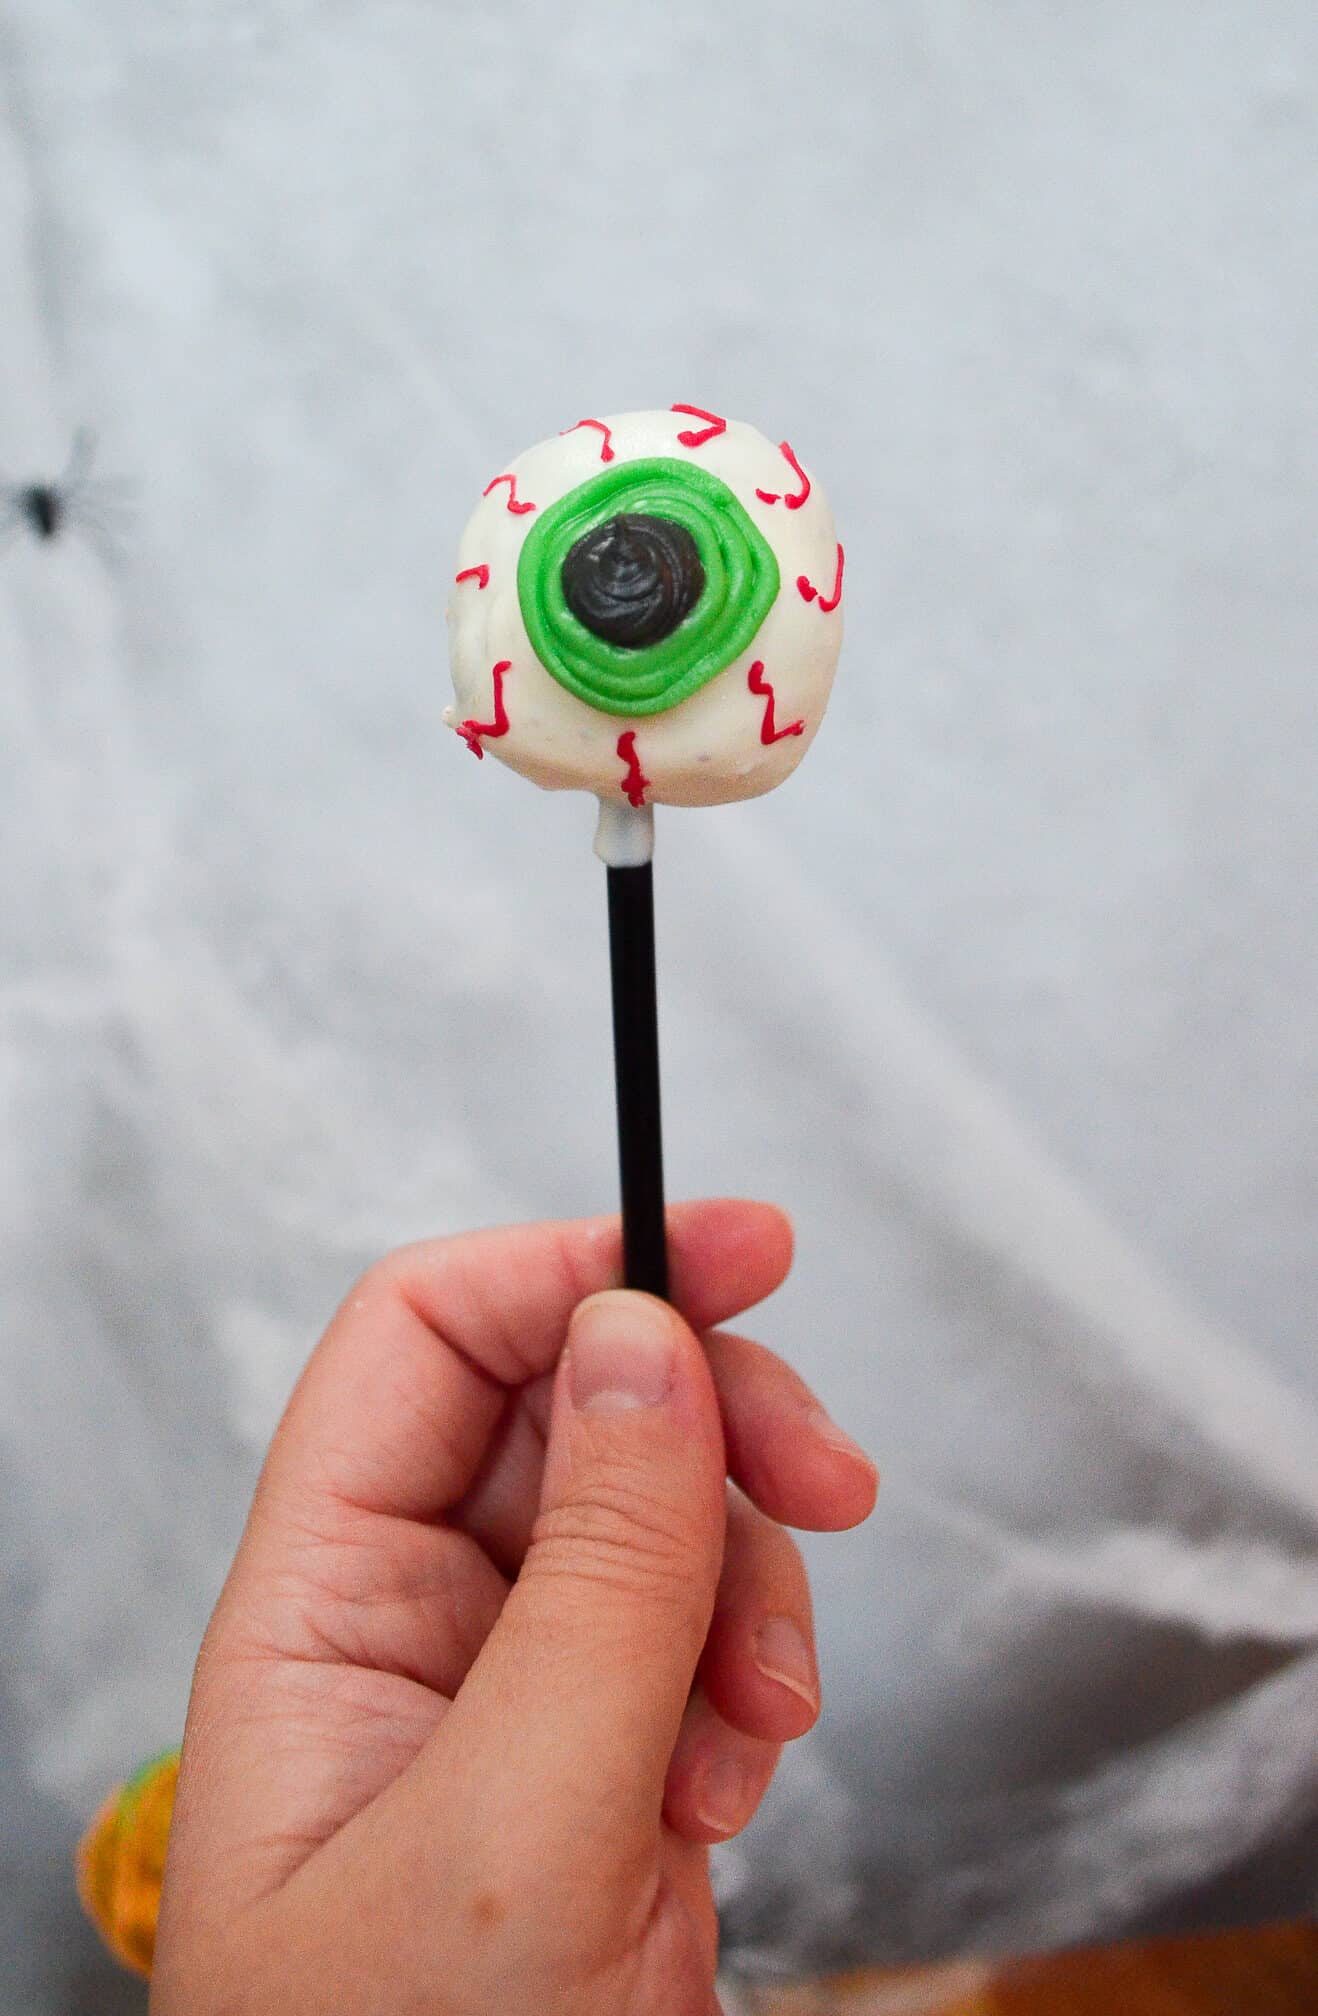
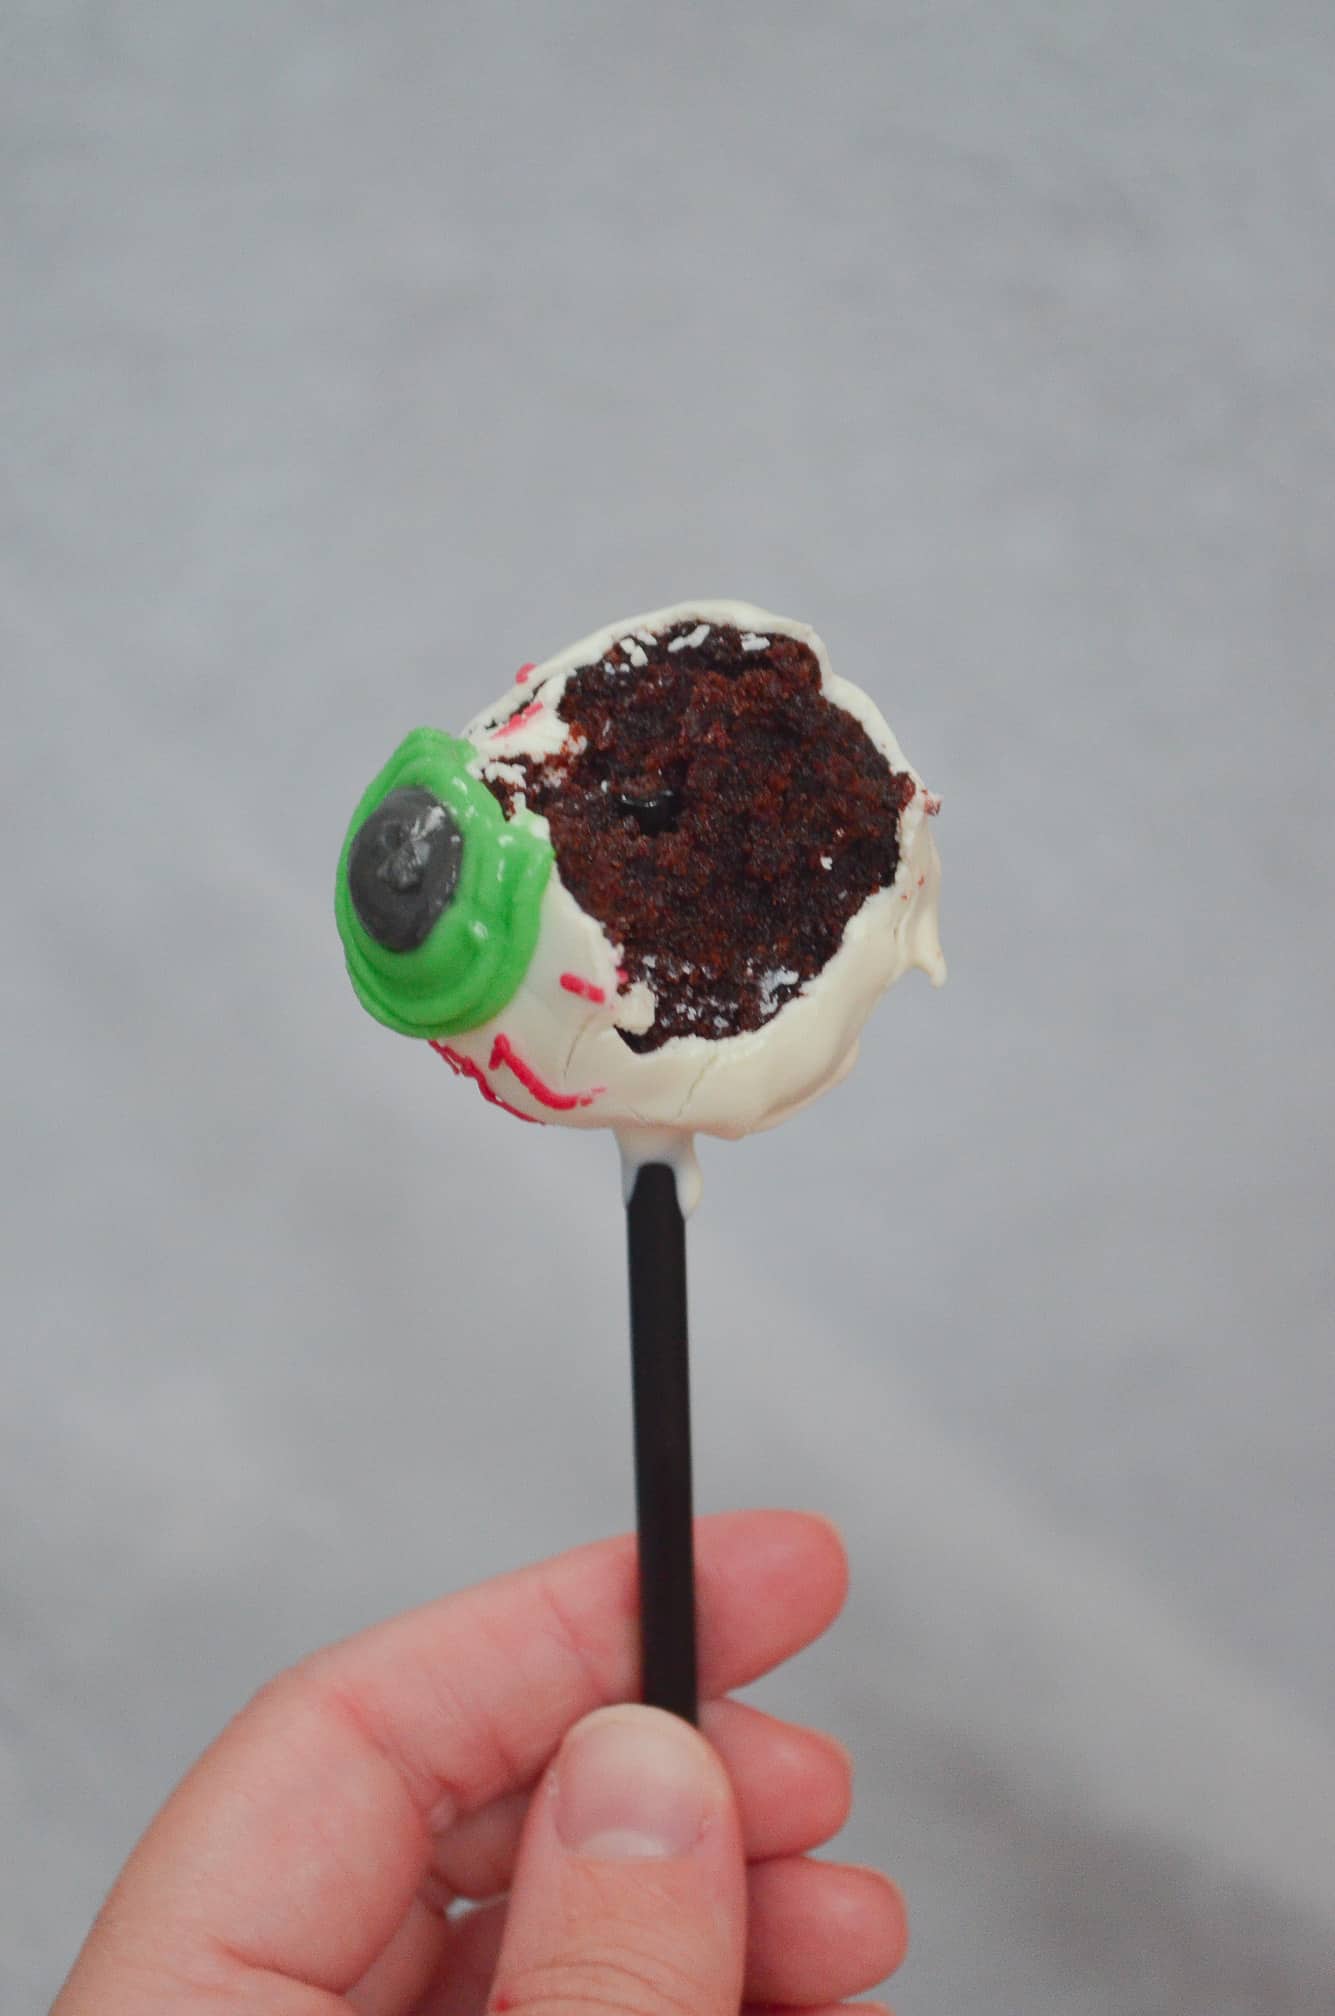
- Eyeball – For the eyeballs, you need the remaining green icing and you’ll also need to colour some of the remaining white icing, black and red. Using the black icing, pipe small circles in the middle of one side of the cake pop, then pipe the green icing around this in circles to create the ‘iris’. Then finally, using the red icing pipe very thin squiggly lines around the eye to emulate veins. Then set aside to dry.
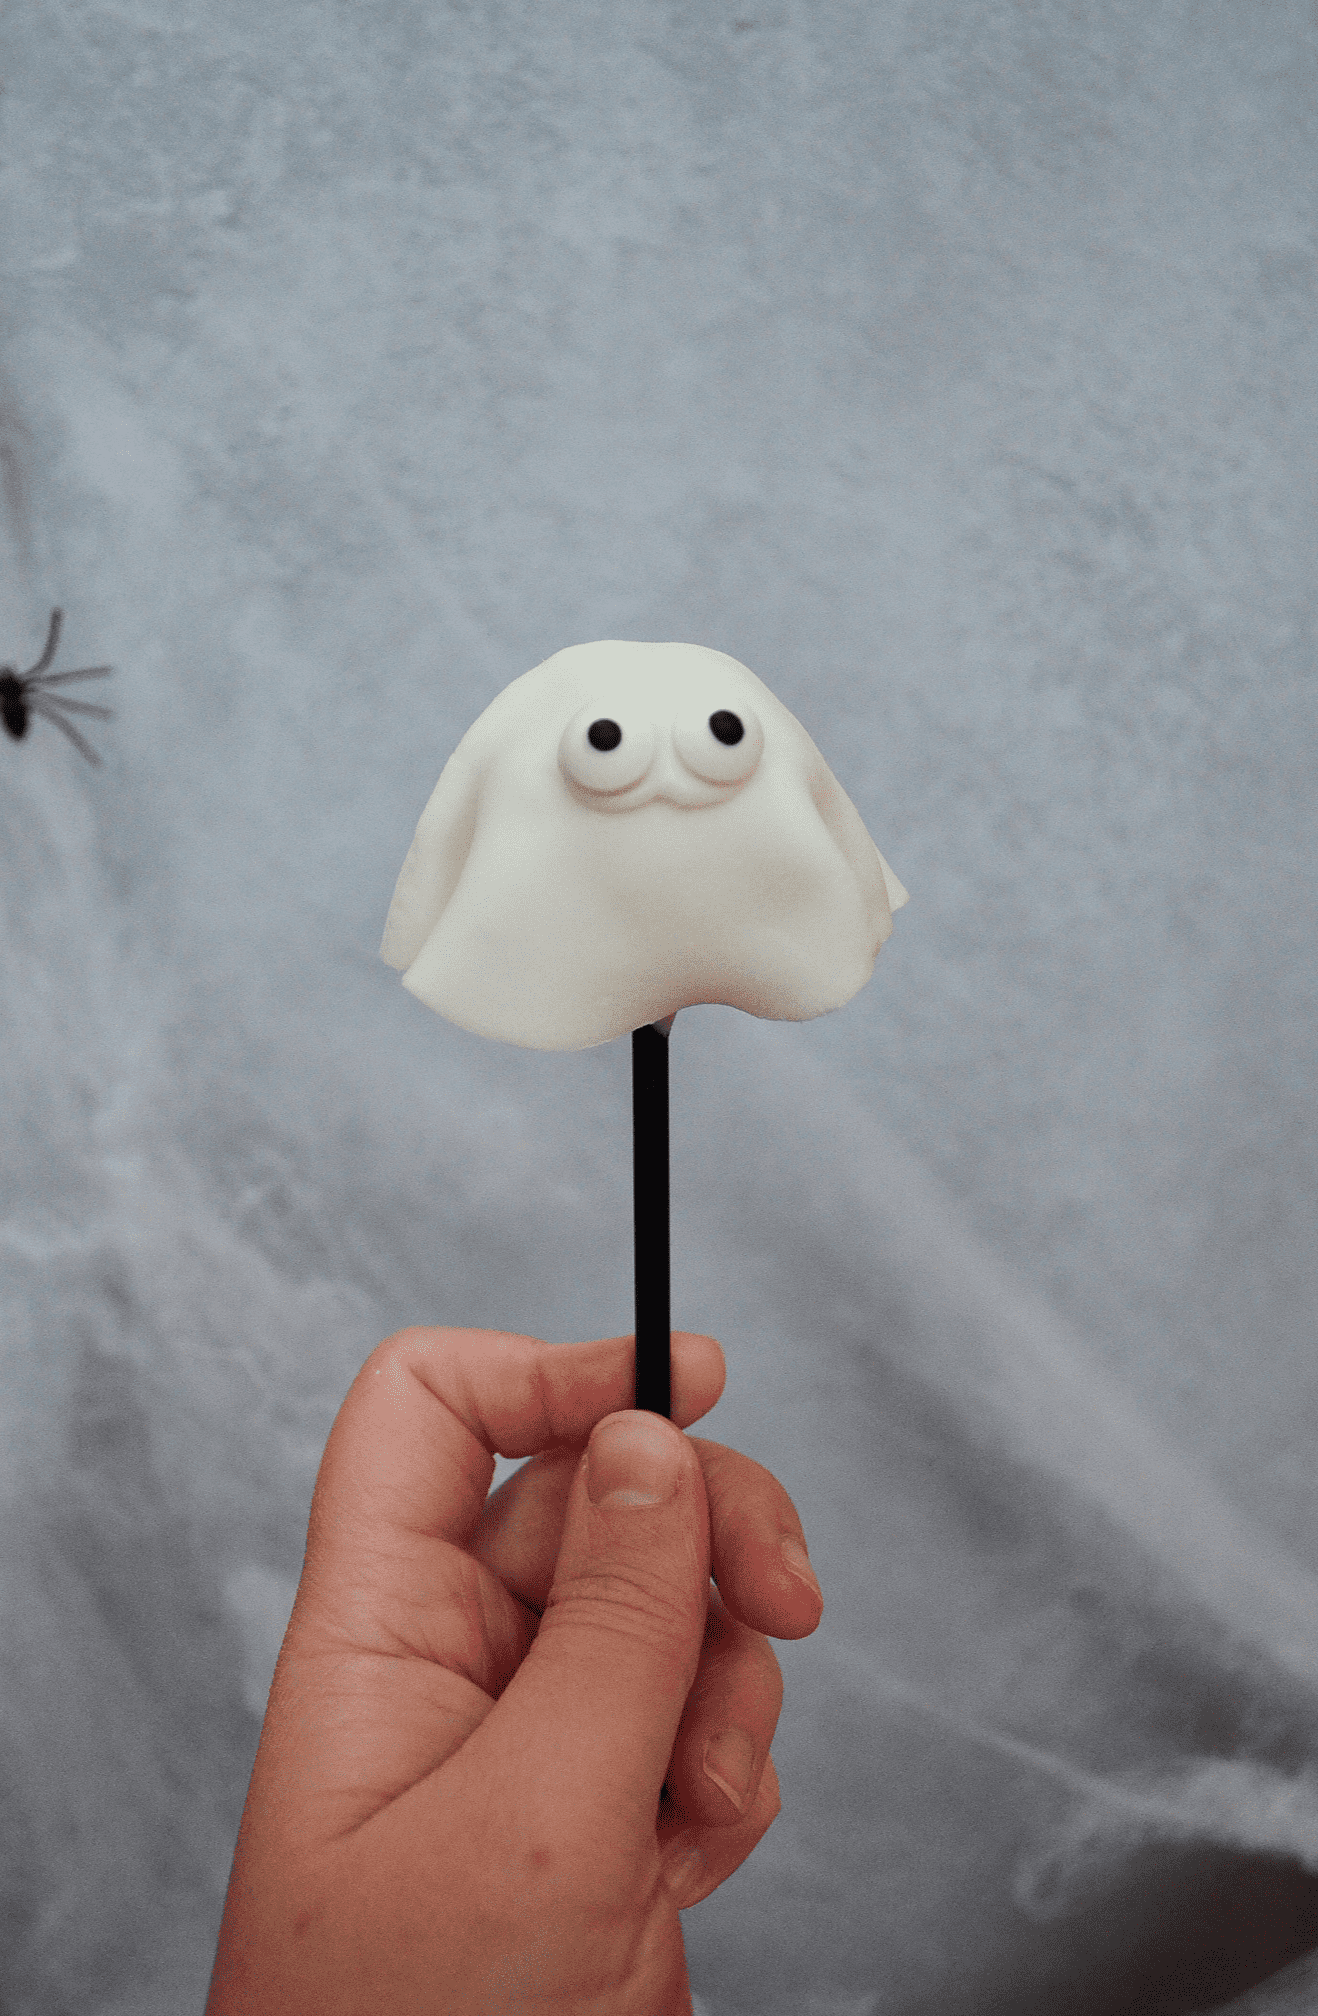
- Ghost – Finally, for the ghosts you’ll need fondant icing. Roll the icing out till quite thin, and drape over the cake pop to look like a ghost. You can pleat the icing a little at the sides, to give the ghost more shape. Finally, pipe two blobs of the remaining white icing and press in the edible eyes. Then set aside to set.
Tips & Tricks
The cake pops themselves last really well, and the cake stays moist. However, the decorations like edible eyes and fondant don’t last as well. I’d advise making them the day of, or day before, of serving, for them to look their best.
Yes absolutely! The cake flavour can be anything you want, for Halloween especially a red velvet might work well!
You can, but it won’t be bright white like with the candy melts. You will also need to use oil-based food colouring to create the orange pumpkins, as water-based food colouring can split the chocolate.
I’m so happy with how these turned out, as not only are they delicious but they look SO cute too! Perfect for a Halloween party, or an afternoon baking session infront of a spooky film. You can be so creative with the decoration and change up the cake flavour if you want too! So versatile, but so so tasty!
You may also like:
Halloween Cake Pops
Ingredients
Cake Balls
- 400 g chocolate cake baked and cooled
- 40 g unsalted butter room temperature
- 40 g icing sugar
- 1/4 tsp vanilla extract
White Coating (Mummy, Eyeball, Ghost)
- 225 g bright white candy melts
- 1 tbsp vegetable/sunflower oil
Orange Coating (Pumpkin)
- 75 g orange candy melts
- 1 tsp vegetable/sunflower oil
Decorations
- 180 g royal icing sugar
- edible eyes
- orange gel food colouring
- green gel food colouring
- black gel food colouring
- red gel food colouring
- 80 g white fondant icing
Instructions
- For the cake balls: Make the box cake mix as per the instructions, leave to cool and keep in an air-tight container overnight. The next day, crumble 400g of the cake into a large bowl. Then in a separate small bowl, using a wooden spoon or silicone spatula, beat together the butter, icing sugar and vanilla until you have a smooth buttercream. Then stir this into the crumbled cake, until it just comes together in your hand.
- Using your hands make 20 balls, approx. 30g each, place on a baking tray and then into the freezer for 20 minutes to harden. Then take balls out, and roll between your hands to perfect the ball shape, then place back into the freezer for five minutes.
- For the coating: While the cake balls are on their second freeze, place the white candy melts and oil into a heat-proof jug and melt in the microwave in 30 second increments until melted. Stirring at each 30 second interval. Then remove the cake balls from the freezer. Take a cake pop stick and first dip it into the melted candy melts, and then insert into the middle of a cake pop. Then swirl the cake pop in the melted candy melts until fully covered, and then gently tap the stick on the edge of the jug to remove any excess. Set aside upright to set (you can use a leftover cardboard box, to stick the cake pop sticks into). Repeat the process until you have coated 16 cake pops. Then melt the orange candy melts and oil in another jug as above, and dip the remaining 4 cake pops. Set all aside to dry.
- To decorate the mummy cake pops: Mix the royal icing together with a dash of water in a large bowl. You need enough water to create a thick stiff icing paste, so add slowly as it can thin very quickly. Then place 60g of it into a piping bag, and cut off the end to create a small hole. Firstly, pipe two small blobs onto a white cake pop and press two of the edible eyes on until secure. Then pipe the icing in strips, randomly all across the cake pop, covering the eyes partially to give the 'mummy' look. Repeat the process on three more white cake pops, then set aside to dry.
- To decorate the pumpkin cake pops: Place 30g of the white royal icing into a small bowl, and colour with a small blob of orange food colouring. Then place into a piping bag and cut off the end to create a very small hole. Place 45g of the white royal icing into another small bowl, and colour with a small blob of green food colouring. Then place into a piping bag and cut off the end to create a very small hole. With the orange icing, pipe thin lines up the sides of an orange cake pop, to emulate the pumpkin ribs. Then using the green icing pipe the stalk and stem (don't use all the icing, as you need it for the eyeball cake pops). Repeat the process on three more orange cake pops, then set aside to dry.
- To decorate the eyeball cake pops: Place 30g of the white royal icing into a small bowl, and colour with a small blob of black food colouring. Then place into a piping bag and cut off the end to create a small hole. Place 15g of the white royal icing into another small bowl, and colour with a small blob of red food colouring. Then place into a piping bag and cut off the end to create a very small hole. Finally, cut a little more off the end of the green icing piping bag, to create a slightly larger hole. Using the black icing, pipe small circles in the middle of one side of a white cake pop, then pipe the green icing around this in circles to create the 'iris'. Then finally, using the red icing pipe very thin squiggly lines around the eye to emulate veins. Repeat the process on three more white cake pops, then set aside to dry.
- To decorate the ghost cake pops: Dust your work surface with icing sugar, and roll out the fondant icing until quite thin. Then cut four circles out with a 10cm cookie cutter. Dab a little water onto the top of the remaining 4 white cake pops, and drape a circle of fondant over each cake pop. Pleat the sides of the fondant, to give each cake pop more of a ghost-like shape. Finally, pipe two blobs of the remaining white icing and press in the edible eyes. Then set aside to set.
Notes