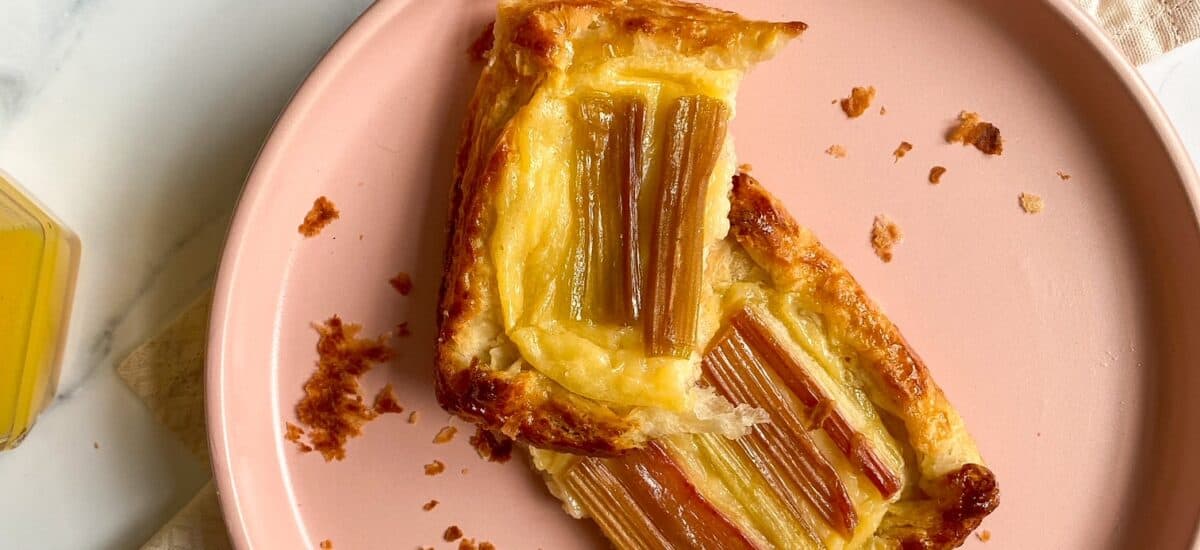
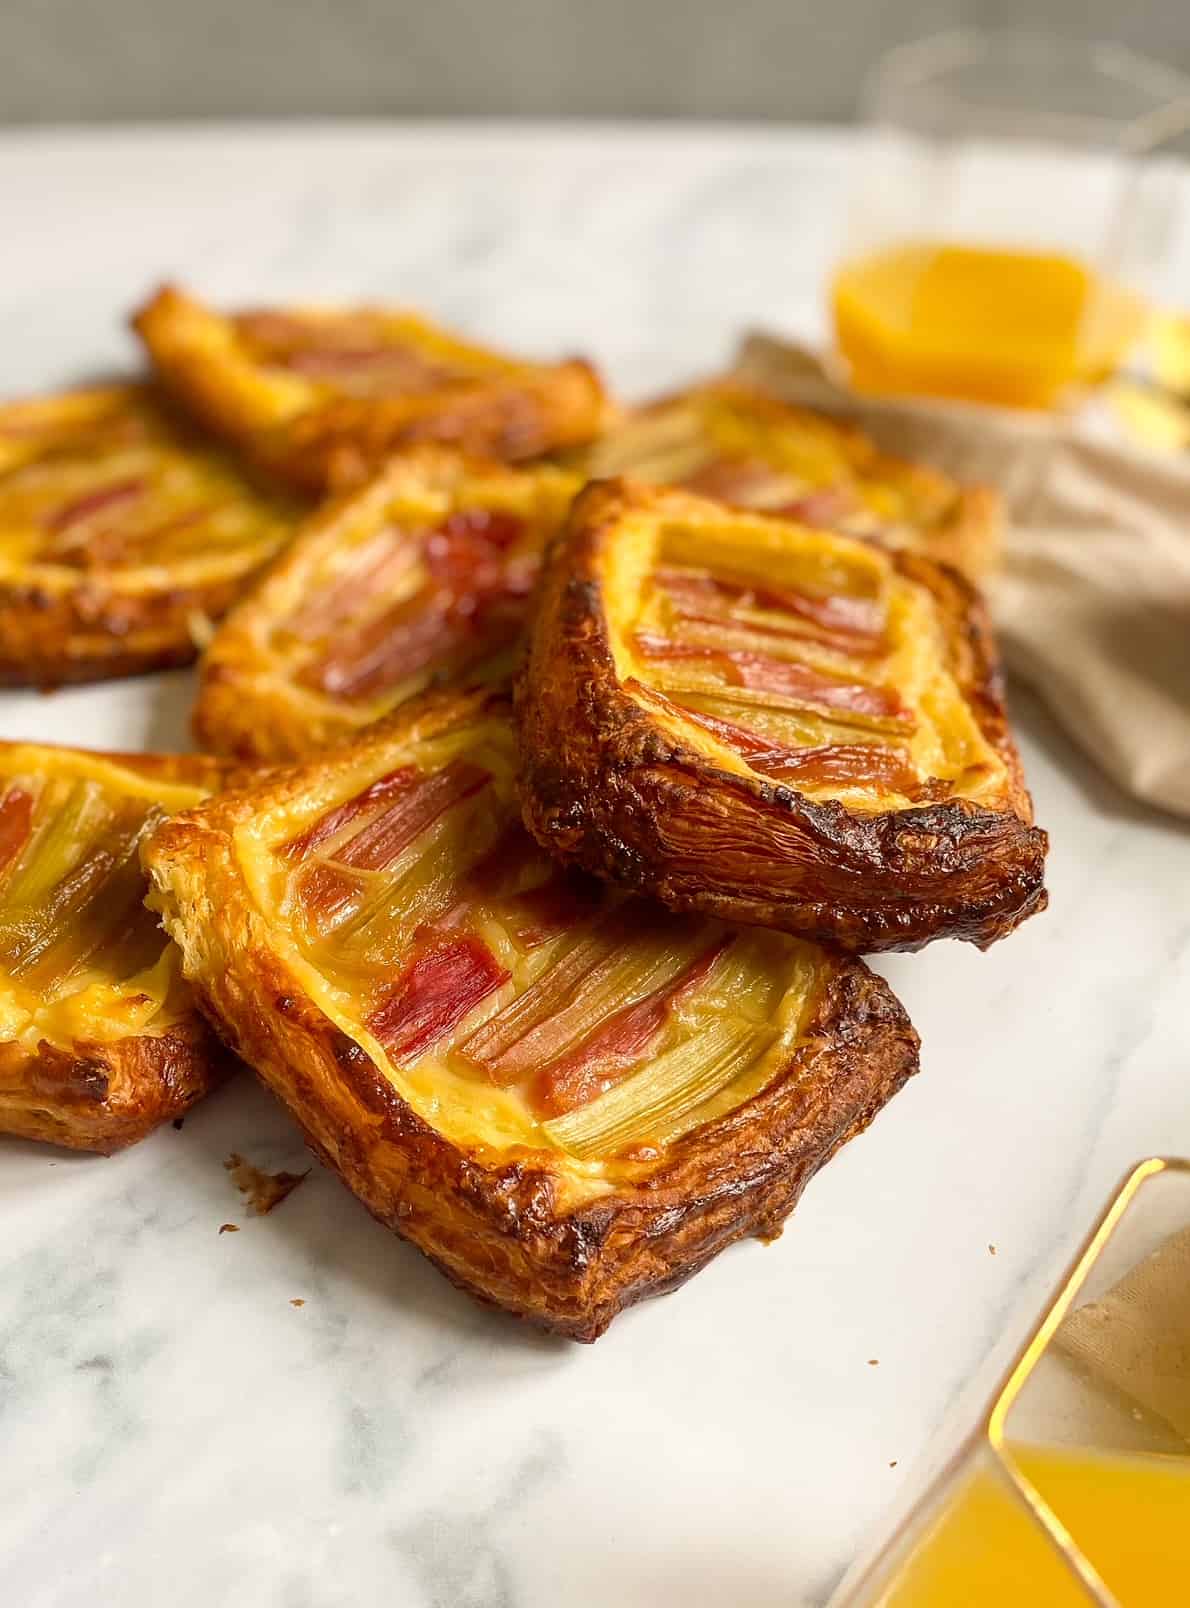
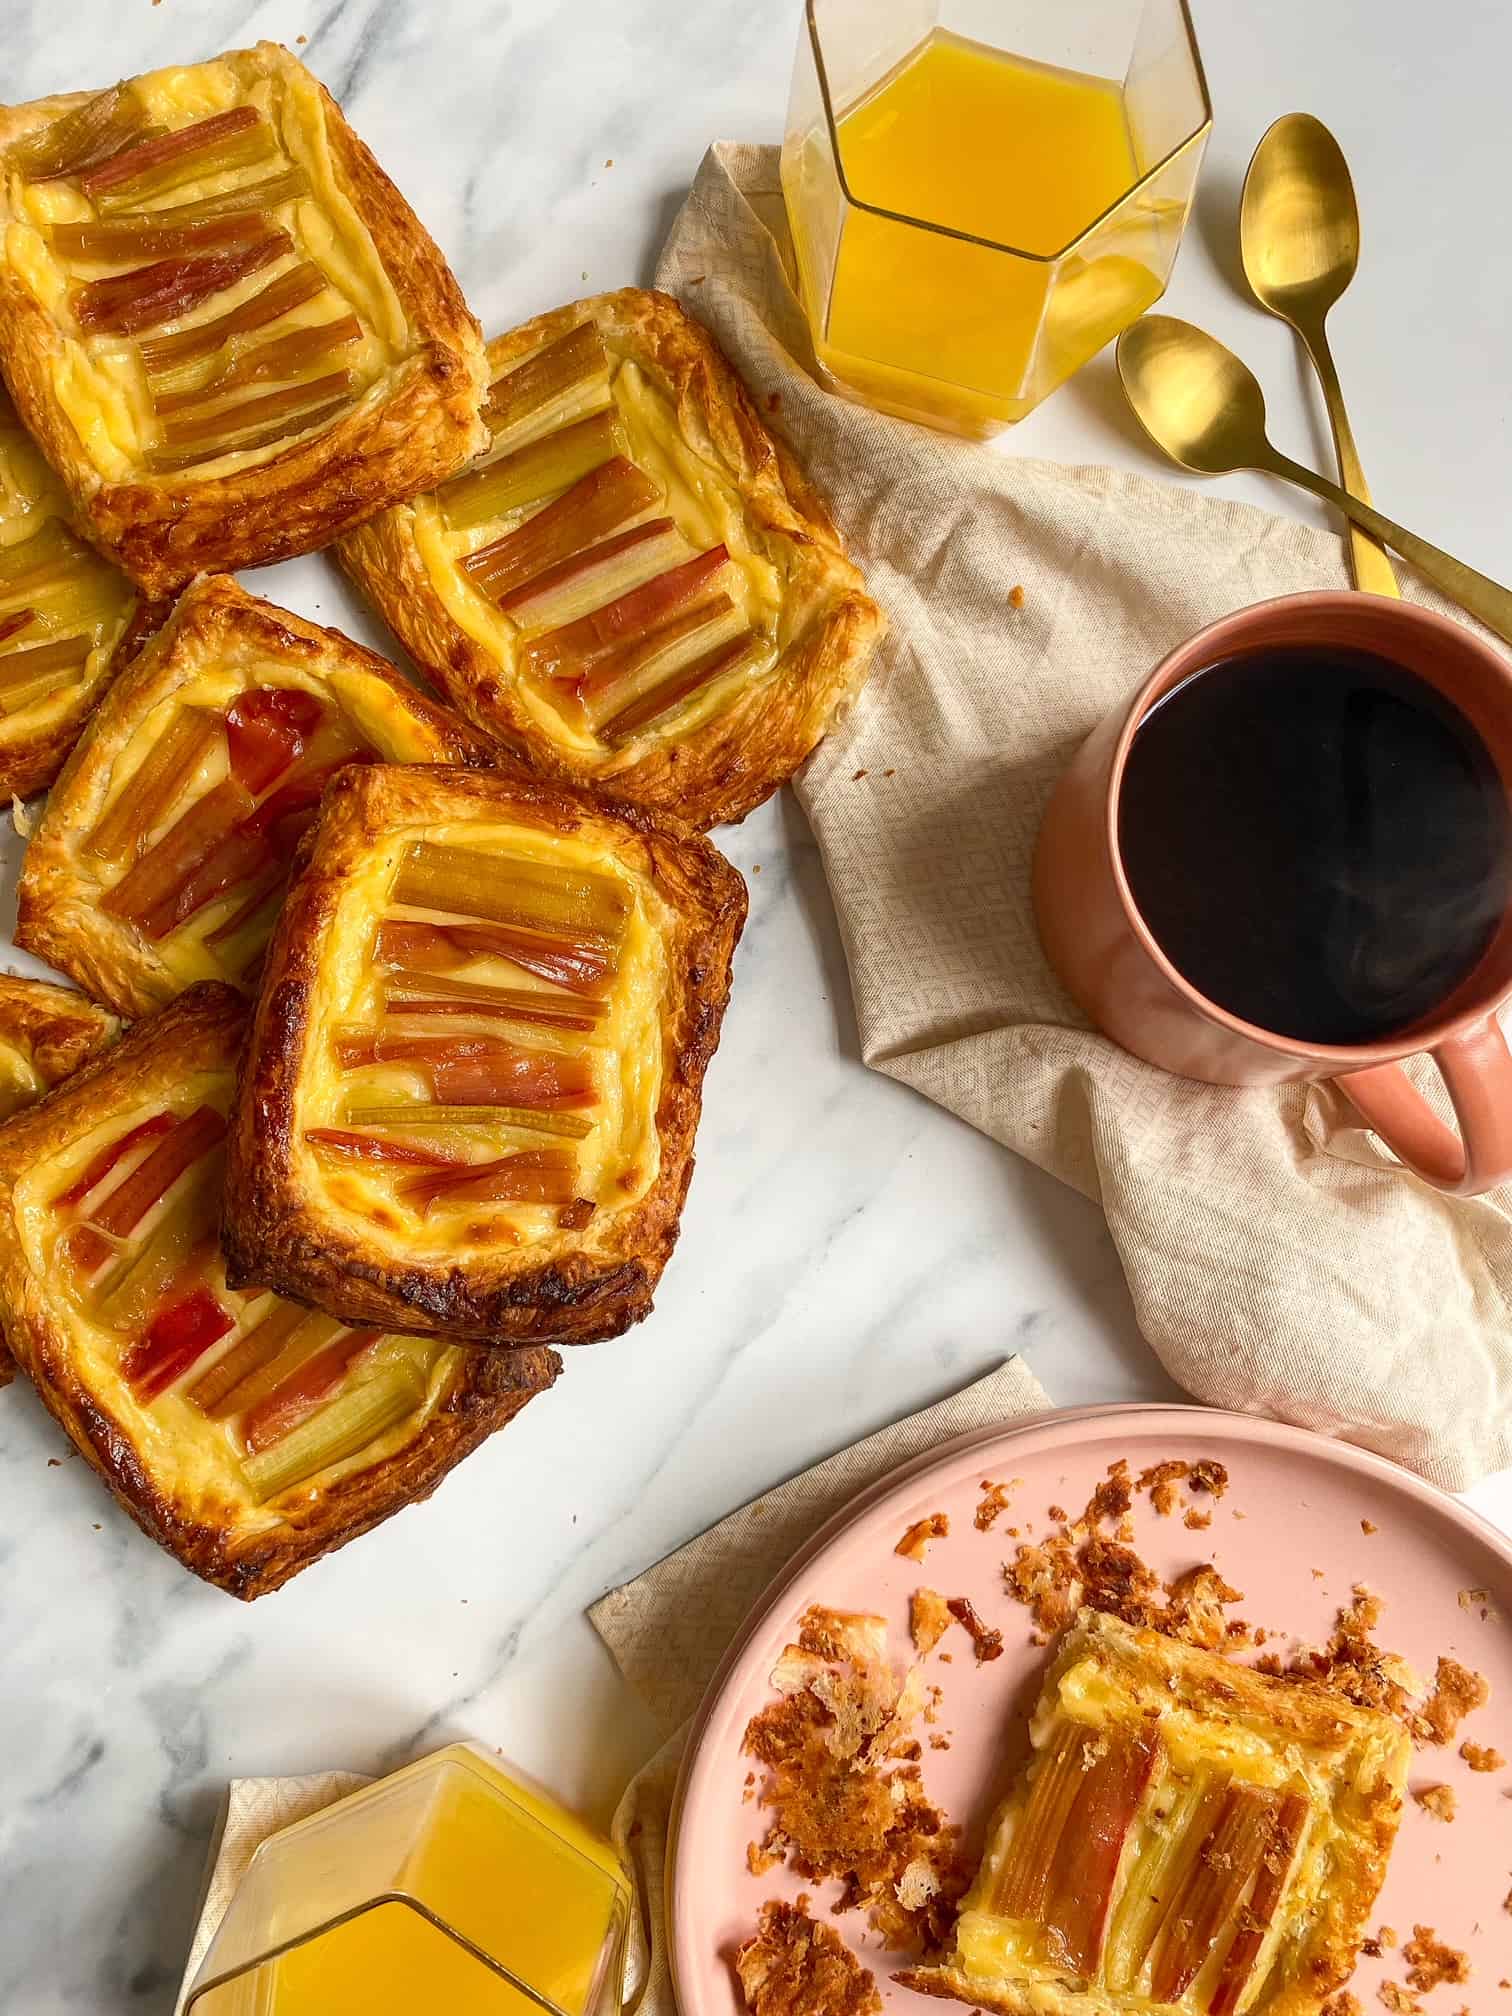
Flaky buttery pastry, creamy vanilla creme patissiere and sweet roasted rhubarb. These rhubarb and custard Danishes are the perfect sweet treat to start your day!
Danish pastries are one of my absolute favourite treats for breakfast. The butteryness and flakiness of the pastry, pairs perfectly against the creamy and fruity fillings. Once you have the pastry method down, you can make all manner of danishes! Fill it with frangipane, fill it with chocolate or creme patissiere and raspberries!
Now lets be straight. Making rhubarb and custard Danishes isn’t a quick recipe. But! They do freeze well, so you can make a double batch and reap the rewards of your hard work later.
Key Components
- Danish Pastry Dough – this takes a fair while to make, though the majority of that time is spent with the dough chilling in the fridge! Make sure to use a quality butter (French if possible – i.e. President) to give the best flavour and texture.
- Creme Patissiere – the creamy, vanilly filling to many desserts. This comes together quite quickly, but does need overnight chilling time.
- Rhubarb – the most gorgeous fruit (or is it a vegetable?!). The rhubarb is roasted for this recipe, giving it a delicious sweetness.
How to make Rhubarb and Custard Danishes:
Danishes do take a little while to make, as the dough and creme patissiere needs time to chill in the fridge overnight. But there isn’t much to do in the morning, aside from assembling and proving which you can totally do in your pyjamas! 😉
Making the danish pastry dough:
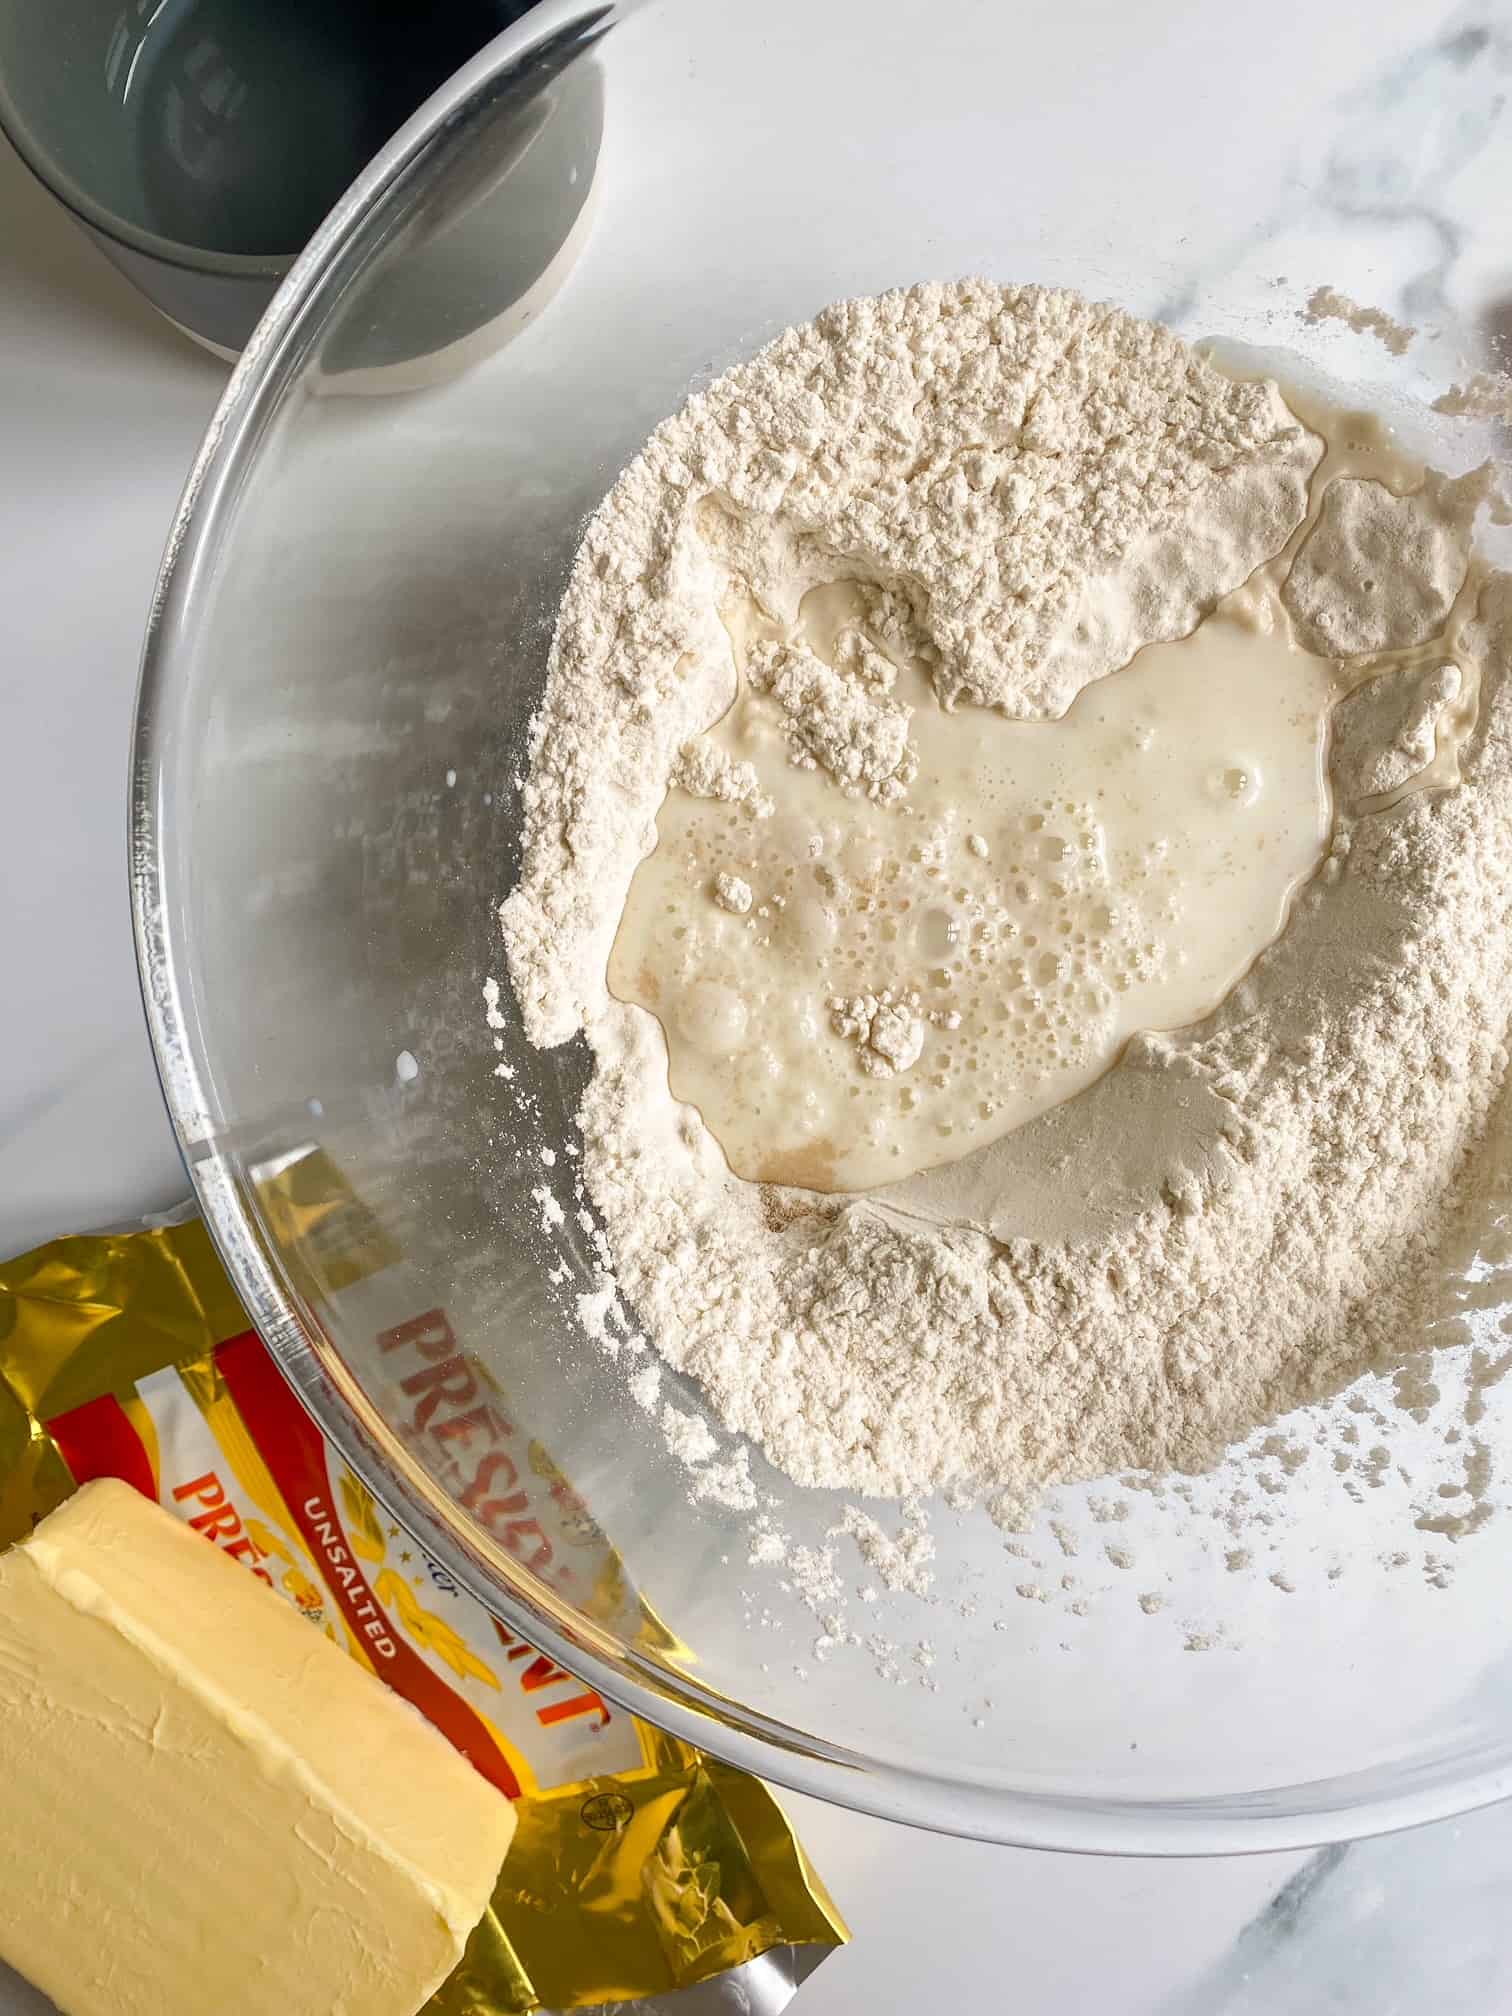
So firstly the flour, yeast, sugar and salt need to be combined in a large bowl with the milk and water. Once you have a dough – it will be really scraggy at this point, so don’t worry! Wrap it in clingfilm and place in the fridge to chill for 45 minutes.
At this point you can prepare your butter. Now most recipes I used when I was younger told me to get a block of cold butter and beat it with a rolling pin until it was flat. It was SO hard to do and took so much energy. So thats not what we’re going to do.
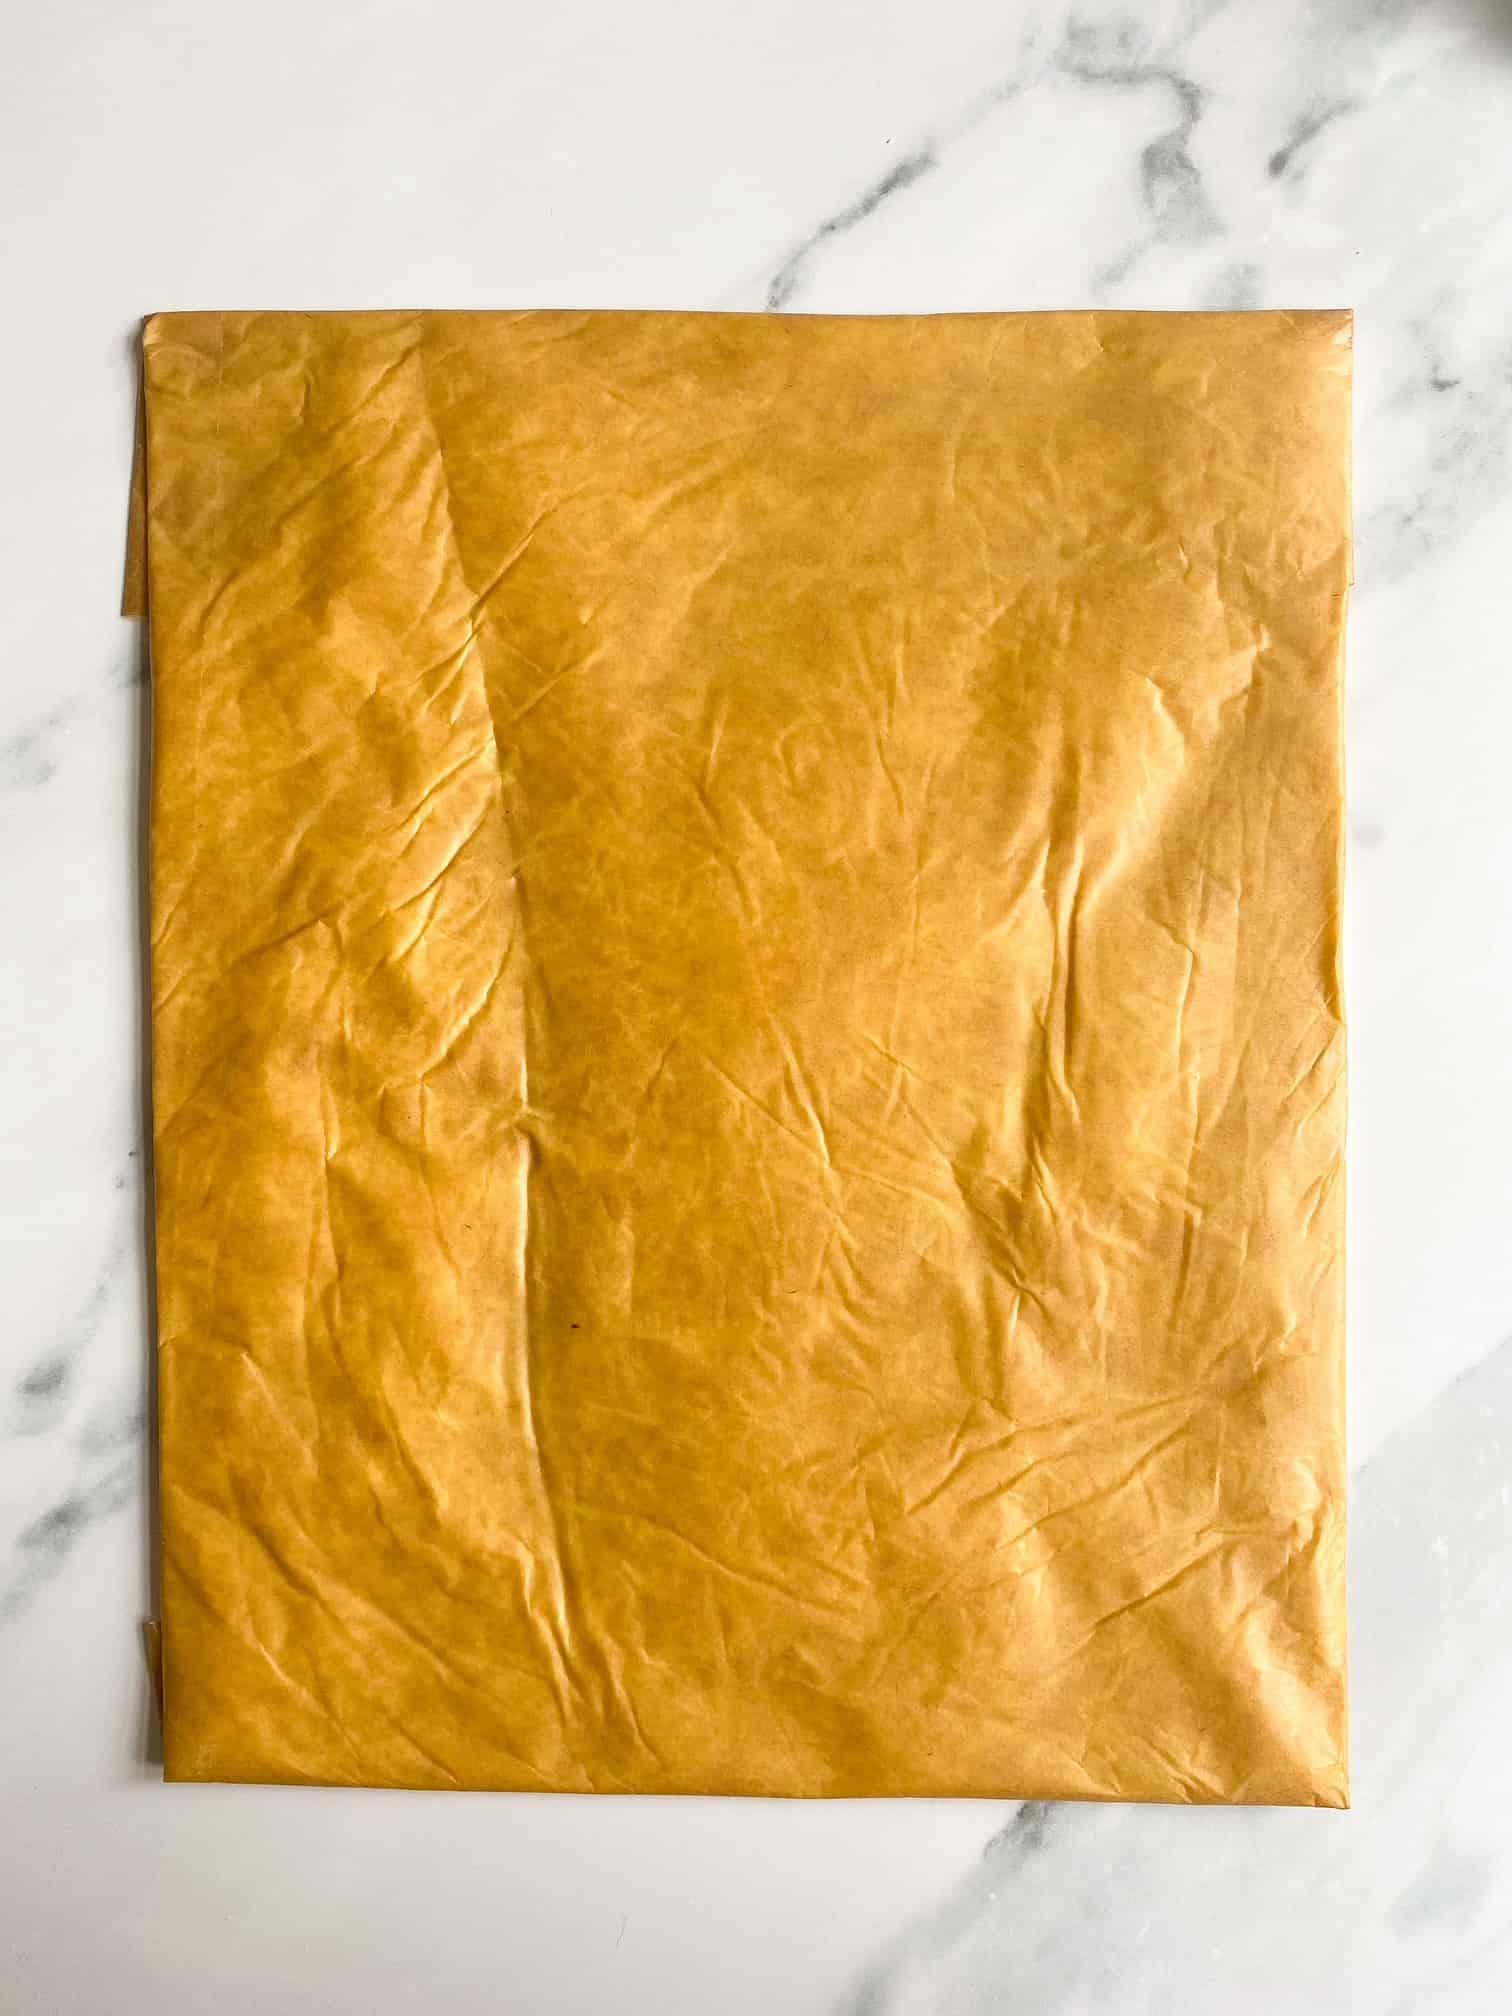
Instead, take your room temperature butter and spread it onto a piece of baking paper. You want to have a piece of baking paper that’s big enough to fold up, with the butter sealed inside in a thin layer approx. 28x22cm. You should end up with an envelope of butter, that you can place in the freezer to chill. SO much easier.

Turning and Folding Danish Pastry Dough
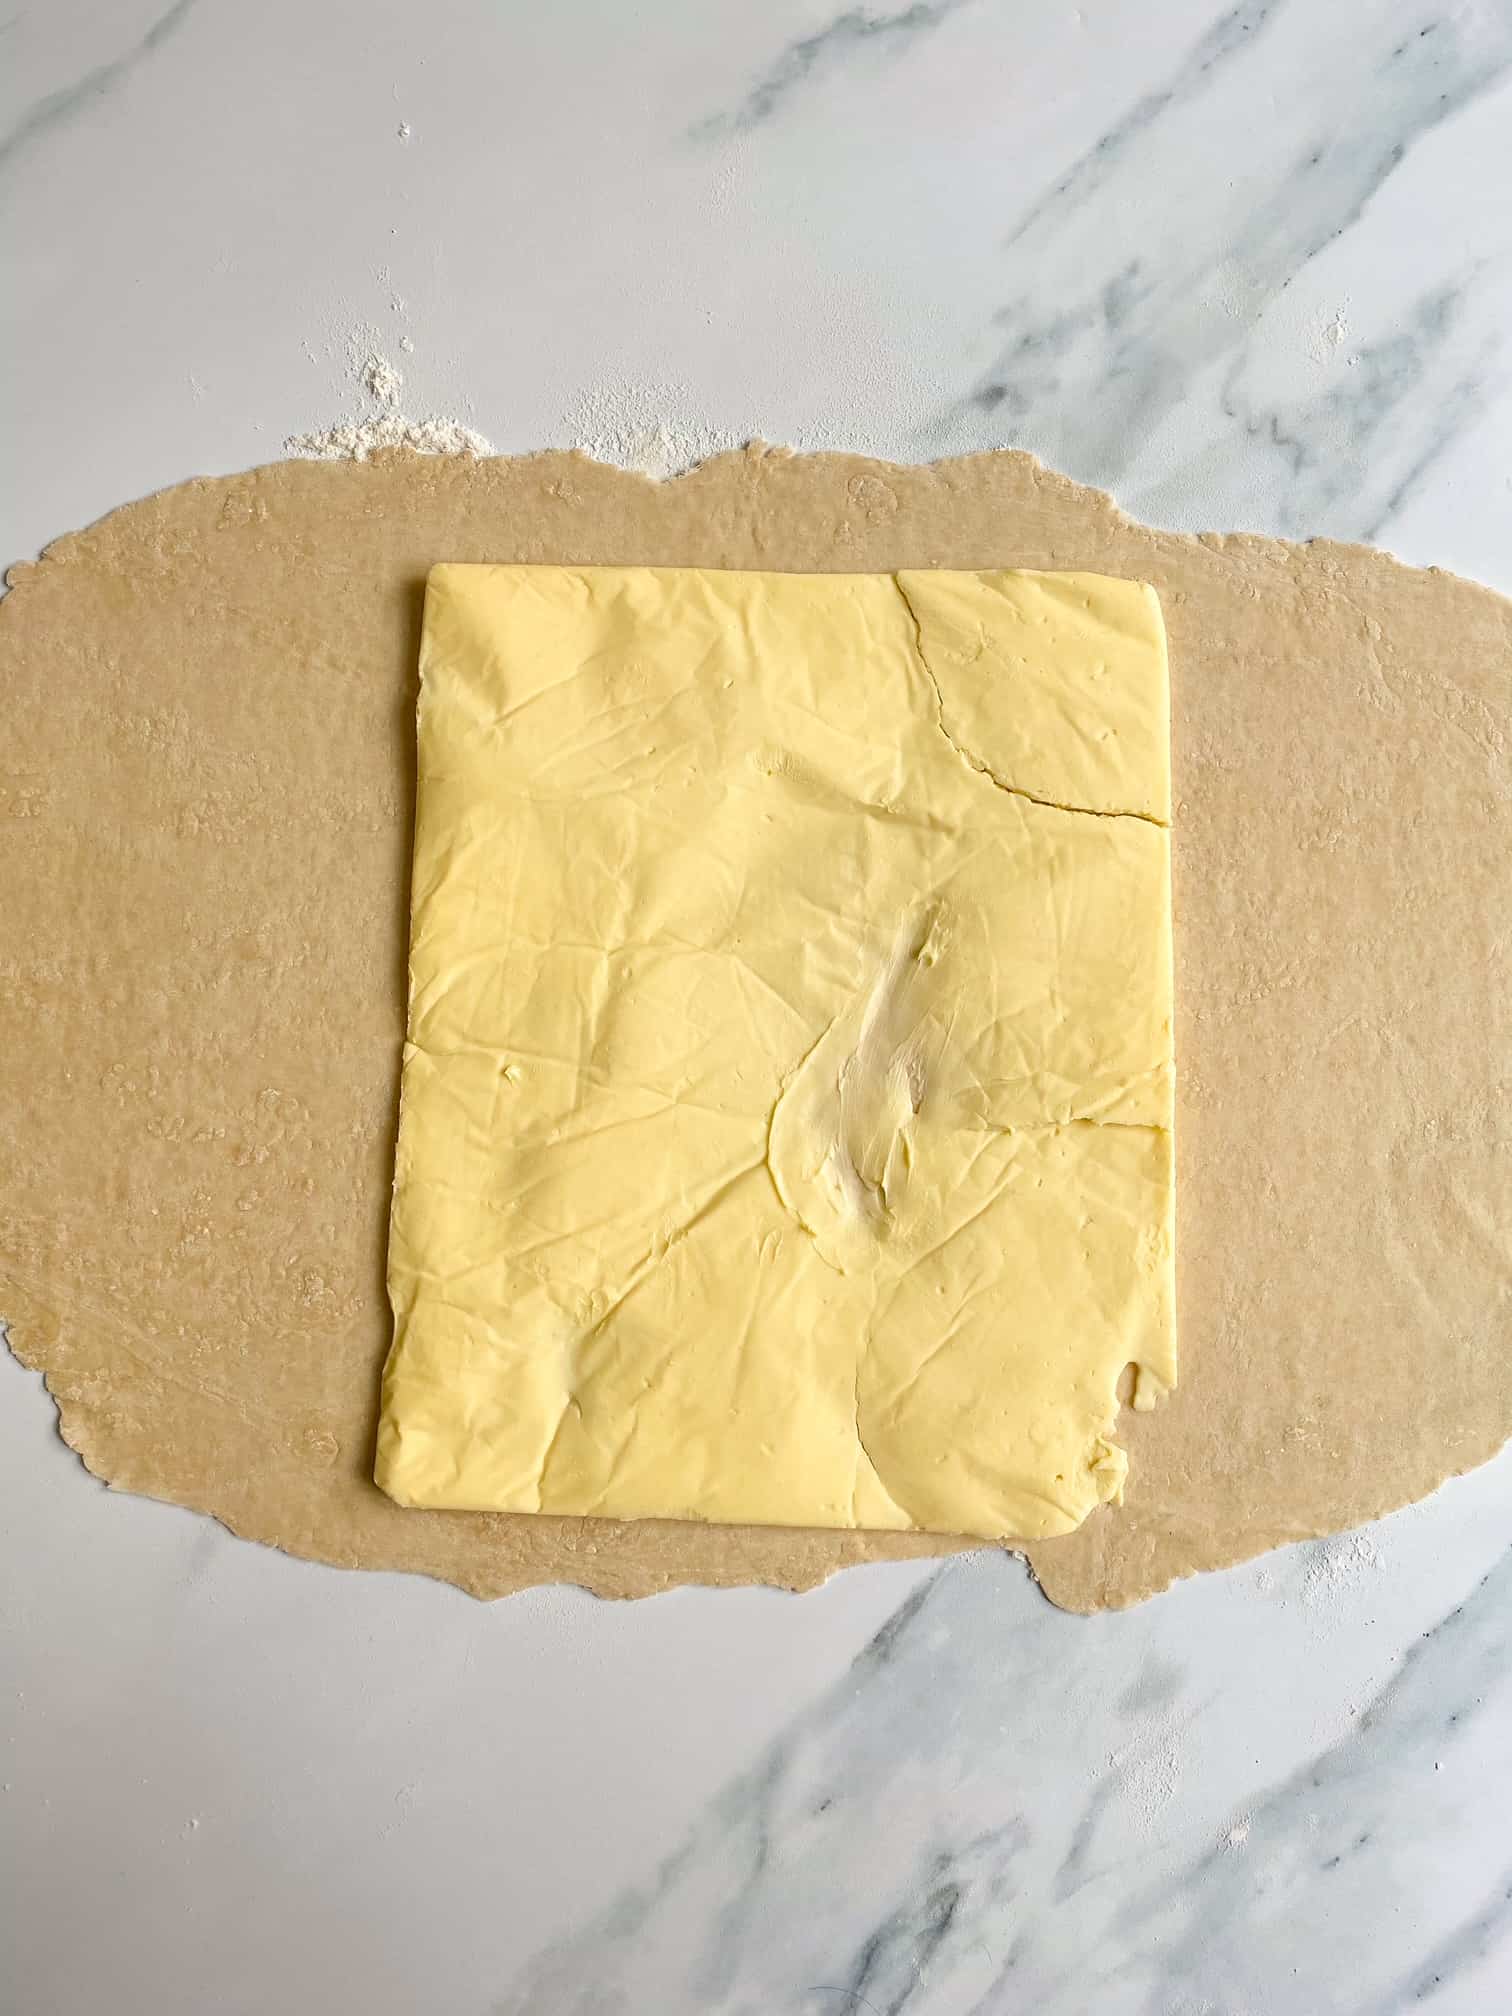
First of all, you need to roll out your dough and then encase the chilled butter. See the pictures below, but essentially you place the butter in the middle and fold over the sides of the dough to encase.
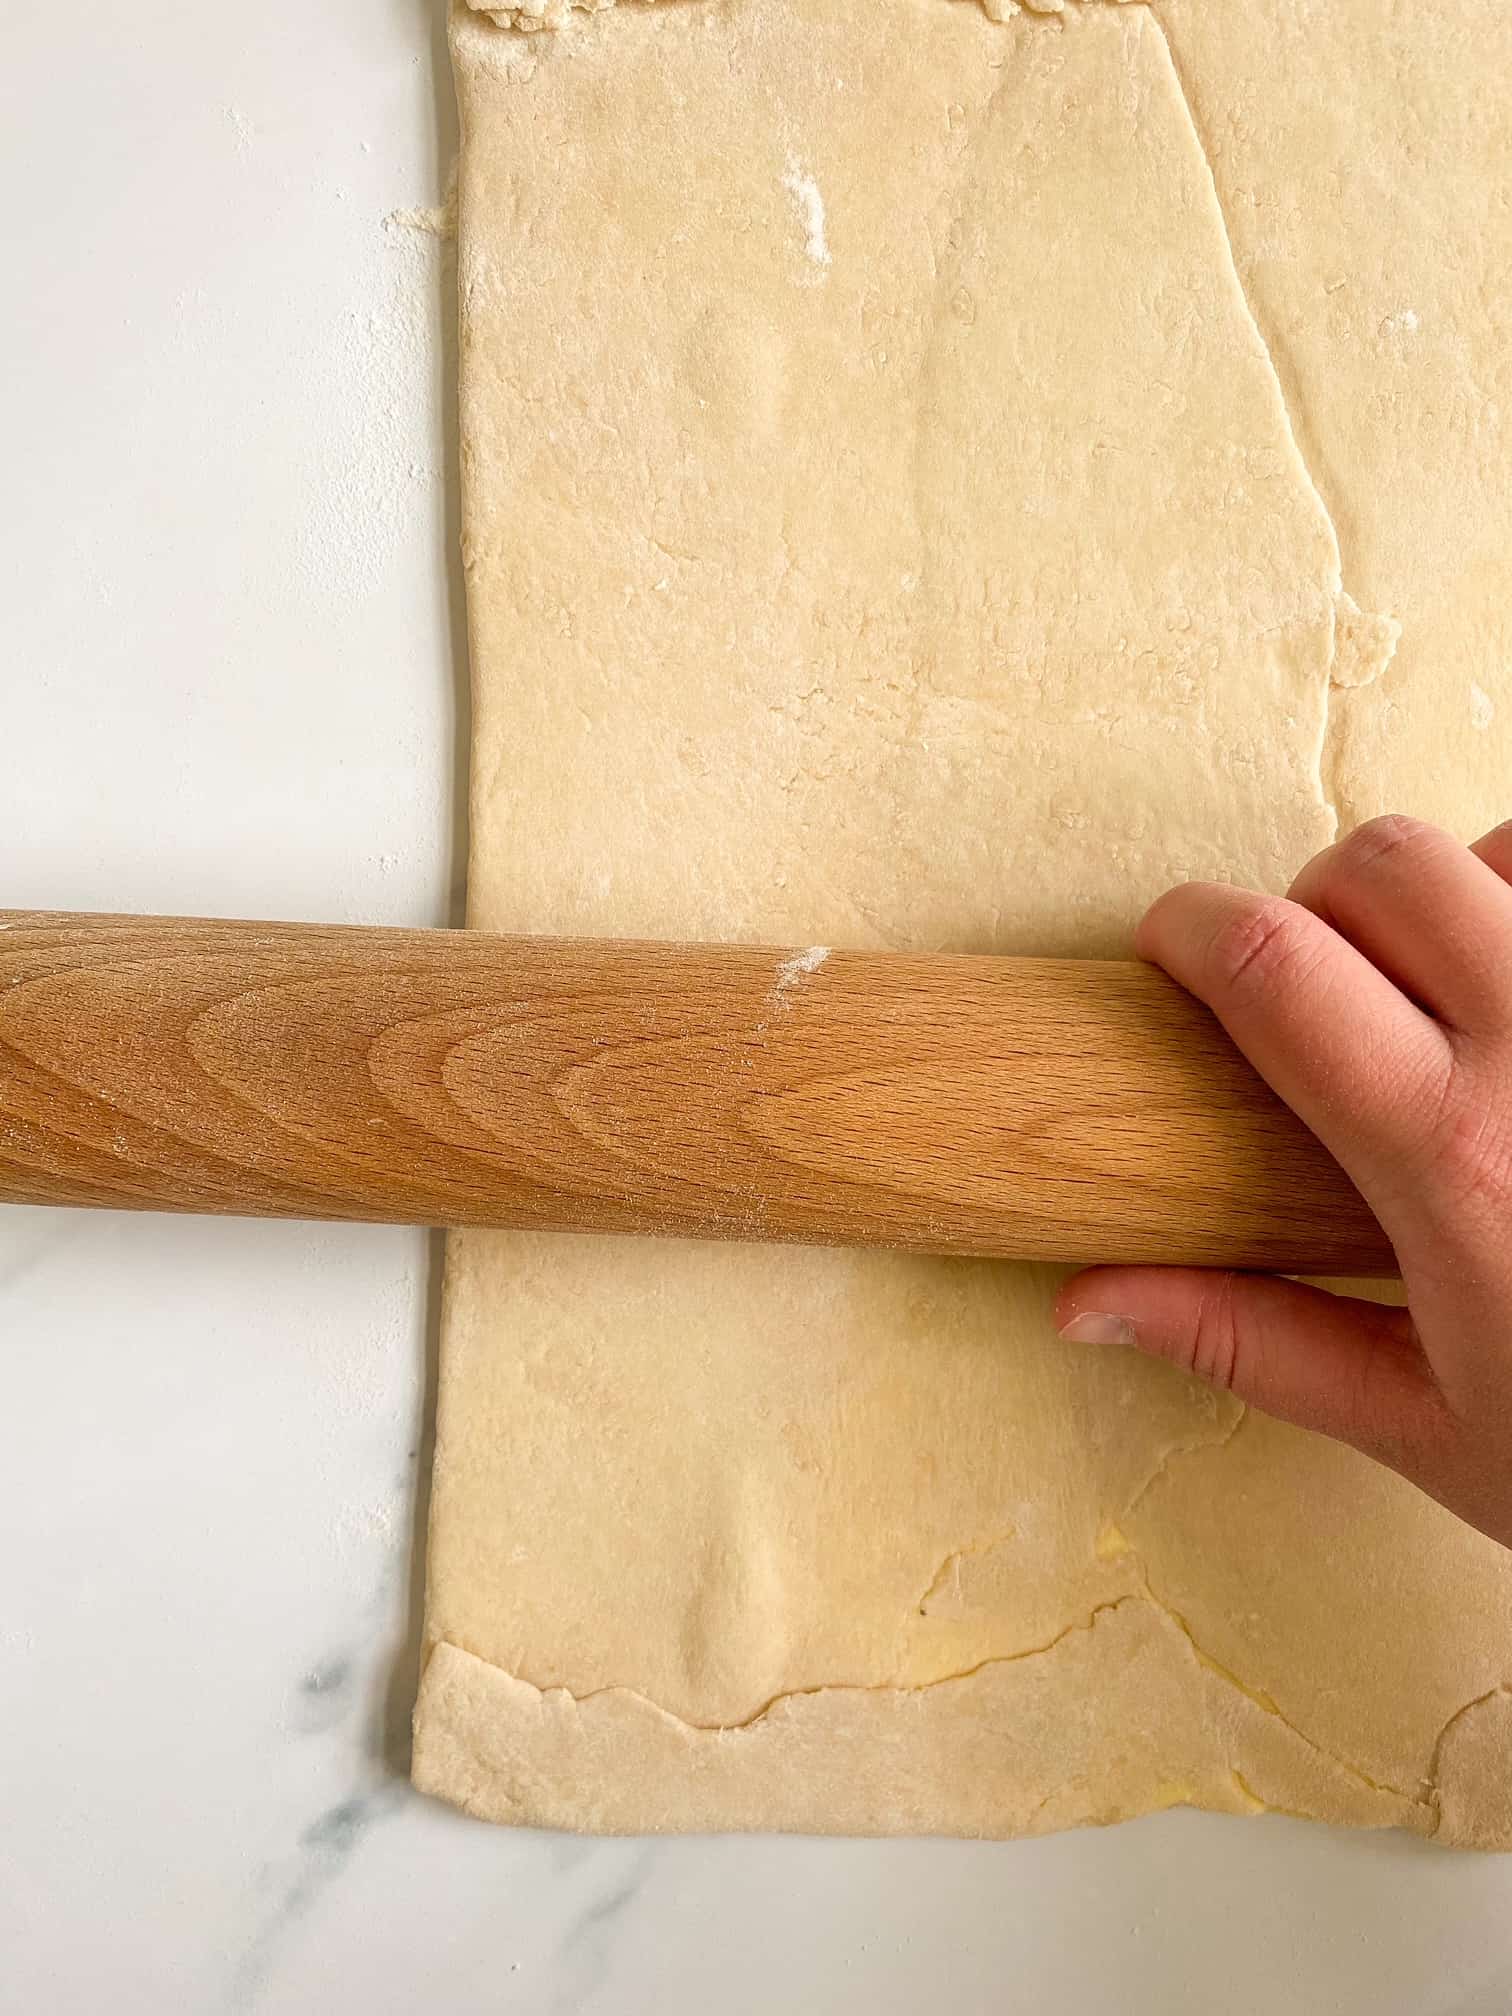
This pastry is quite dry and therefore does need a bit of elbow grease to roll out! But it really adds to the flakiness, so I promise you its so worth it!
Then, to laminate the dough, you need to ‘turn’ it. This basically means to roll out the pastry and then fold up like a letter. For Danish pastry dough you want to do this three times, which will create 27 layers. A croissant dough for example would be many more turns to create more layers!
In between each ‘turn’, the dough needs to be chilled for 30 minutes. This step is crucial to keep the butter hard, so it doesn’t seep out of the layers. It’s the butter trapped within the dough that creates the flakiness – the water content in the butter evaporates creating steam that gets trapped and makes pockets within the dough. So we definitely want to keep as much butter trapped in the dough as possible!
After you’ve completed three turns, the dough needs to be wrapped and left in the fridge overnight. You need to give it at least 12 hours to rest.


Making the creme patissiere
Creme patissiere is a rich, creamy custard. Its the basis for so many desserts like eclairs, fruit tarts, mille-feuille… etc. So once you have the technique down, its a great recipe to have under your belt!
Making it is fairly simple and quite a quick process. Boiled milk and vanilla, are whisked into egg yolks, sugar and cornflour. This mixture is then placed back onto the heat and cooked until thickened.
The hot custard then needs to be covered with clingfilm, directly onto the surface, to stop a skin forming. Then left in the fridge overnight – or up to three days if you really wanted to get ahead!
Roasting Rhubarb
For the filling, the rhubarb needs to be roasted before baking with the Danish. You can do this the night before, so that your pastry, creme patissiere and rhubarb are all ready in the morning together! Organisation at its finest!
Roasting the rhubarb is super easy. Just mix small slices of the rhubarb with sugar, and roast in the oven for 10 minutes with a foil covering, and 10 minutes without. Once the rhubarb has cooled, you can then use it for your Danishes straight away or cover and place in the fridge overnight.
Assembling the Danishes
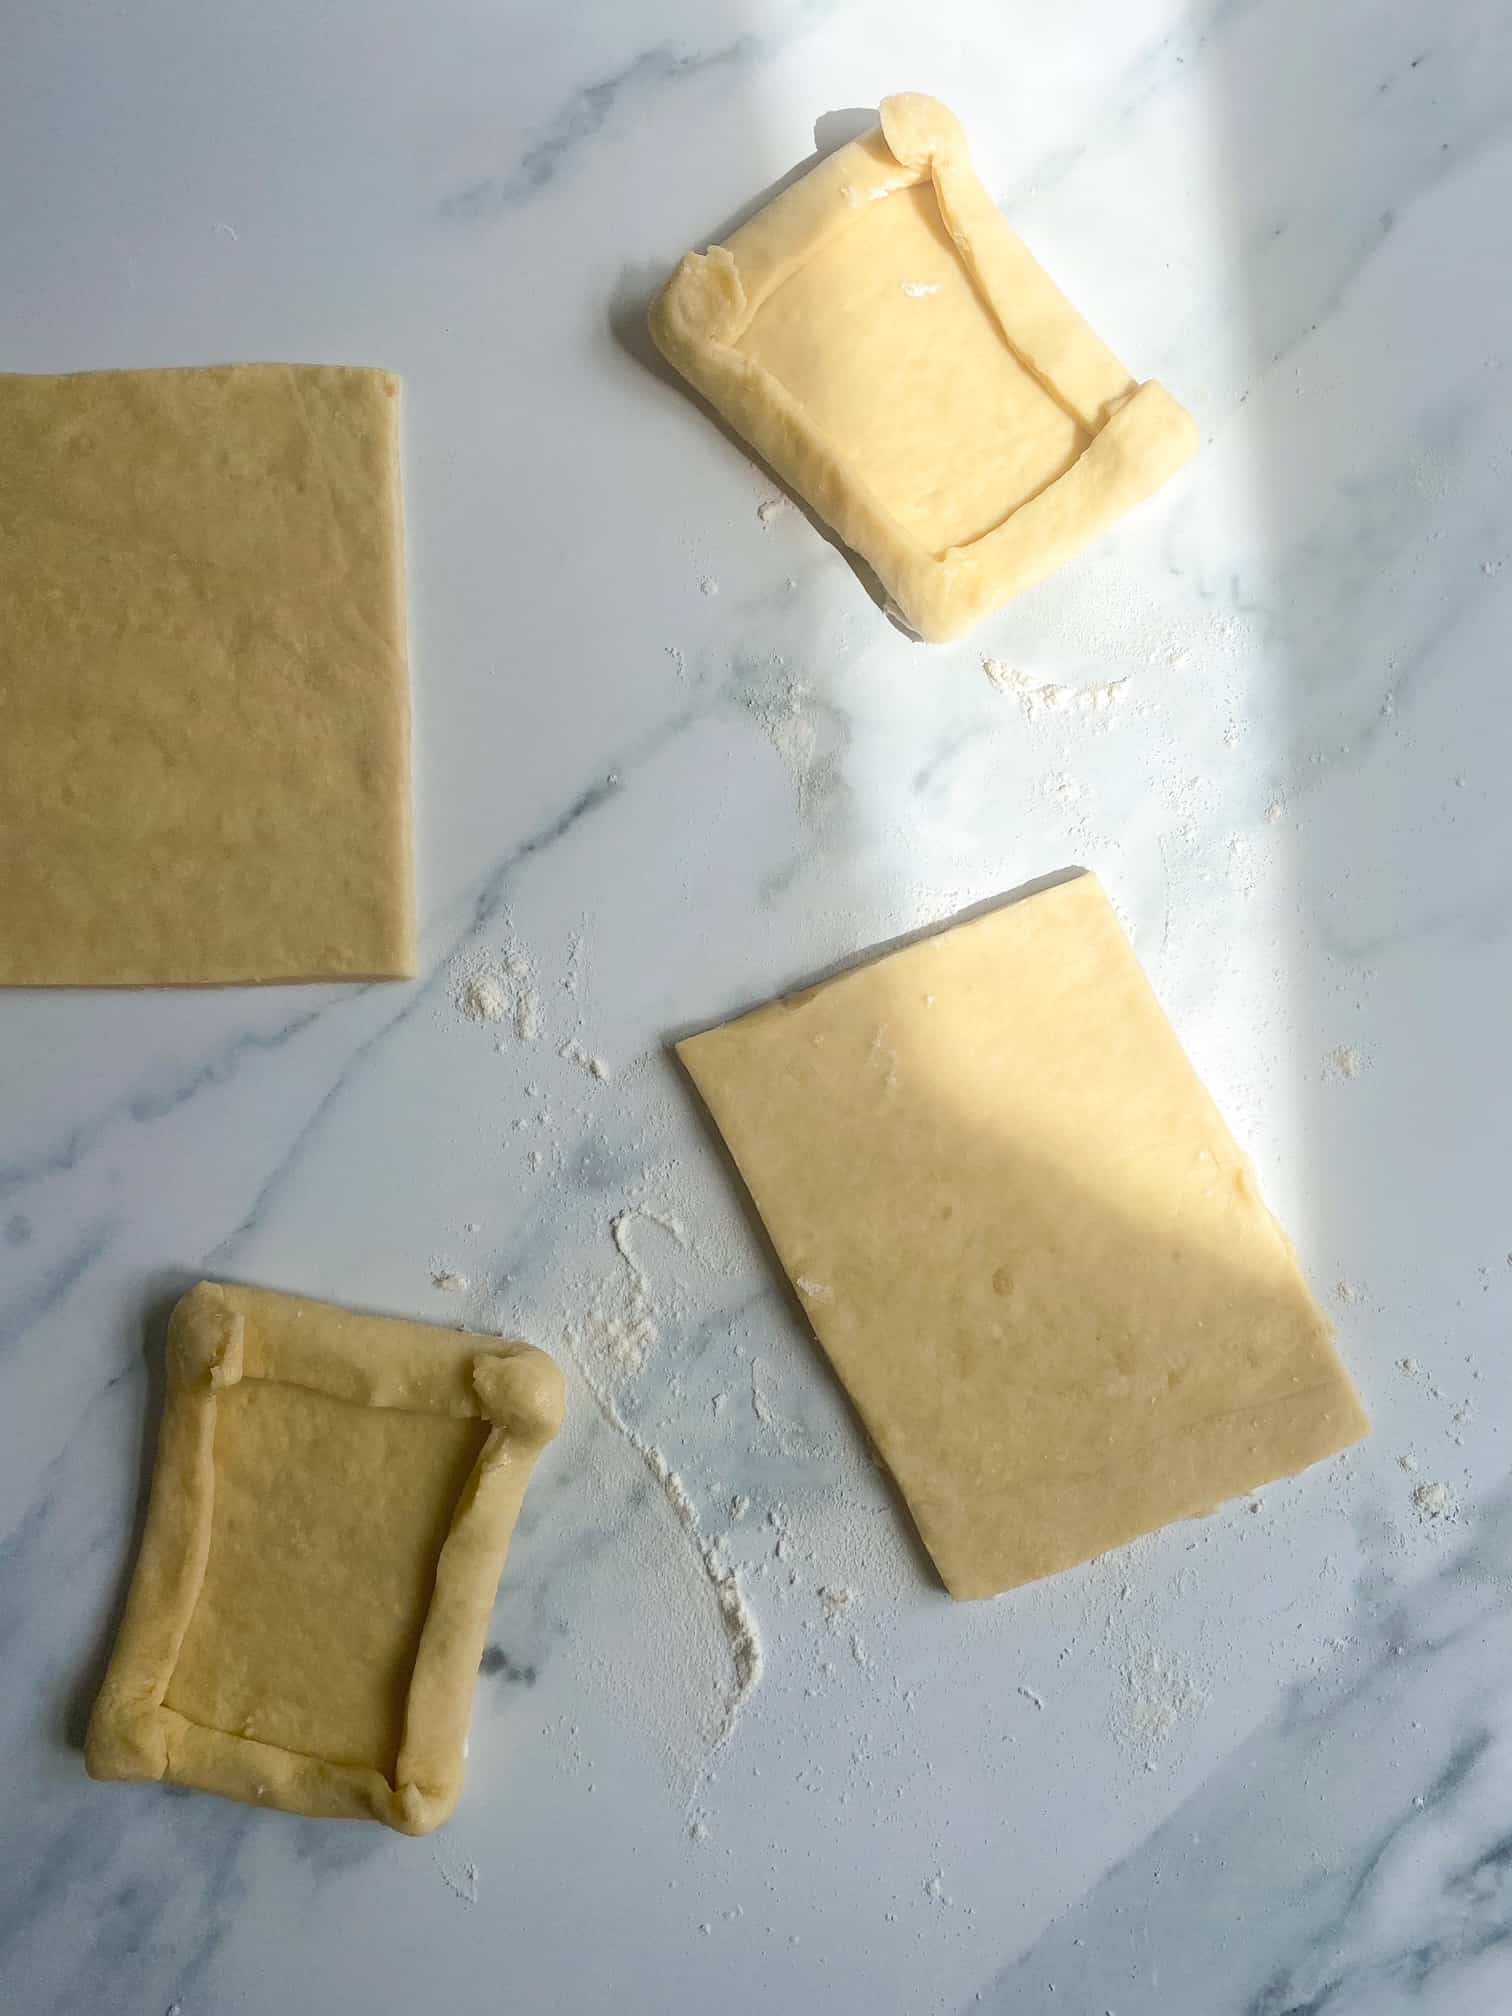
In the morning, the chilled dough needs to be rolled out to approx. 40x30cm. To make this easier for yourself, make sure to keep an even rectangle shape when you’re rolling. So the dough is the same thickness across.
This will take a little time, but just keep persevering. It might look like the pastry will never get any longer/wider, but I promise it will. There’s a reason big bakeries use machines to roll out the dough, as this is hard work!!
Once your dough is rolled out, cut them into 8 equal rectangles and then fold the sides of each to create a ‘picture frame’ effect. Then they need to be left to prove for at least 2 hours, until they’re doubled in size. The perfect time for you to get back into bed!!
Finally, the creme patissiere can be spread on each Danish and topped with slices of roasted rhubarb, before baking for 18-20 minutes. And voila!

Tips & Tricks
The short answer is no! Danish pastry is like a cousin to puff pastry, as Danish pastry includes yeast whereas puff pastry does not. Danish pastry also contains sugar, which is what makes it better suited for sweet breakfast pastries.
Yes! I tested this myself as I wasn’t sure, but it worked perfectly. Once your Danishes are cool, wrap them individually in clingfilm, very tight. Then freeze for up to one month. Defrost in the fridge before consuming – once defrosted they can also be reheated in the oven.
Absolutely! And in fact I would recommend it, so you have stock in the freezer. I would advise halving the dough and rolling them out separately once you get to the assembly stage however, to make it easier.
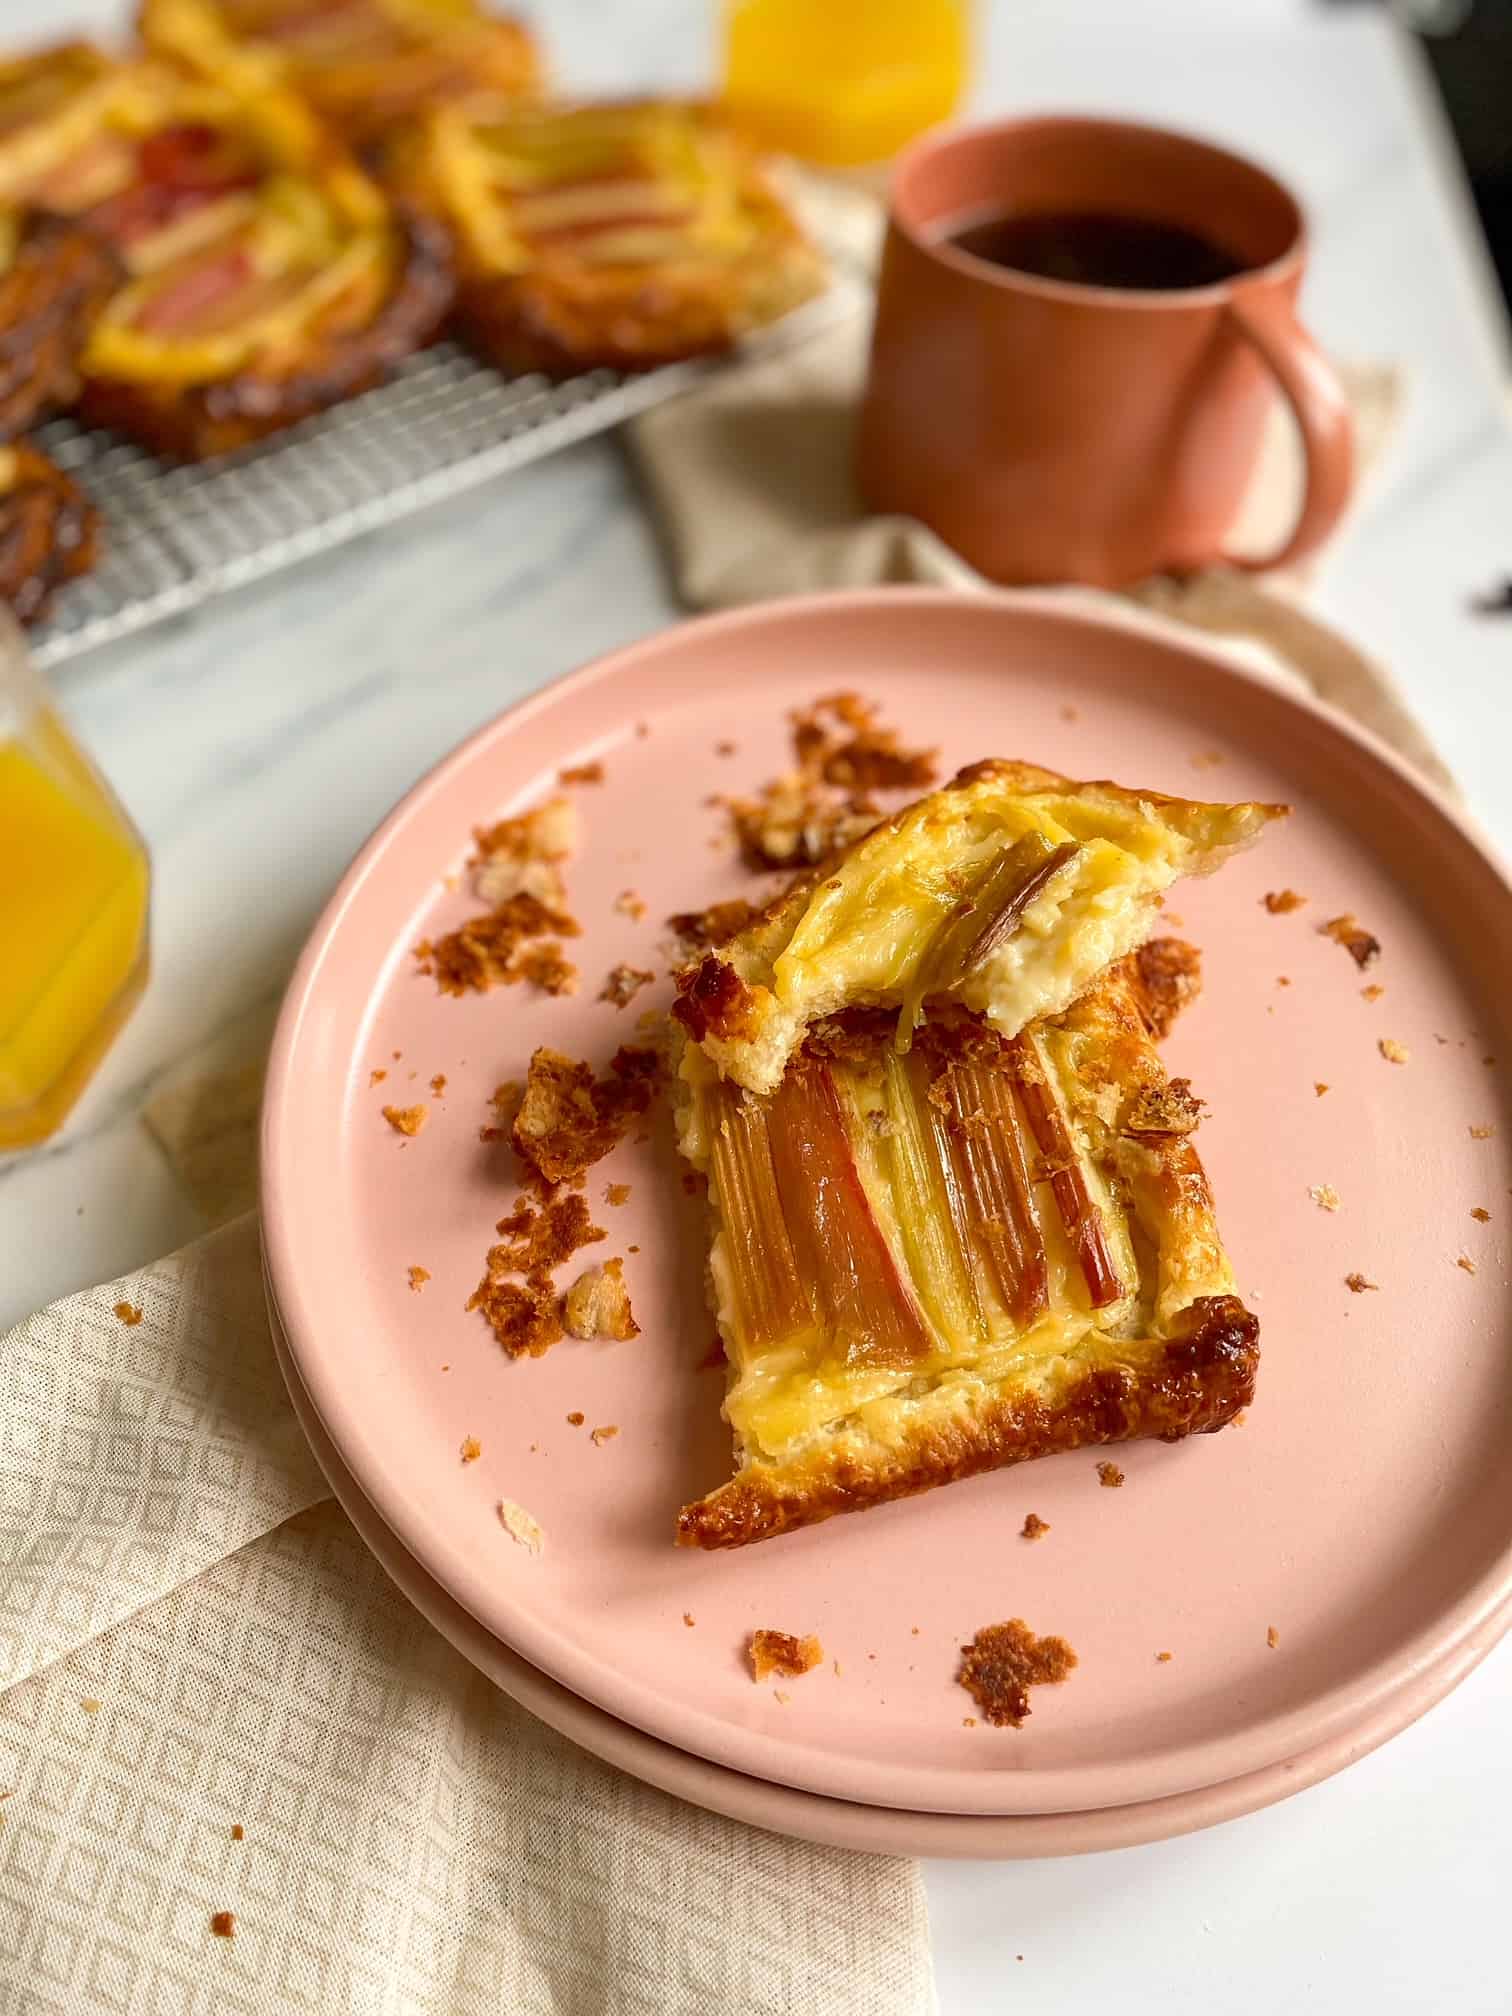
These rhubarb and custard Danishes are the crispest, flakiest, creamiest, sweetest…..just most delicious treat! I wouldn’t blame you if all 8 are eaten in one go! The best kind of baking is hours of labour, for a 10 second demolish right??? 😉
I really hope you love these as much as I do! Please leave a review below, if you make them!
You may also like:

Rhubarb and Custard Danishes
Ingredients
Pastry
- 250 g strong white bread flour
- 7 g fast action dried yeast
- 30 g caster sugar
- 1/2 tsp salt
- 60 ml milk whole or semi-skimmed
- 60 ml water
- 250 g unsalted butter room temperature
Creme Patissiere
- 250 ml milk whole or semi-skimmed
- 2 tsp vanilla extract
- 1 large egg
- 2 large egg yolks
- 100 g caster sugar
- 25 g cornflour
Rhubarb Filling
- 400 g rhubarb
- 150 g caster sugar
Glaze
- 1 large egg
Instructions
- For the pastry: Place the flour, yeast, sugar and salt into a large bowl and using a silicone spatula mix to combine. Then pour in the milk and water and mix again to combine. Lightly flour your work surface, and tip the dough out. Knead slightly until the dough comes together and you have a scraggy looking, but uniform dough. Wrap in clingfilm and chill in the fridge for 45 minutes.
- Meanwhile, cut a piece of baking paper big enough to create an envelope, with one side measuring 28x22cm approx. Then spread the butter into the baking paper, until you have a thin layer and you can fold the baking paper up to create a seal around the butter. The butter will therefore be 28x22cm approx. Place this flat in the freezer to chill.
- Once the dough has chilled, roll it out onto a lightly floured worksurface until you can place the butter in the middle and have enough dough to completely cover the butter on each side. Fold the pastry over the butter, making sure its sealed on all sides, pressing it together where needed. Then roll a few times to completely seal the butter in the pastry, and then begin your first turn – fold the top 1/3 of the pastry down, and then fold the bottom 1/3 of the dough up over the top. Like you would fold a letter. Wrap this in clingfilm and place in the fridge to chill for 30 minutes.
- Repeat the turns twice more, with 30 minutes chilling time between each. Then leave in the fridge to chill overnight – at least 12 hours.
- For the creme patissiere: Put the egg and yolks in a large heatproof bowl and whisk in the sugar and cornflour until smooth. Then set aside. Place the milk and vanilla extract into a medium saucepan and bring to the boil over a medium-high heat.
- Pour the boiling vanilla milk over the egg mixture, whisking constantly to combine. Pour this mixture back into the pan and return to a medium heat. Whisk constantly until thickened, cooking for a minute or so extra to cook out the cornflour. Then pour the cooked crème patissiere into a heat-proof bowl and press a sheet of clingfilm onto the surface to stop it forming a skin. Set aside to cool a little, then place into the fridge to chill overnight.
- To assemble: The next morning, roll the chilled dough out onto a lightly floured worksurface to a rectangle roughly 40x30cm. Then cut into 8 equal rectangles, and fold the edges of each over to create a 'picture frame' style. Place onto lined baking trays, leaving a little space between each to spread, and lightly cover with clingfilm. Leave to prove in a warm place until doubled in size, at least 2 hours.
- For the rhubarb: Meanwhile, preheat the oven to 200C/180C Fan/Gas Mark 6. Then prepare your rhubarb, by chopping off the woody ends and then chopping into thin batons. Place the batons into a roasting dish, and mix with the sugar. Cover with foil and roast for 10 minutes, then stir and remove the foil. Before roasting for a further 10 minutes. Set aside to cool.
- Leave the oven on at 200C/180C/Gas Mark 6. Then remove the creme patissiere from the fridge, and with a silicone spatula lightly beat to loosen. Then spoon onto the middle of each proved Danish, spreading so it is an even layer. Place the cooled and roasted rhubarb on top of the creme patissiere, in even lines. Finally, beat the remaining egg and with a pastry brush brush over the exposed edges of the pastry on each Danish. Then bake for 18-20 minutes until golden and crisp.