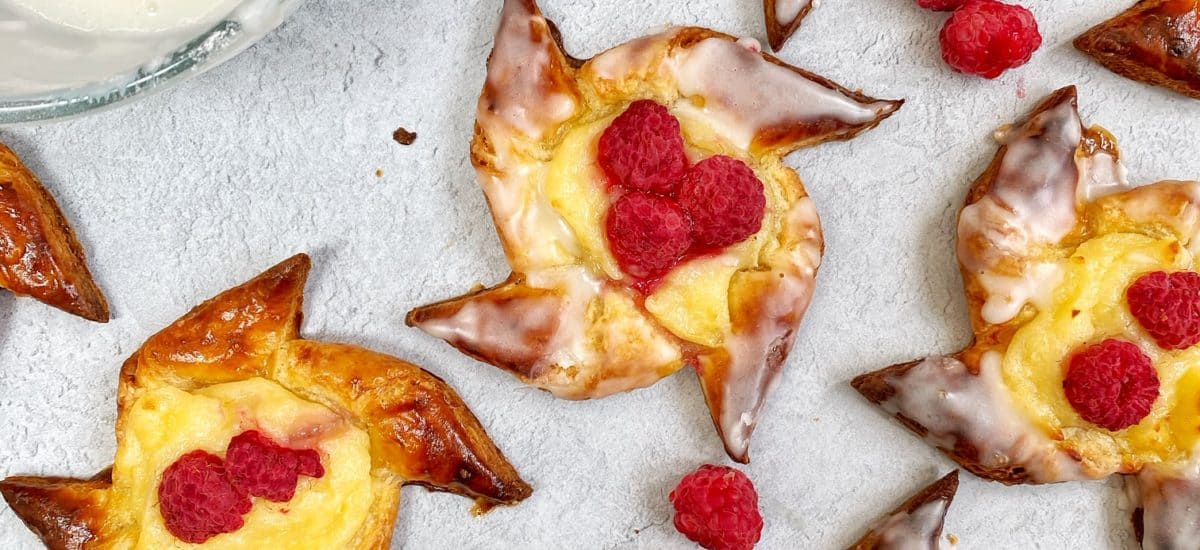

Danishes for breakfast, are to me; one of lifes great pleasures. The star of a Sunday brunch and there are just SO many delicious variations. One of these being a classic raspberry danish. Flaky golden pastry, creamy creme patisserie and tart raspberries on top. Its a delicious combination of flavours, but I’ve added a little extra, with lemon icing drizzled onto the pastries once baked. It adds a little tangy sweetness which really pushes these danishes to the next level.
Now, danishes being a laminated dough inherently require a little more work than your average bake. But don’t let that put you off! Once you’ve got the hang of a laminated dough I promise you it won’t seem so scary. For me the process of the dough isn’t tricky and there really isn’t much hands on time but therein lies the problem. Laminated dough is allll about technique. It’s definitely something that you get better with practise at, but each attempt at these raspberry danishes will still be delicious so its worth trying!!
Here’s what I’ve learnt so far:
- Quality butter is key. Laminated dough is made up of a large quantity of butter so you want to get the best you can afford to get the best flavour! I recommend President!
- Keep your butter well chilled. This is absolutely paramount to successful lamination.
- Don’t roll back and forth over the dough. Instead, roll in one direction and then turn the dough. This will help to create long gluten strands.
Creme patisserie is an absolute stalwart in the baking world. Its added to a surprising amount of classic French bakes – souffles, mille-feuille and pain au raisins just to name a few! It is essentially a thickened custard and is usually flavoured with vanilla. It creates a delicious creamy base for fruits, so is often used in tarts and danishes. Though it may have a fancy French name, it isn’t too tricky to create. You do however need to have all your ingredients ready to go, as once you’ve started heating the milk it will all come together very quickly.

One tip for creme patisserie?
Don’t take your eye off it and keep whisking! It will go from looking fairly thin and creamy to thick very quickly.
The final elements for these raspberry danishes are pretty simple. Raspberries dotted on top of the creme patisserie before baking. And a simple icing is made with icing sugar and lemon juice to be drizzled on top once the pastries are baked. These danishes are absolutely perfect for a breakfast or brunch where you want to impress! I really hope you enjoy the raspberry danishes as much as I did!
On with the recipe:

Raspberry Danishes
Ingredients
Dough
- 125 g plain flour
- 125 g strong white bread flour
- 7 g fast action dried yeast
- 30 g caster sugar
- 1/2 tsp salt
- 225 g unsalted butter chilled
- 60 ml milk lukewarm
- 60 ml water lukewarm
Creme Patisserie
- 250 ml milk
- 2 tsp vanilla extract
- 1 large egg
- 2 large egg yolks
- 100 g caster sugar
- 25 g cornflour
Topping
- Raspberries
Glaze
- 1 large egg
Icing
- 100 g icing sugar
- juice of 1 small lemon approx. 25ml
Instructions
- To make the dough: Put the flours, yeast, sugar and salt in a large bowl and mix to combine. Dice 125g of the butter into small pieces and add to the bowl. Mix roughly, ensuring you don’t break up the butter too much. Add the liquids and mix again until a rough dough forms. Tip out onto a lightly floured work surface and knead briefly until the dough is uniform. Wrap in clingfilm and chill in the fridge for 45 minutes. Meanwhile, put the remaining butter into the freezer.
- Remove the dough from the fridge and roll out into a long rectangle three times as long as it is wide – roughly 15x45cm. Take the butter out of the freezer and and coarsely grate it over the bottom two-thirds of the dough. Fold the top third of the dough over the middle-third, then fold the bottom third over the other-two thirds as if folding a letter. This is your first turn. Wrap the dough in clingfilm and chill in the fridge for 30 minutes.
- Remove the dough from the fridge and turn the dough 90 degrees so that the open ends are facing you. Then repeat the rolling, folding and chilling process twice more, giving the dough a total of three turns. Wrap the finished dough in clingfilm and put in the fridge overnight.
- For the creme patissiere: Place the milk and vanilla extract into a medium saucepan and bring to the boil over a medium-high heat. Meanwhile, put the egg and yolks in a heatproof bowl and whisk in the sugar and cornflour until smooth.
- Pour the boiling vanilla milk over the egg mixture, whisking constantly to combine. Pour this mixture back into the pan and return to a medium heat. Whisk constantly until thickened, cooking for a few minutes extra to remove the taste of the cornflour. Pour the cooked creme patisserie into a heat-proof bowl and press a sheet of clingfilm onto the surface to stop it forming a skin. Then place into the fridge to chill overnight.
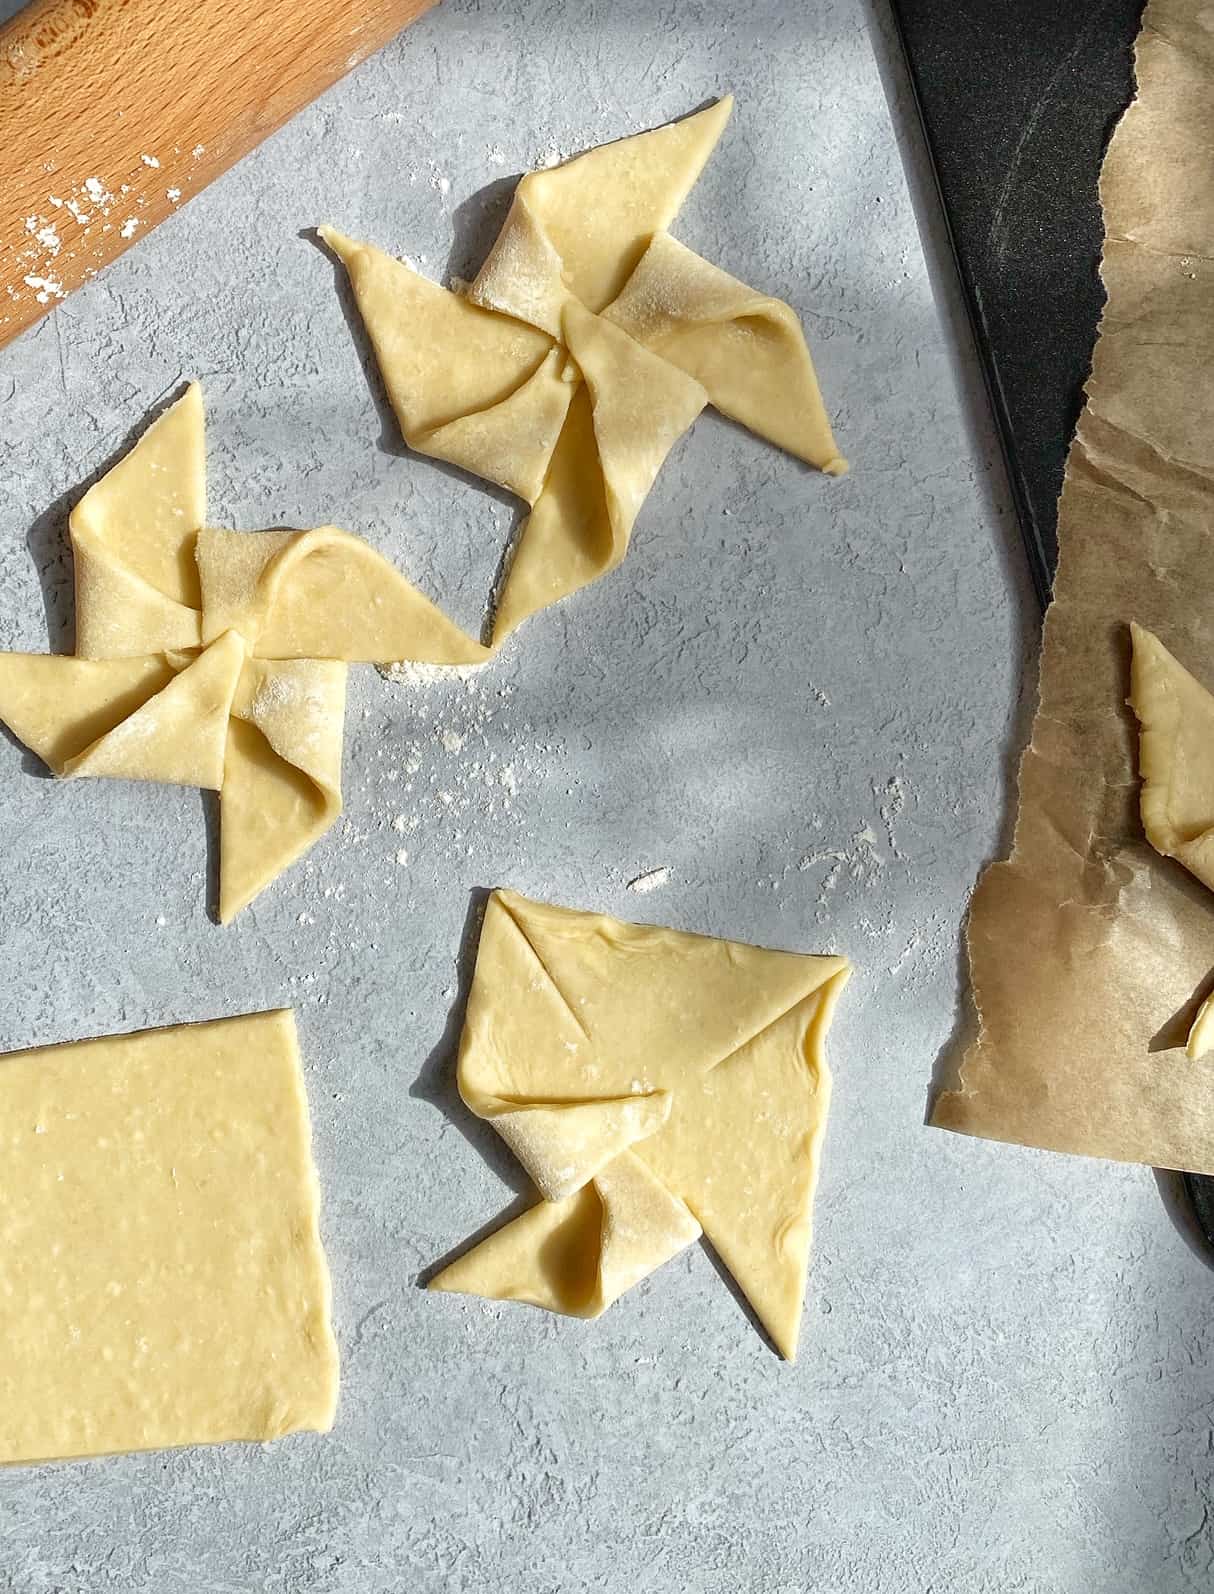
- In the morning, roll the chilled dough out on a lightly floured worksurface to a square roughly 40x40cm. Then cut into 16 equal squares (10x10cm). On each square cut diagonally from each corner, then fold one corner from each triangle into the centre to create a star shape (see picture above). Then place them onto lined baking trays, leaving a little space between each and lightly cover with clingfilm. Leave to rise for about 2 hours until doubled in size.
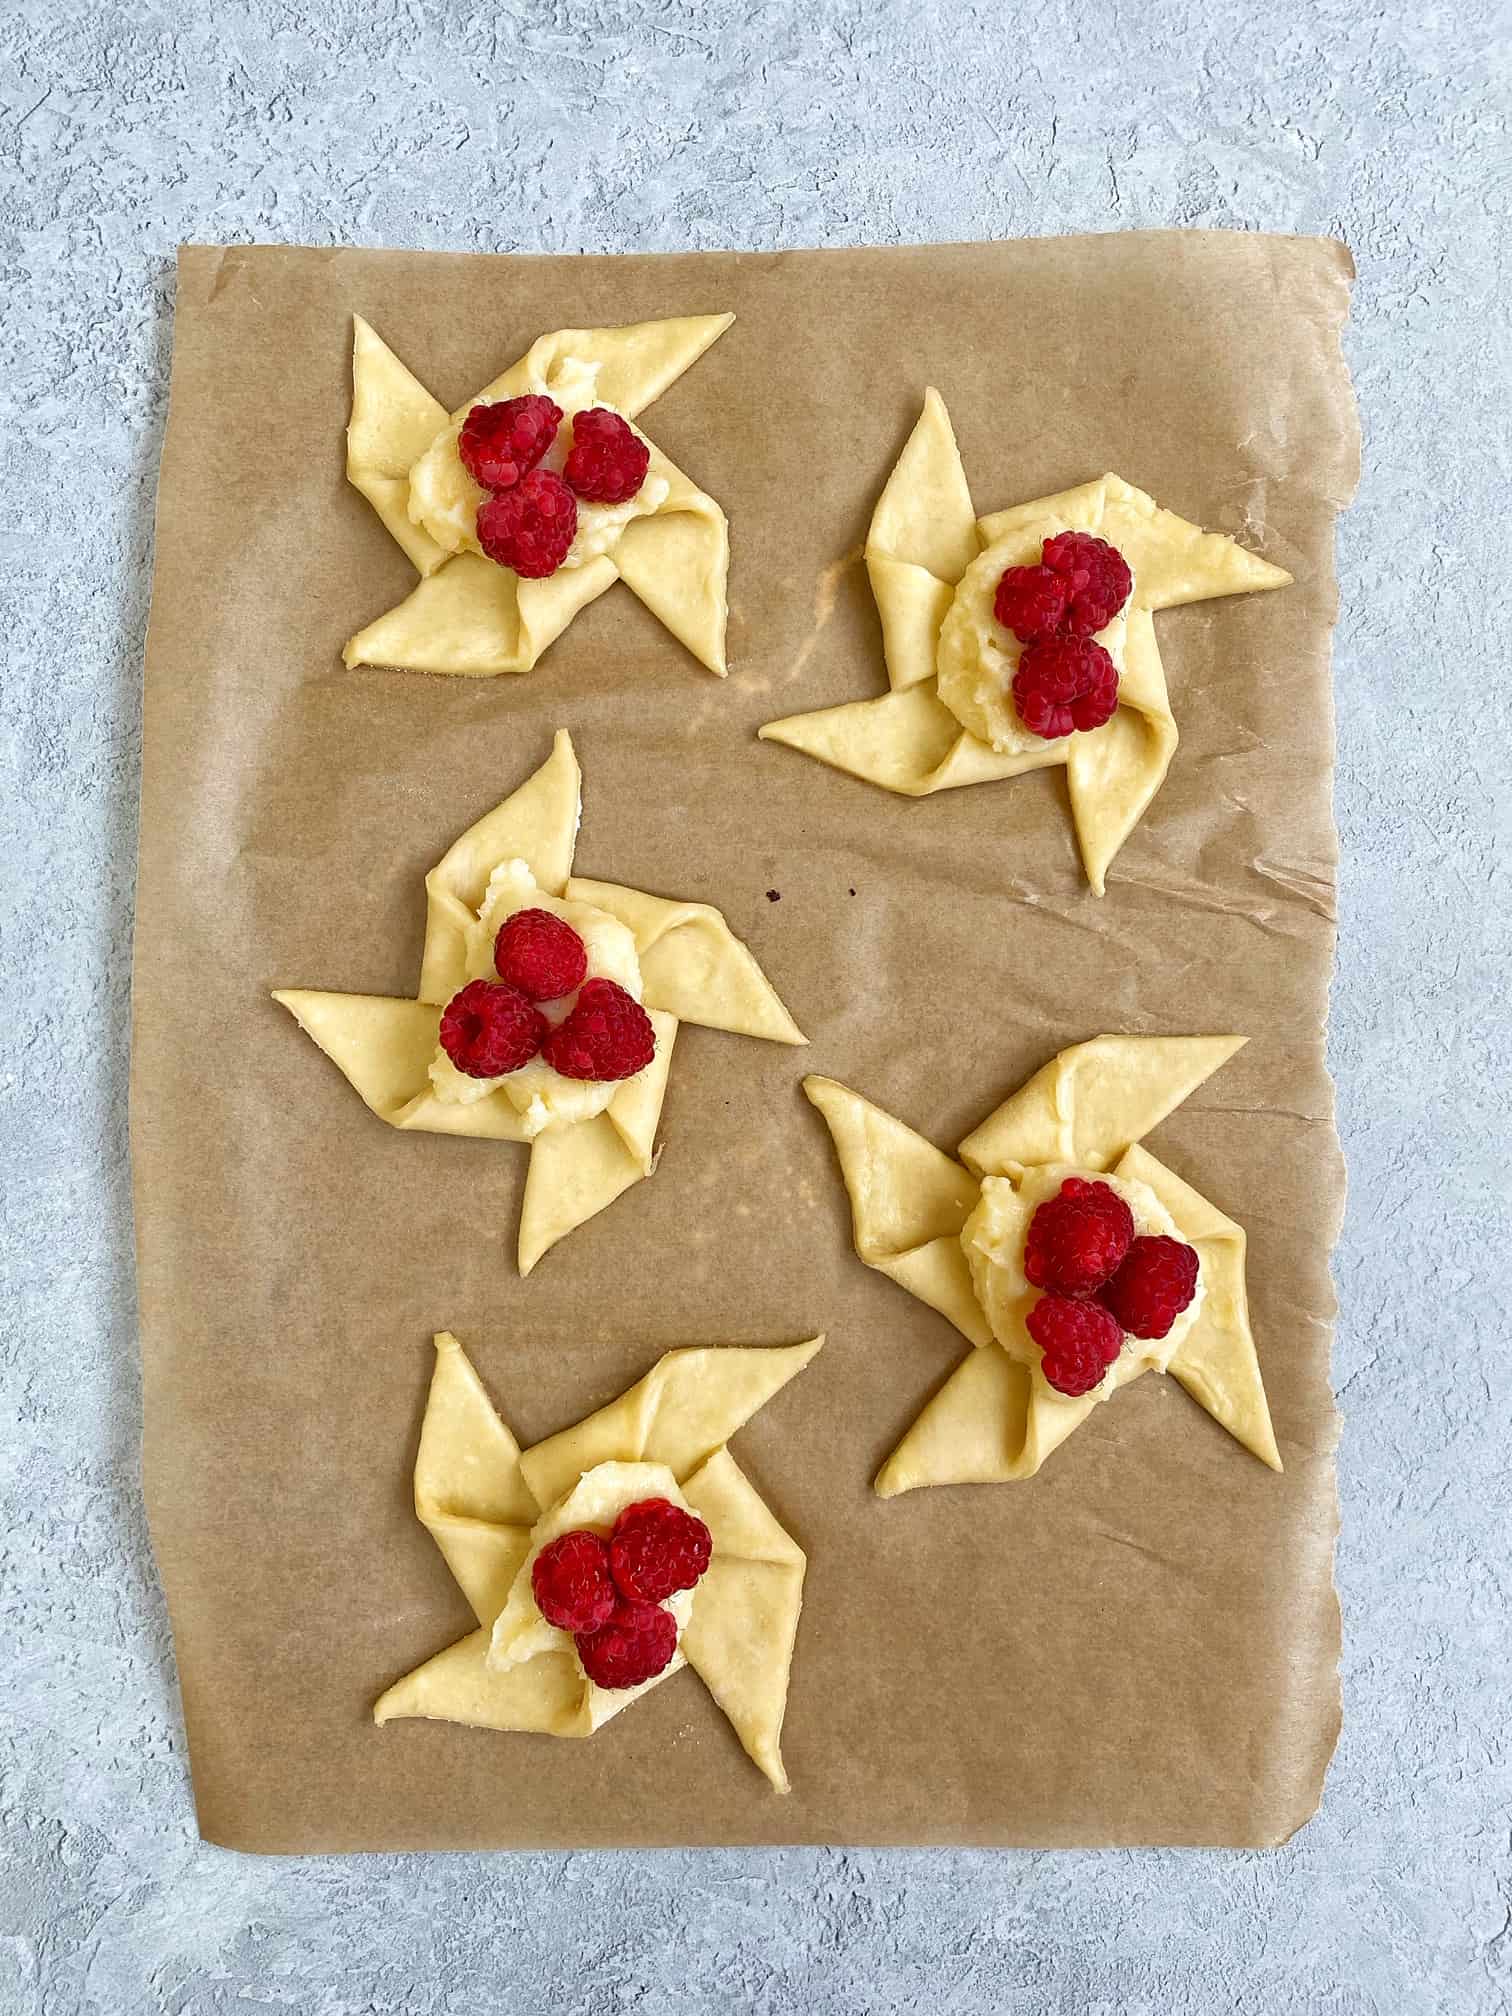
- Preheat the oven to 200C/180C Fan. Then take the creme patisserie from the fridge and beat together until pliable again. Spoon a dollop onto the middle of each pastry star, then top with 2-3 raspberries. Finally, beat the egg and using a pastry brush glaze over the exposed pastry of each star. Bake for 18-20 minutes until golden, then leave to cool.
- For the icing: Mix the icing sugar and lemon juice together in a small bowl. Then using a pastry brush drizzle over the pastries.


Amazing………
I am making these for the 2nd time now, will alwsys use this recipe. Thankyou!
So pleased to hear this Diane!! x