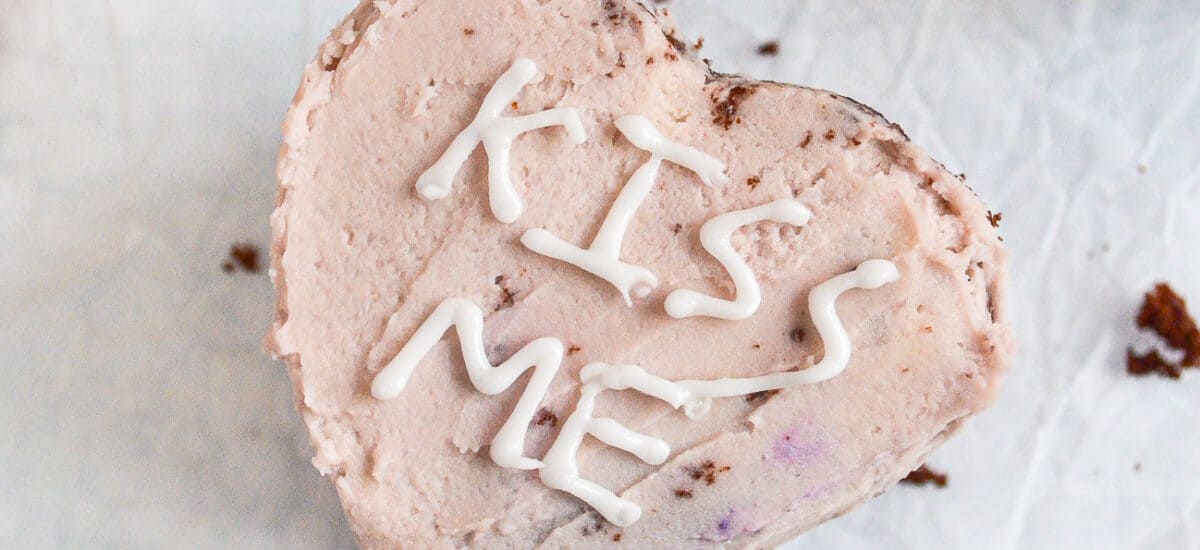
The childhood classic turned into the perfect super cute sharing dessert! These mini conversation heart cakes will definitely impress your valentine!

Conversation hearts or Lovehearts are the super cute sweet that remind me of my childhood. I loved the little sayings and choosing which ones to give to my friends! Nowadays the sweets also have emojis on them…not sure how I feel about that!! But I really wanted to incorporate them into a cute valentines bake, and honestly these mini conversation heart cakes are the best dessert! Moist decadent chocolate cake, filled and covered with a super smooth light American style buttercream. Delicious andddd a valentines gift in one! Whats not to love?!
Key Ingredients You’ll Need
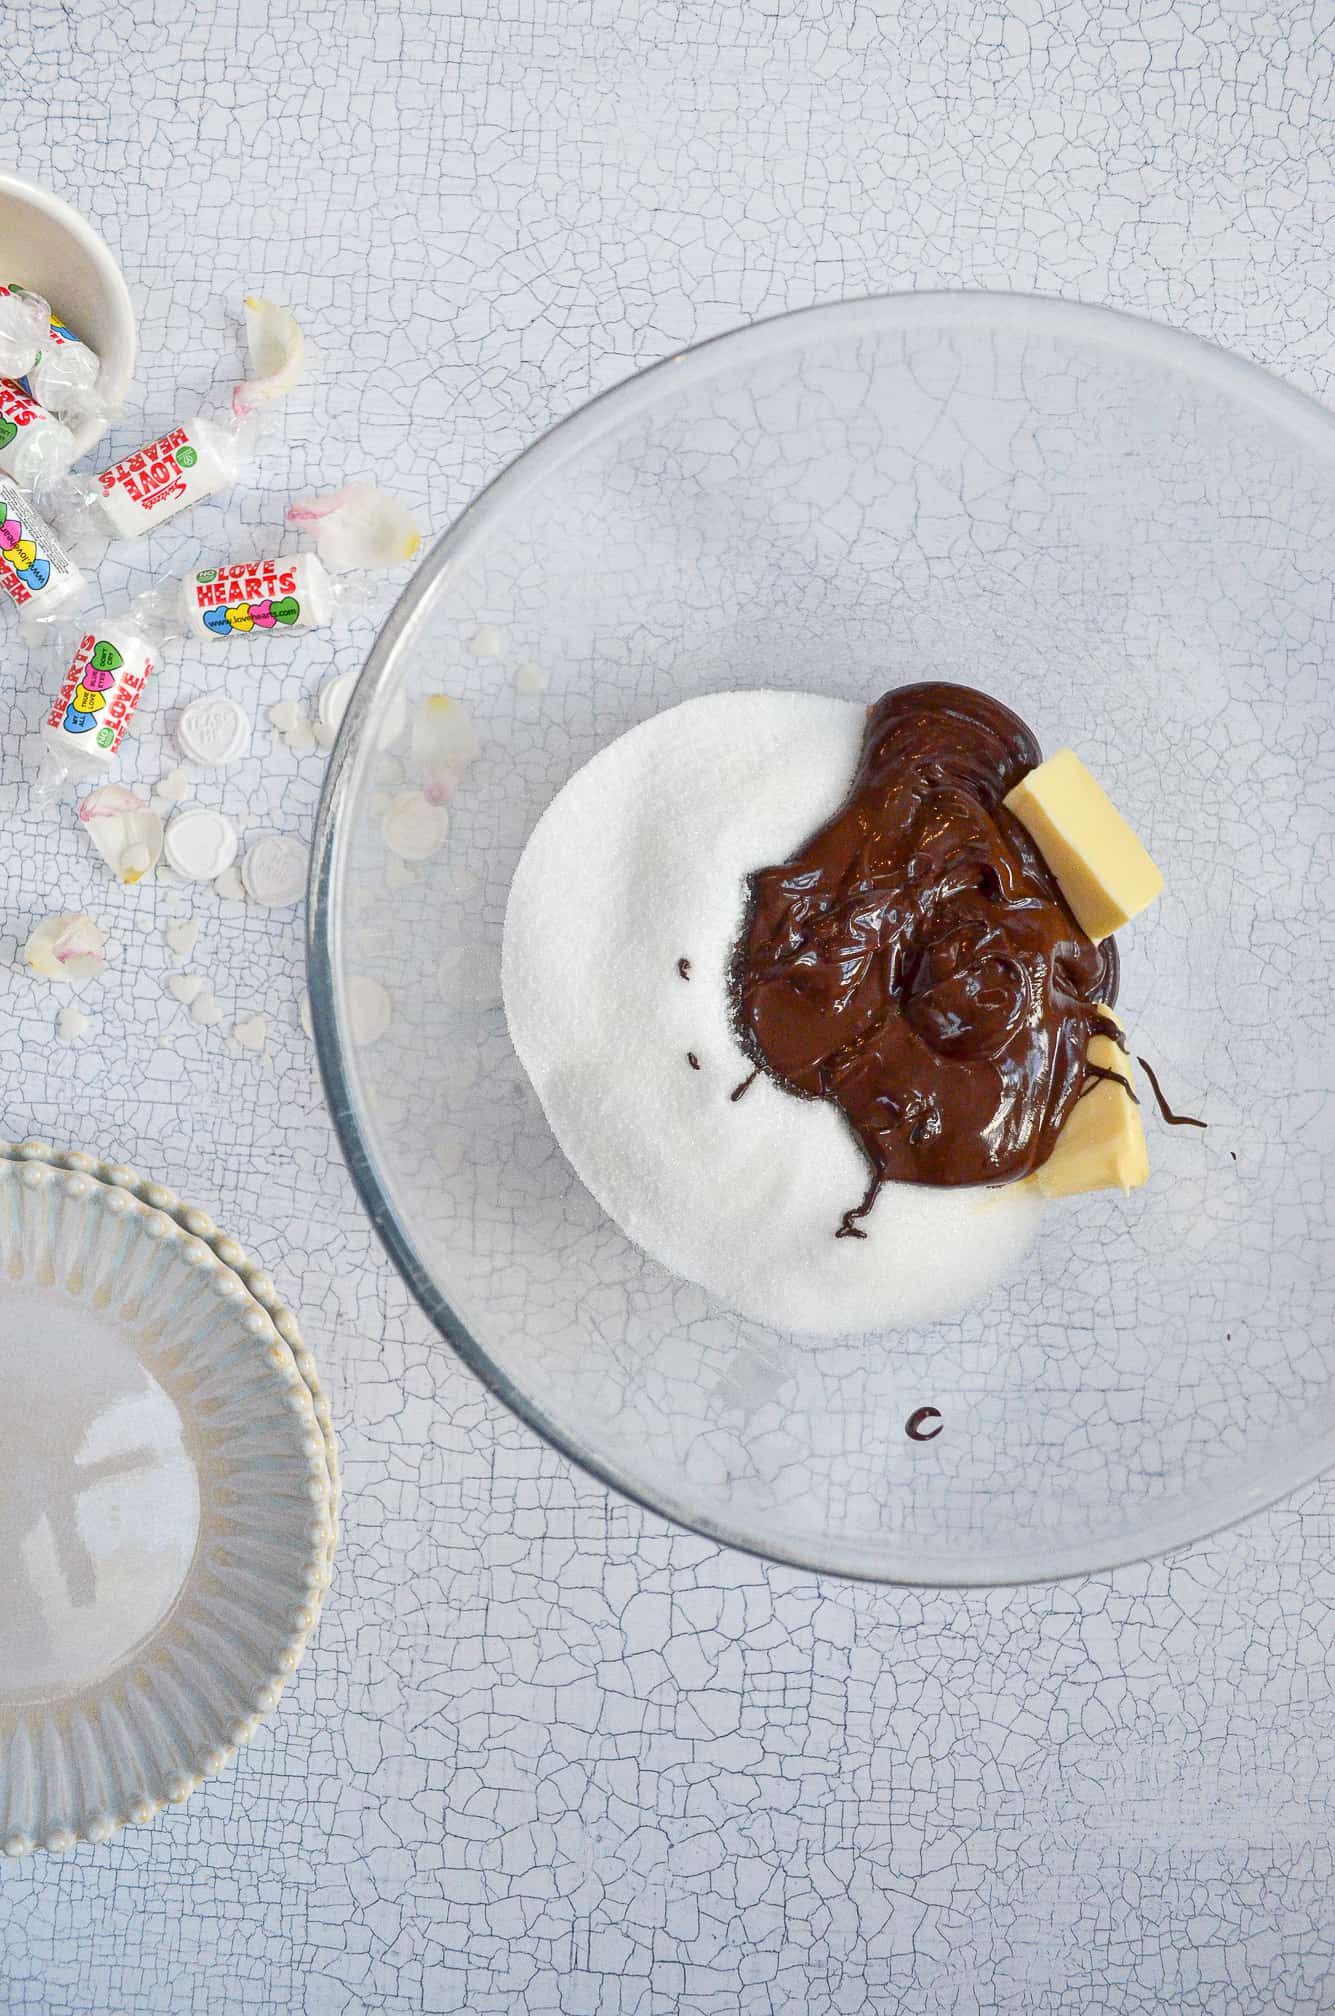
- Coffee – I knoww, I know. This isn’t a coffee cake. But honestly you cannot taste the coffee in this cake at all. I promise. But what it does is bring out the depth of flavour in the chocolate beautifully! I combine the hot coffee with cocoa powder first, which gives the cocoa powder a chance to bloom and give you a delicious super chocolatey cake.
- Unsalted butter (at room temperature) – For this cake to be light and airy you absolutely must start with room temperature butter. If your butter is too hard it won’t incorporate with the ingredients well and you’ll be left with a dense cake. You also need your butter at room temperature to create a light and fluffy American buttercream!
- Icing Sugar – For the buttercream you’ll need a fair amount of icing sugar (powdered sugar). I can’t lie to you, this icing is quite sweet! But it balances really well against the dark chocolate cake that it’s not overpowering.
How to make mini conversation heart cakes
Making mini layered cakes can seem a little intimidating and it definitely has its own unique challenges. But its SO worth it for how cute they look! I’ve got quite a few tips to help you along the way, but so long as you’re patient you’ll have no problems. I would advise in investing in a small offset spatula as it makes life soo much easier when you’re spreading the buttercream. You can also use a cake scraper if you want to get the sides extra smooth!
Making the chocolate sponge
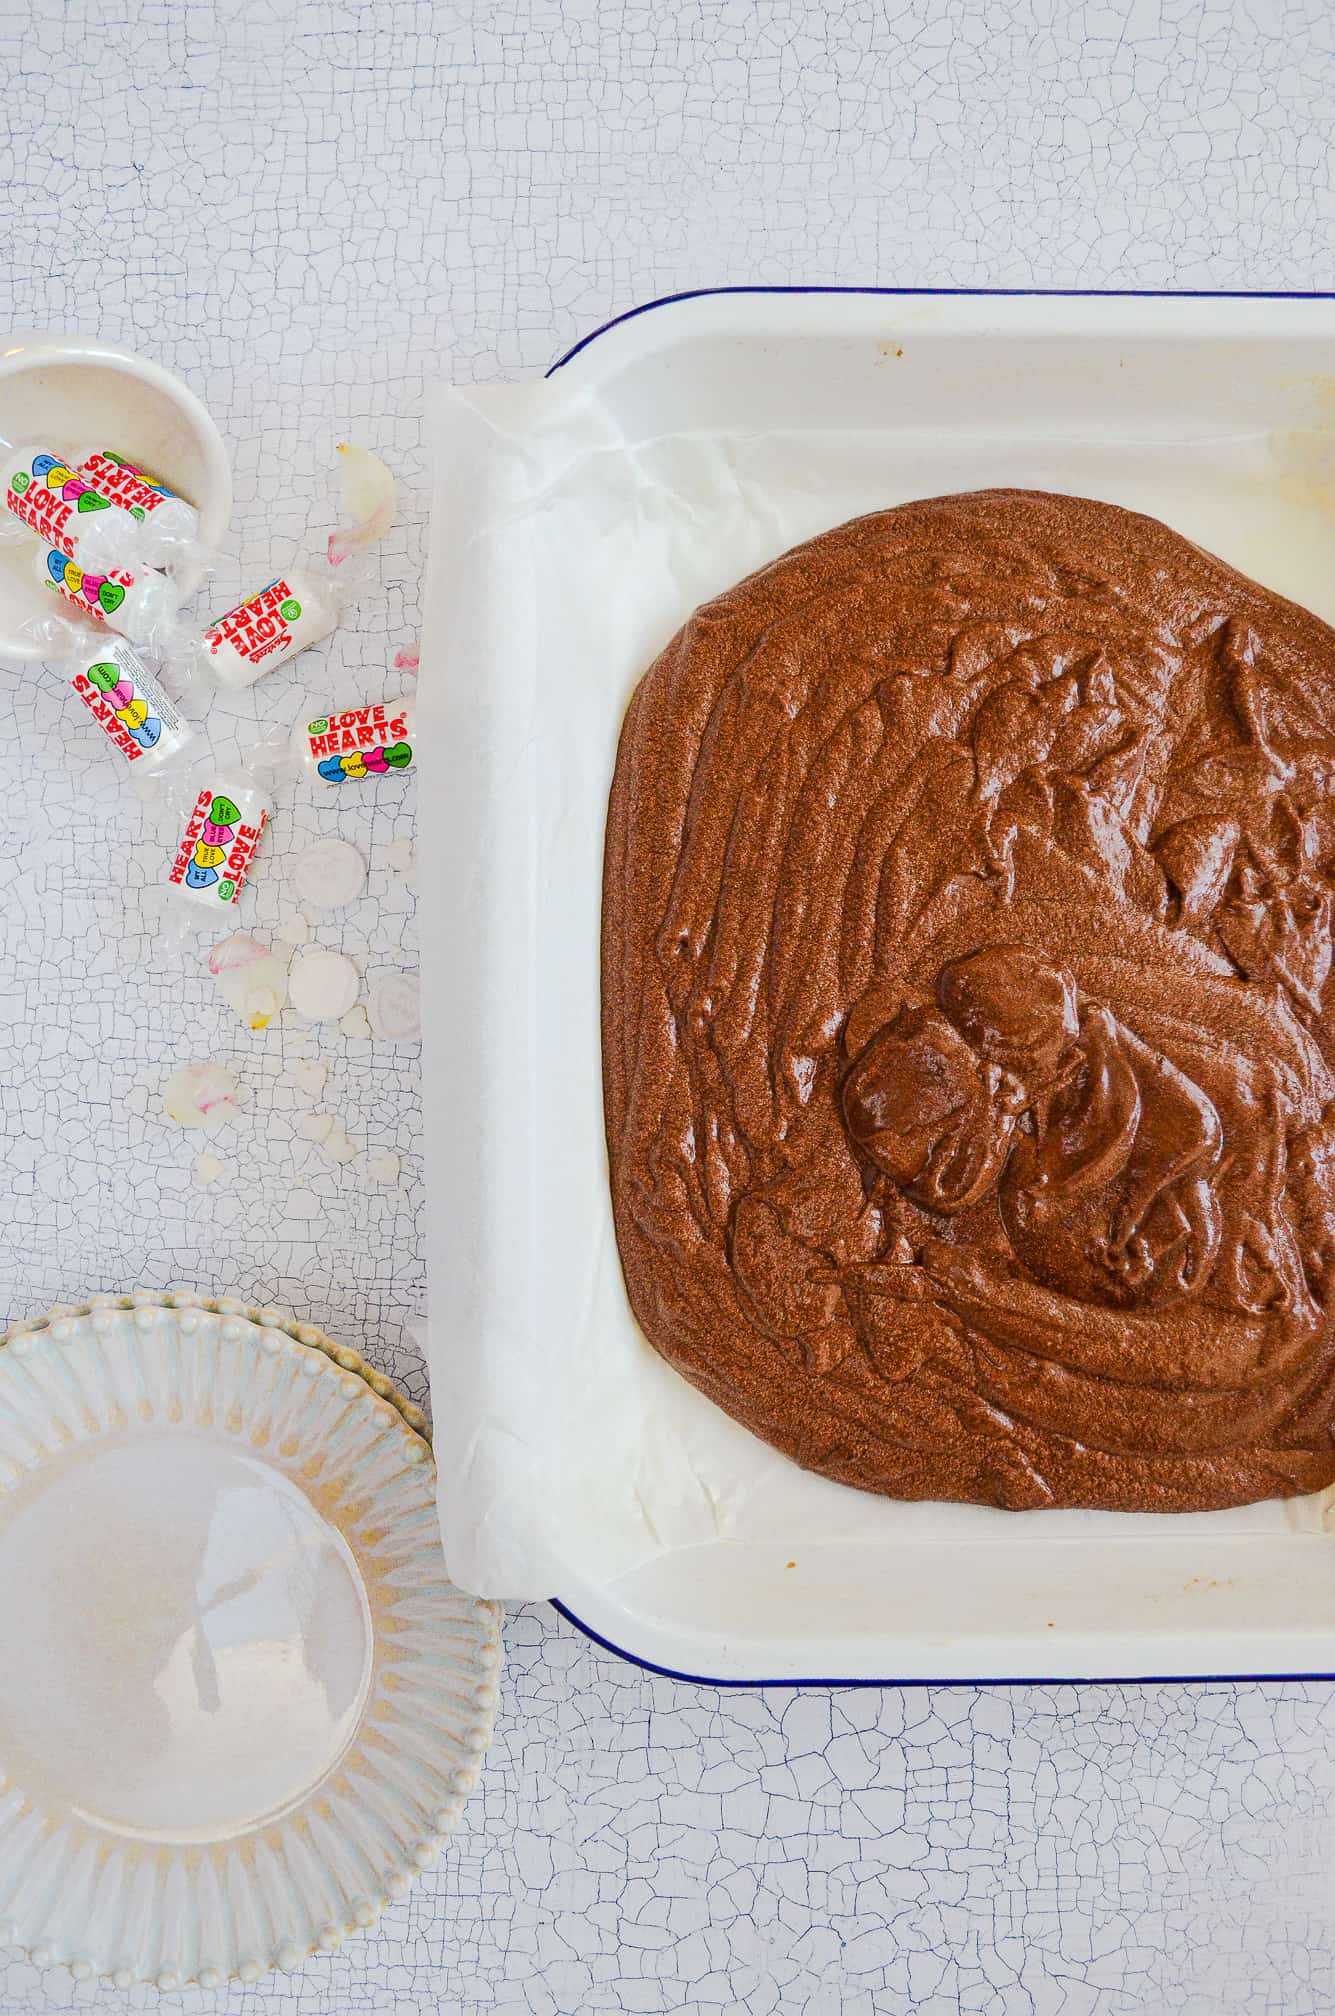
This is my go to chocolate sponge, it never fails and its sooo delicious! The first most important step is to bloom your cocoa powder – i.e. combine it with a hot liquid or fat. In this case we’re going to use hot coffee. You won’t taste the coffee but you will taste the true depth of the chocolate from the cocoa powder. I do this first so I can leave it to the side for a couple of minutes, before combining it with the butter and sugar. This way your butter won’t melt!
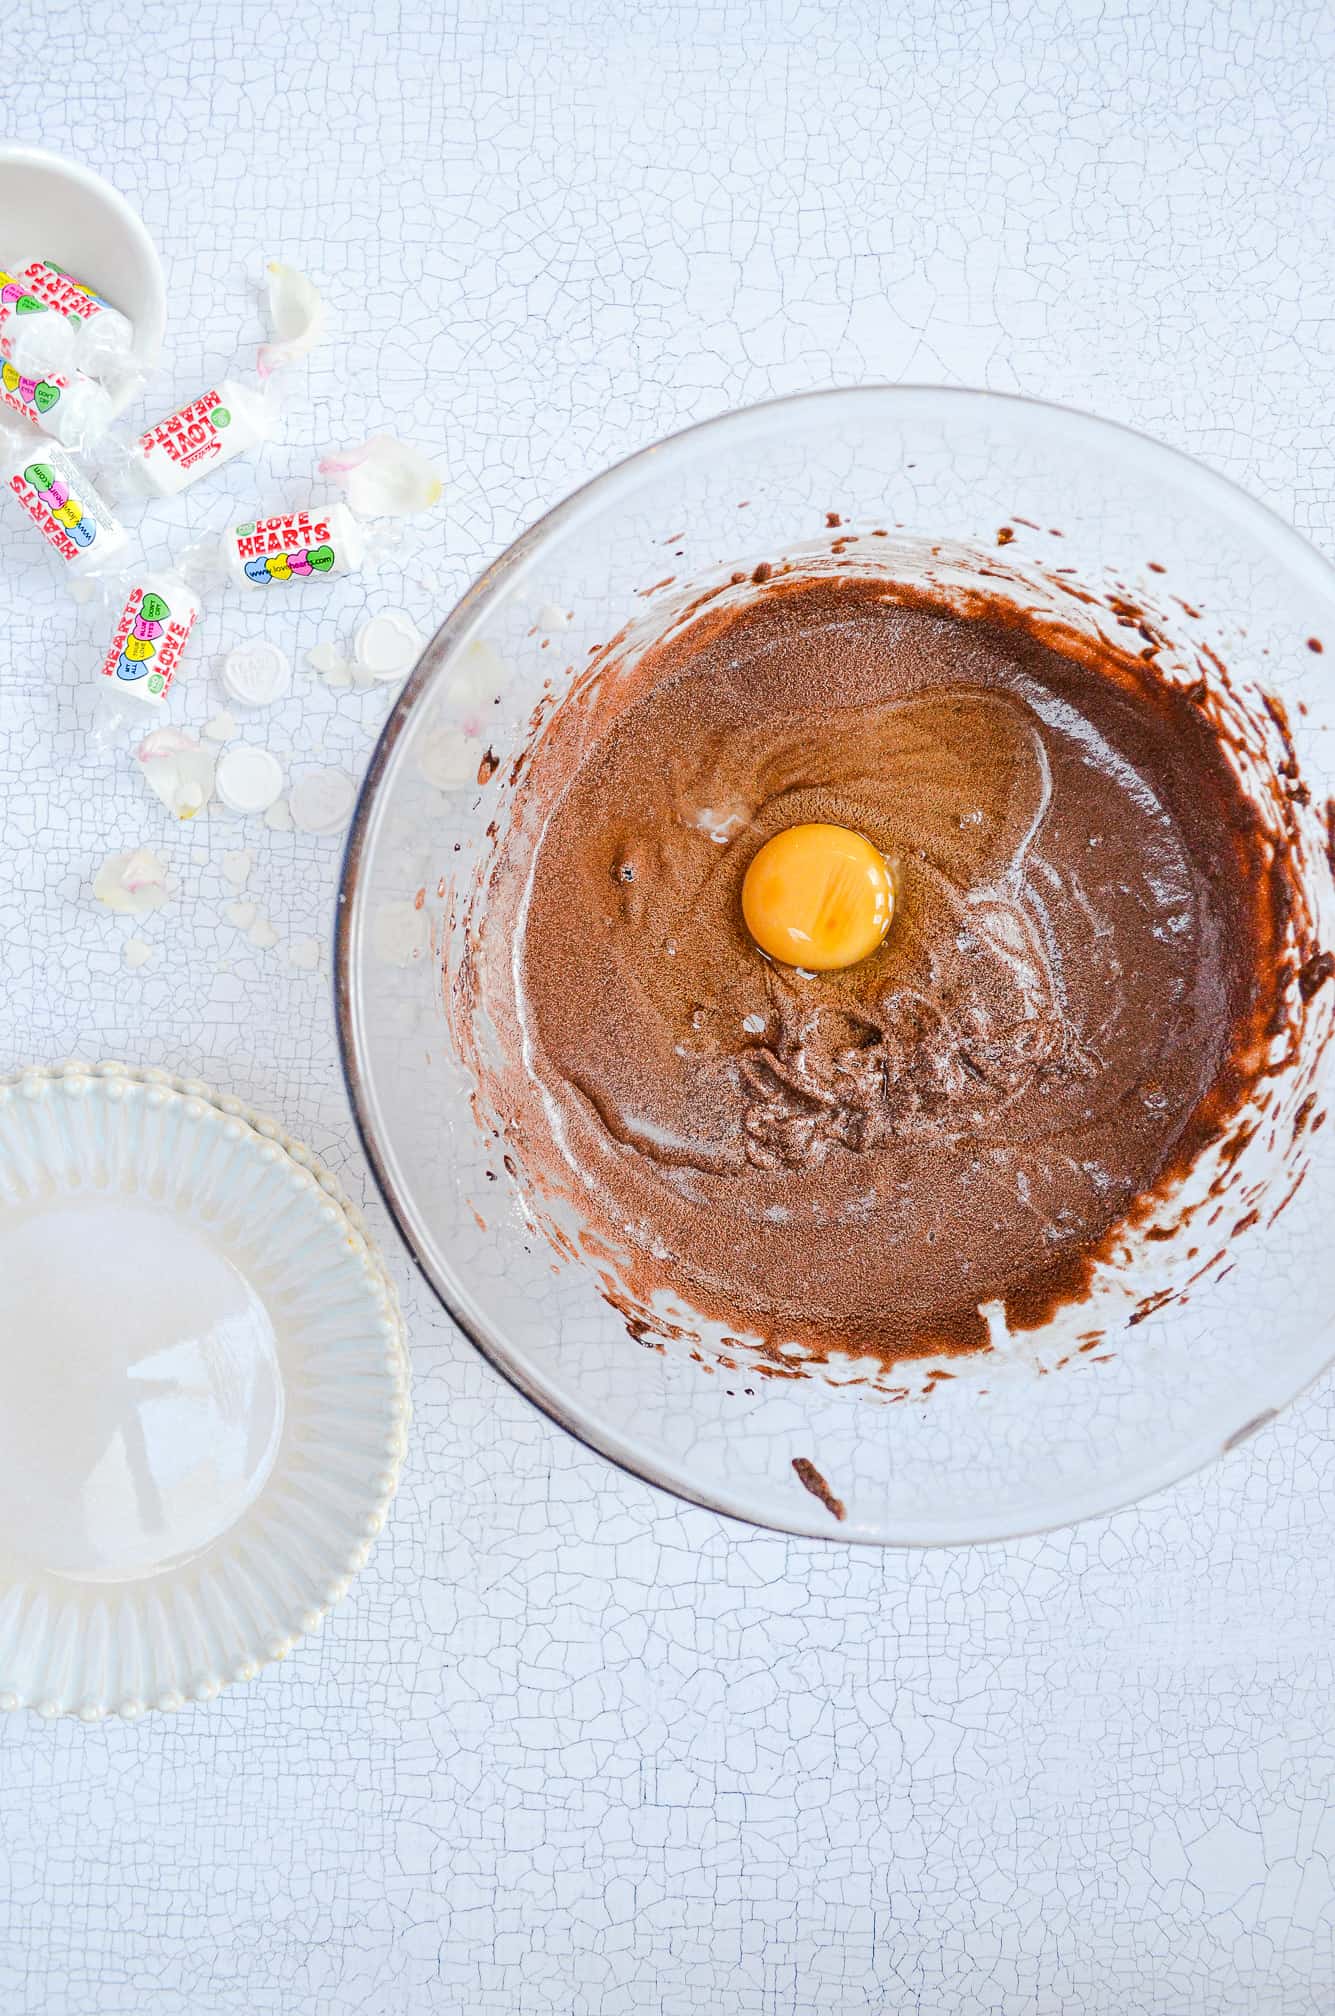
Then the eggs should be added one by one – the mixture may look a little curdled, but I promise you it will be fine. Next step is to mix in the dry ingredients – the plain flour and baking powder. Whenever you’re adding in flour, you only want to mix the batter until it’s just combined. Any further and you’ll start forming gluten strands and your cake could taste tough. Finally, milk should be stirred in and then its ready to bake!
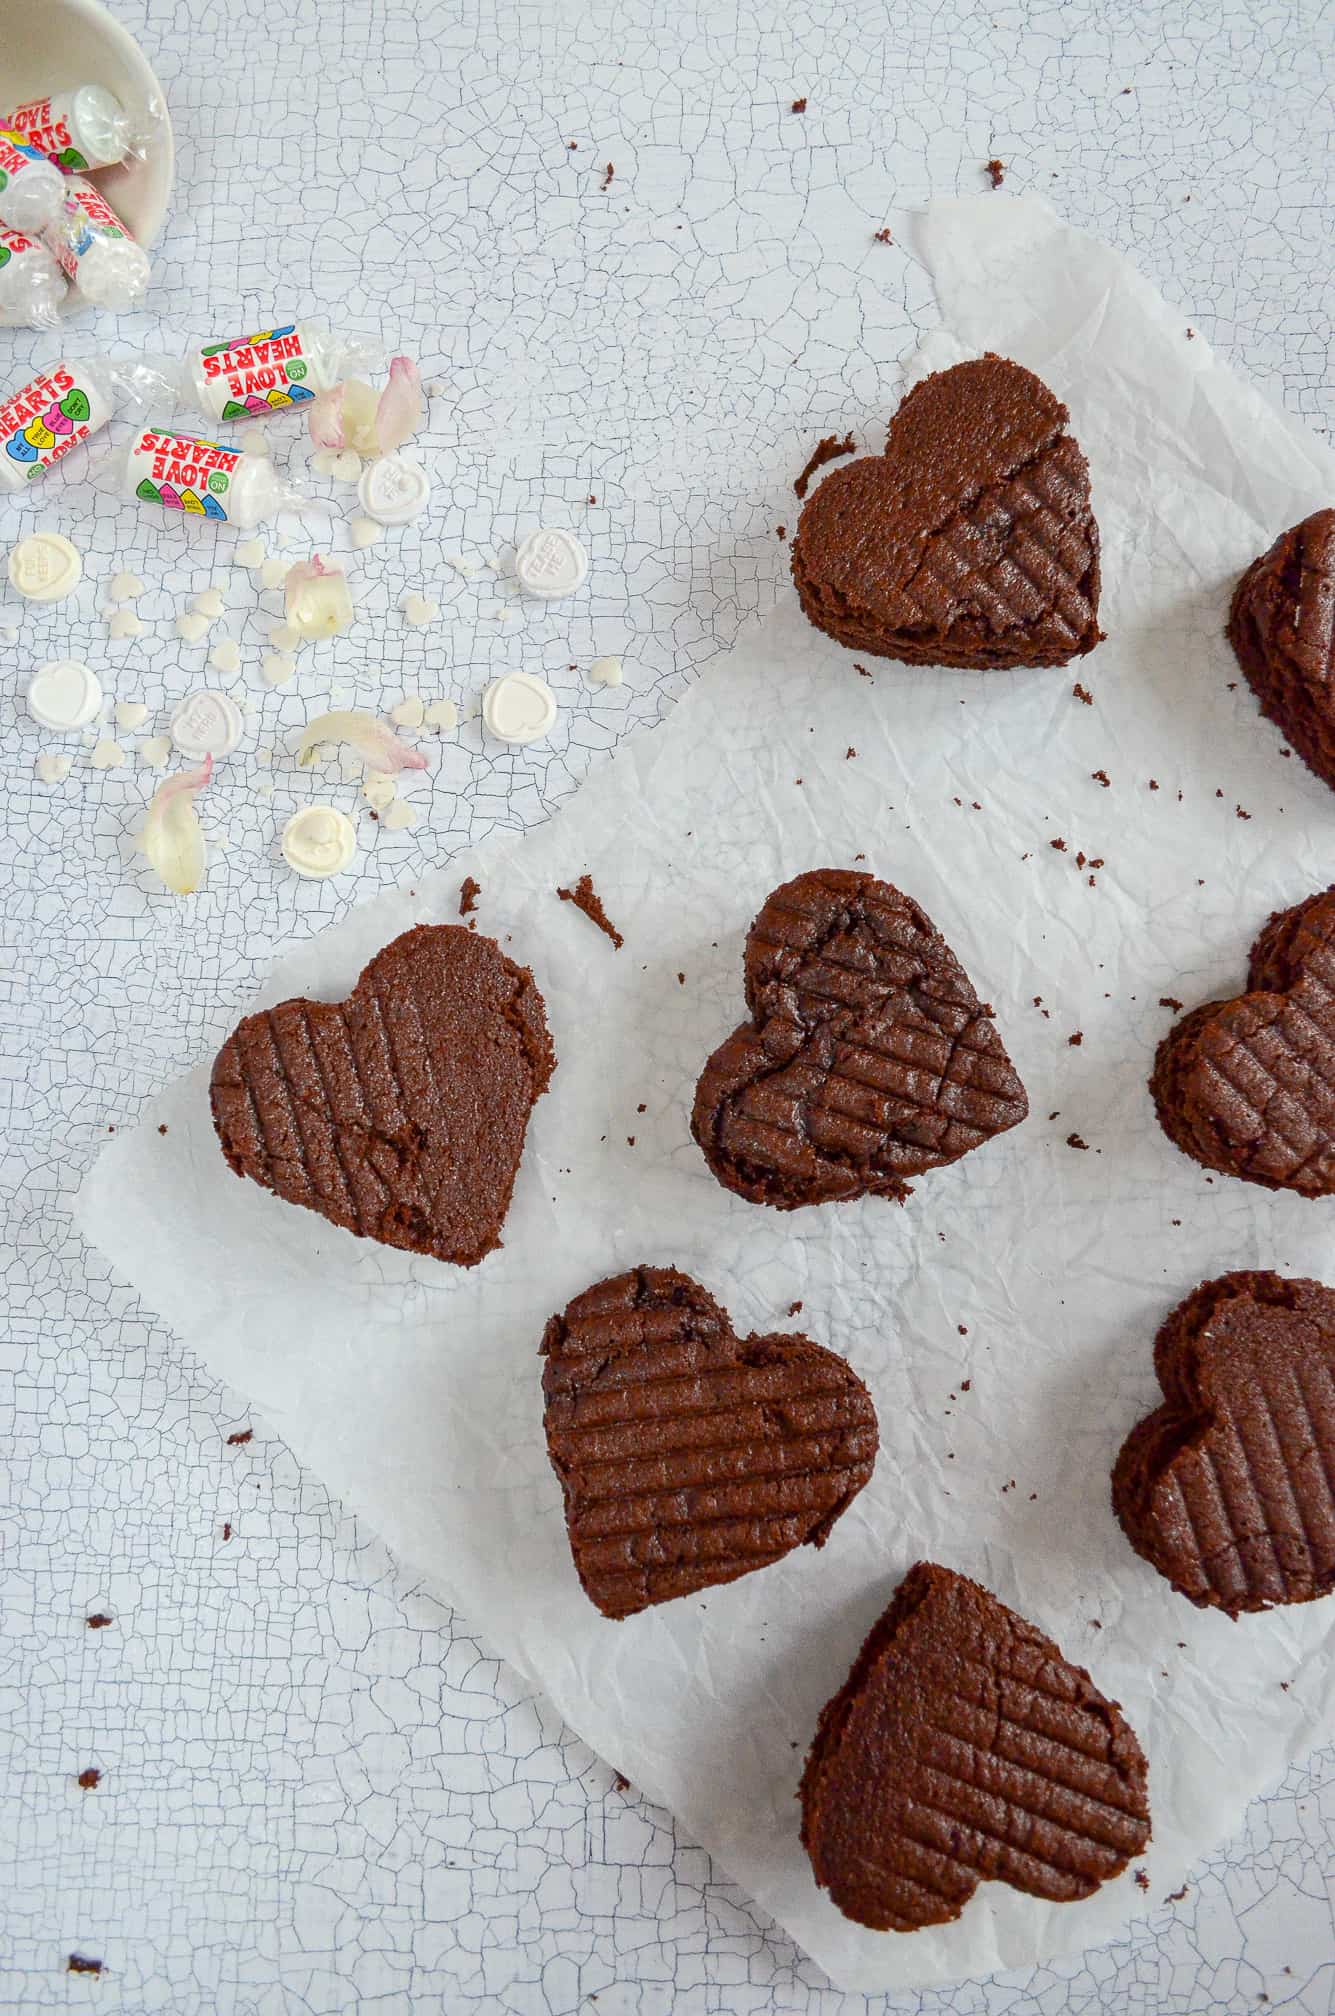
The batter should be baked in a traybake style 12x9inch tin – lined with baking paper always. The cake will be spongy and sound crackly when it’s fully baked, and then it just needs to be left to cool completely. You could make the cake the day before you want to assemble if you wanted!
Making the buttercream
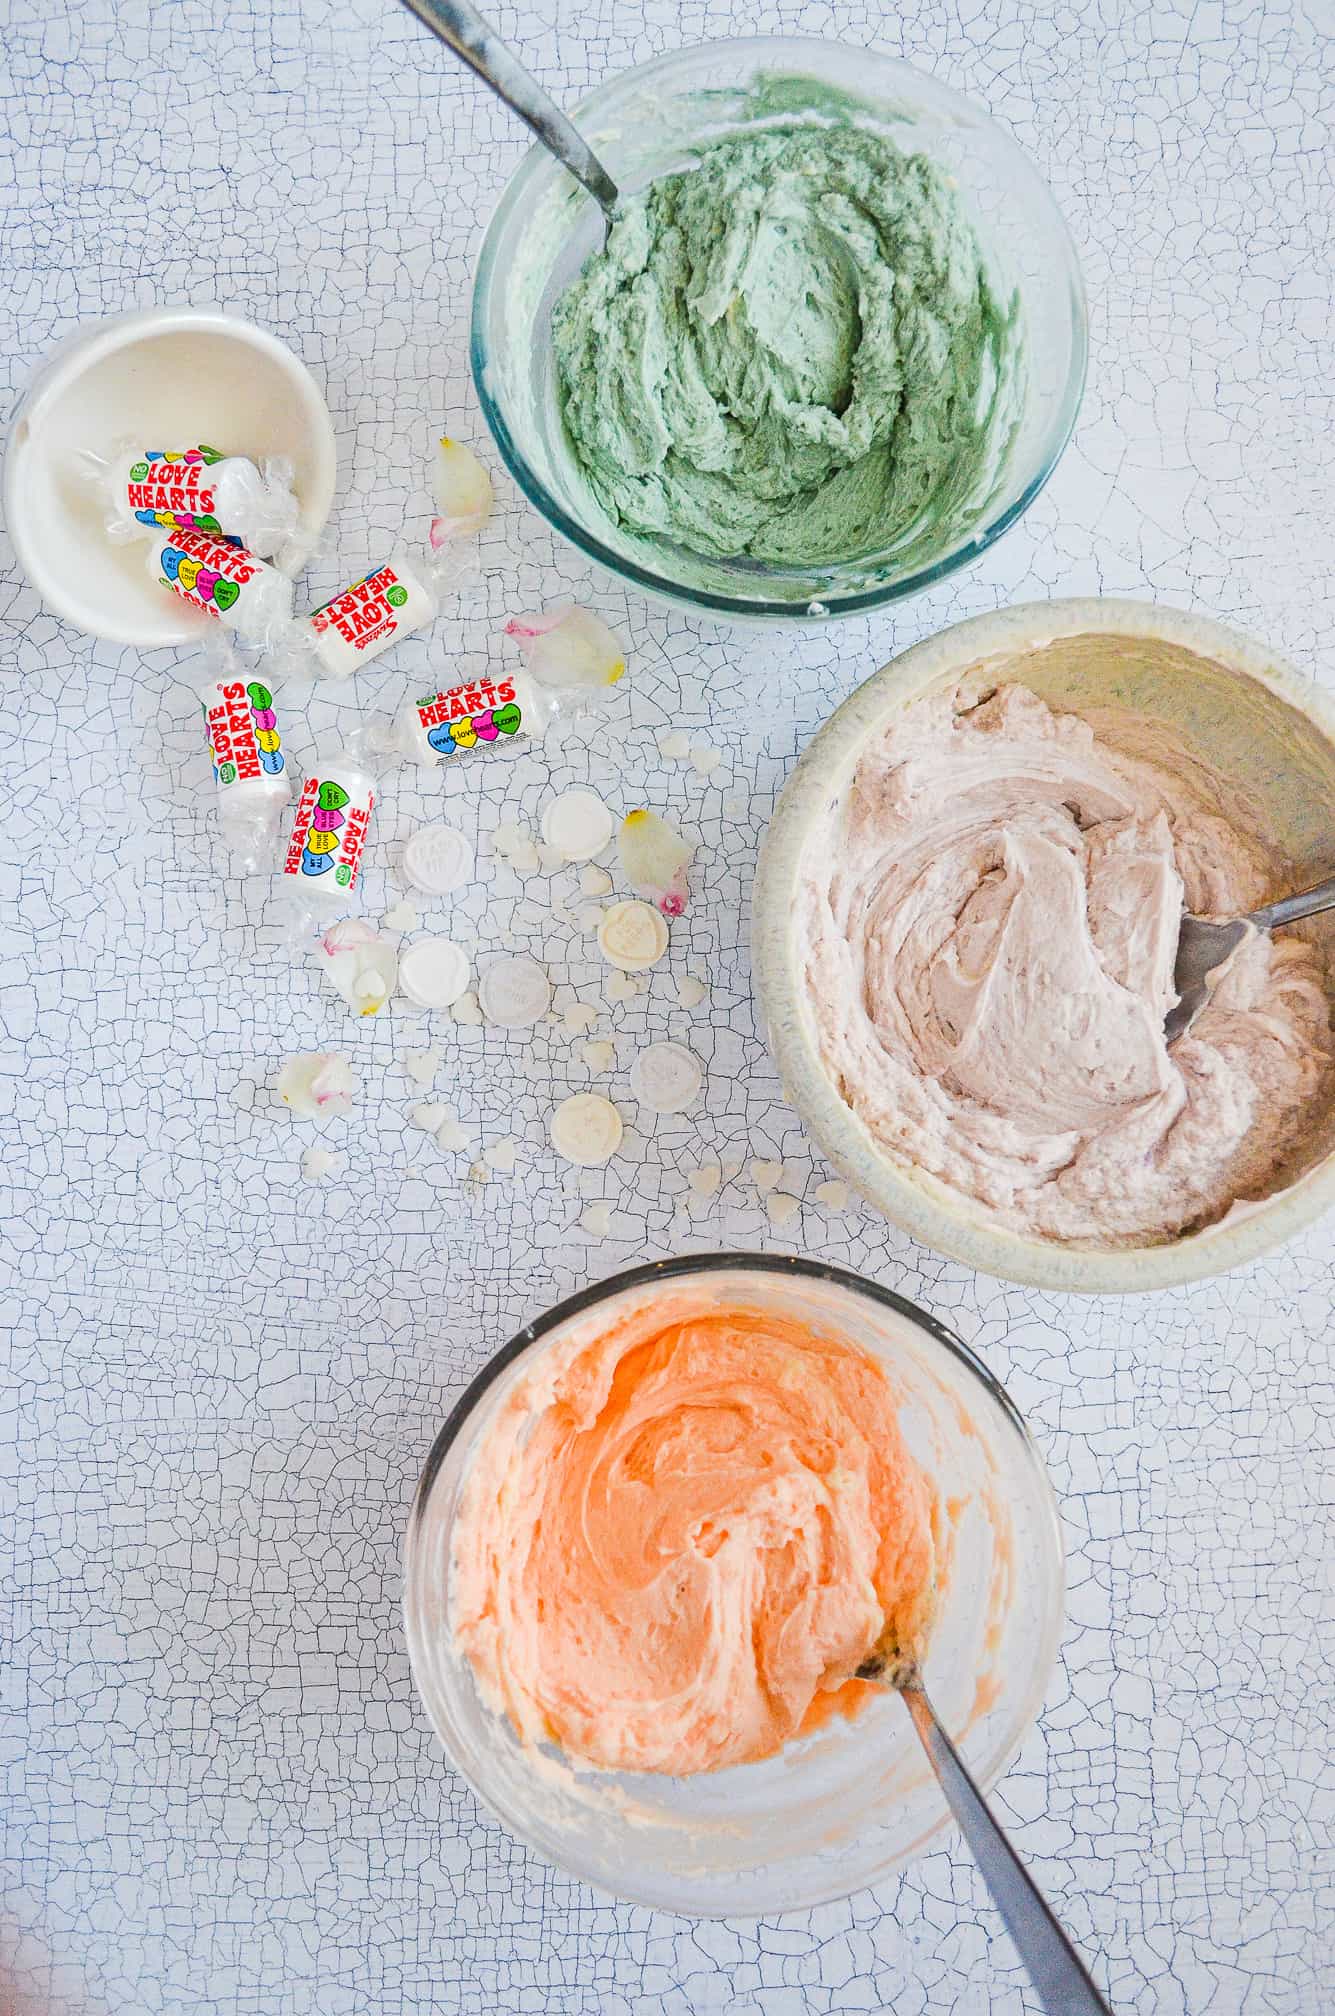
American buttercream is so simple to make, but it can also be done really badly. By that I mean it can often be thick, grainy and cloying. This is not what we want! But don’t worry, because following this method will result in light, fluffy, delicious buttercream! So firstly make sure your butter is at room temperature. Then whip it with either an electric hand-whisk or a stand mixer for a good 2-3 minutes until its visibly lightened in colour and is really soft and creamy. Then you can begin adding the icing sugar in, in additions. Doing it in a few stages rather than all at once gives it a chance to be incorporated well and doesn’t turn your kitchen into a dust cloud!
Once all the icing sugar has been added continue mixing for a few more minutes to really get it silky smooth. Finally, the vanilla extract and milk can be added. Your buttercream should be really creamy and light.
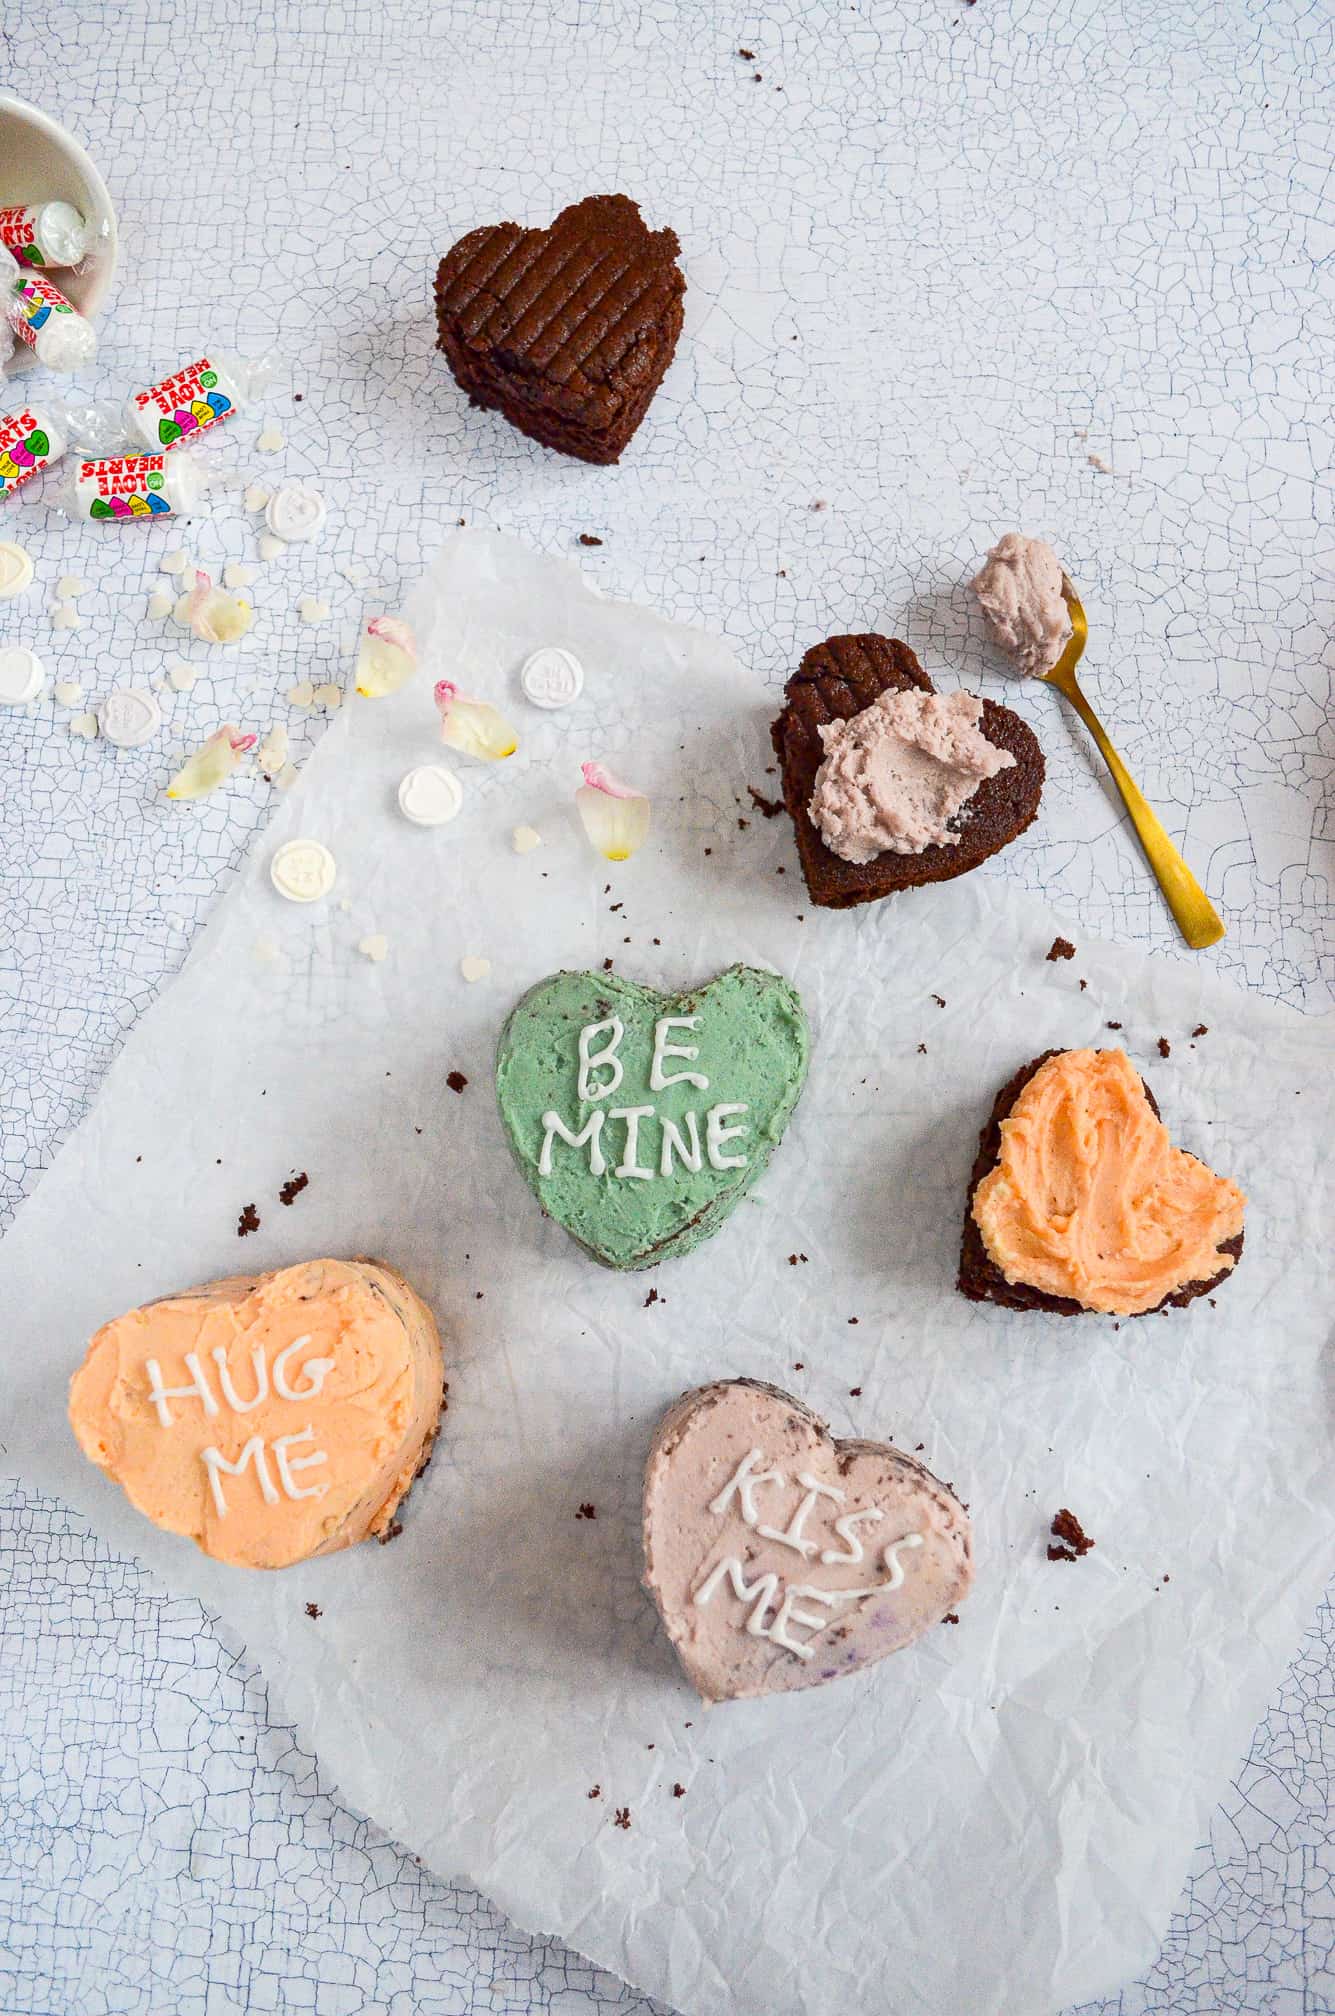
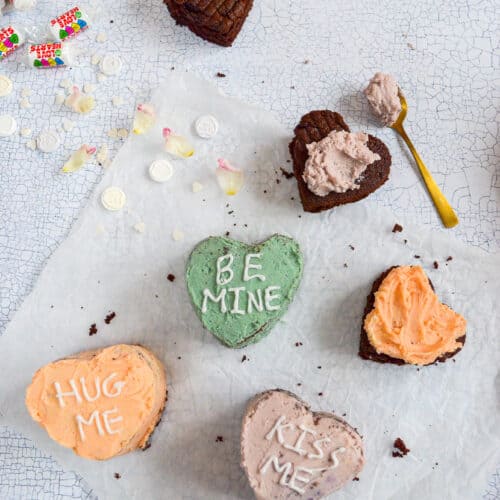
The final stage is to separate the buttercream into three bowls and mix food colouring into each. I chose pink, purple and green but you can choose any colours you like!
Assembling the mini layer cakes
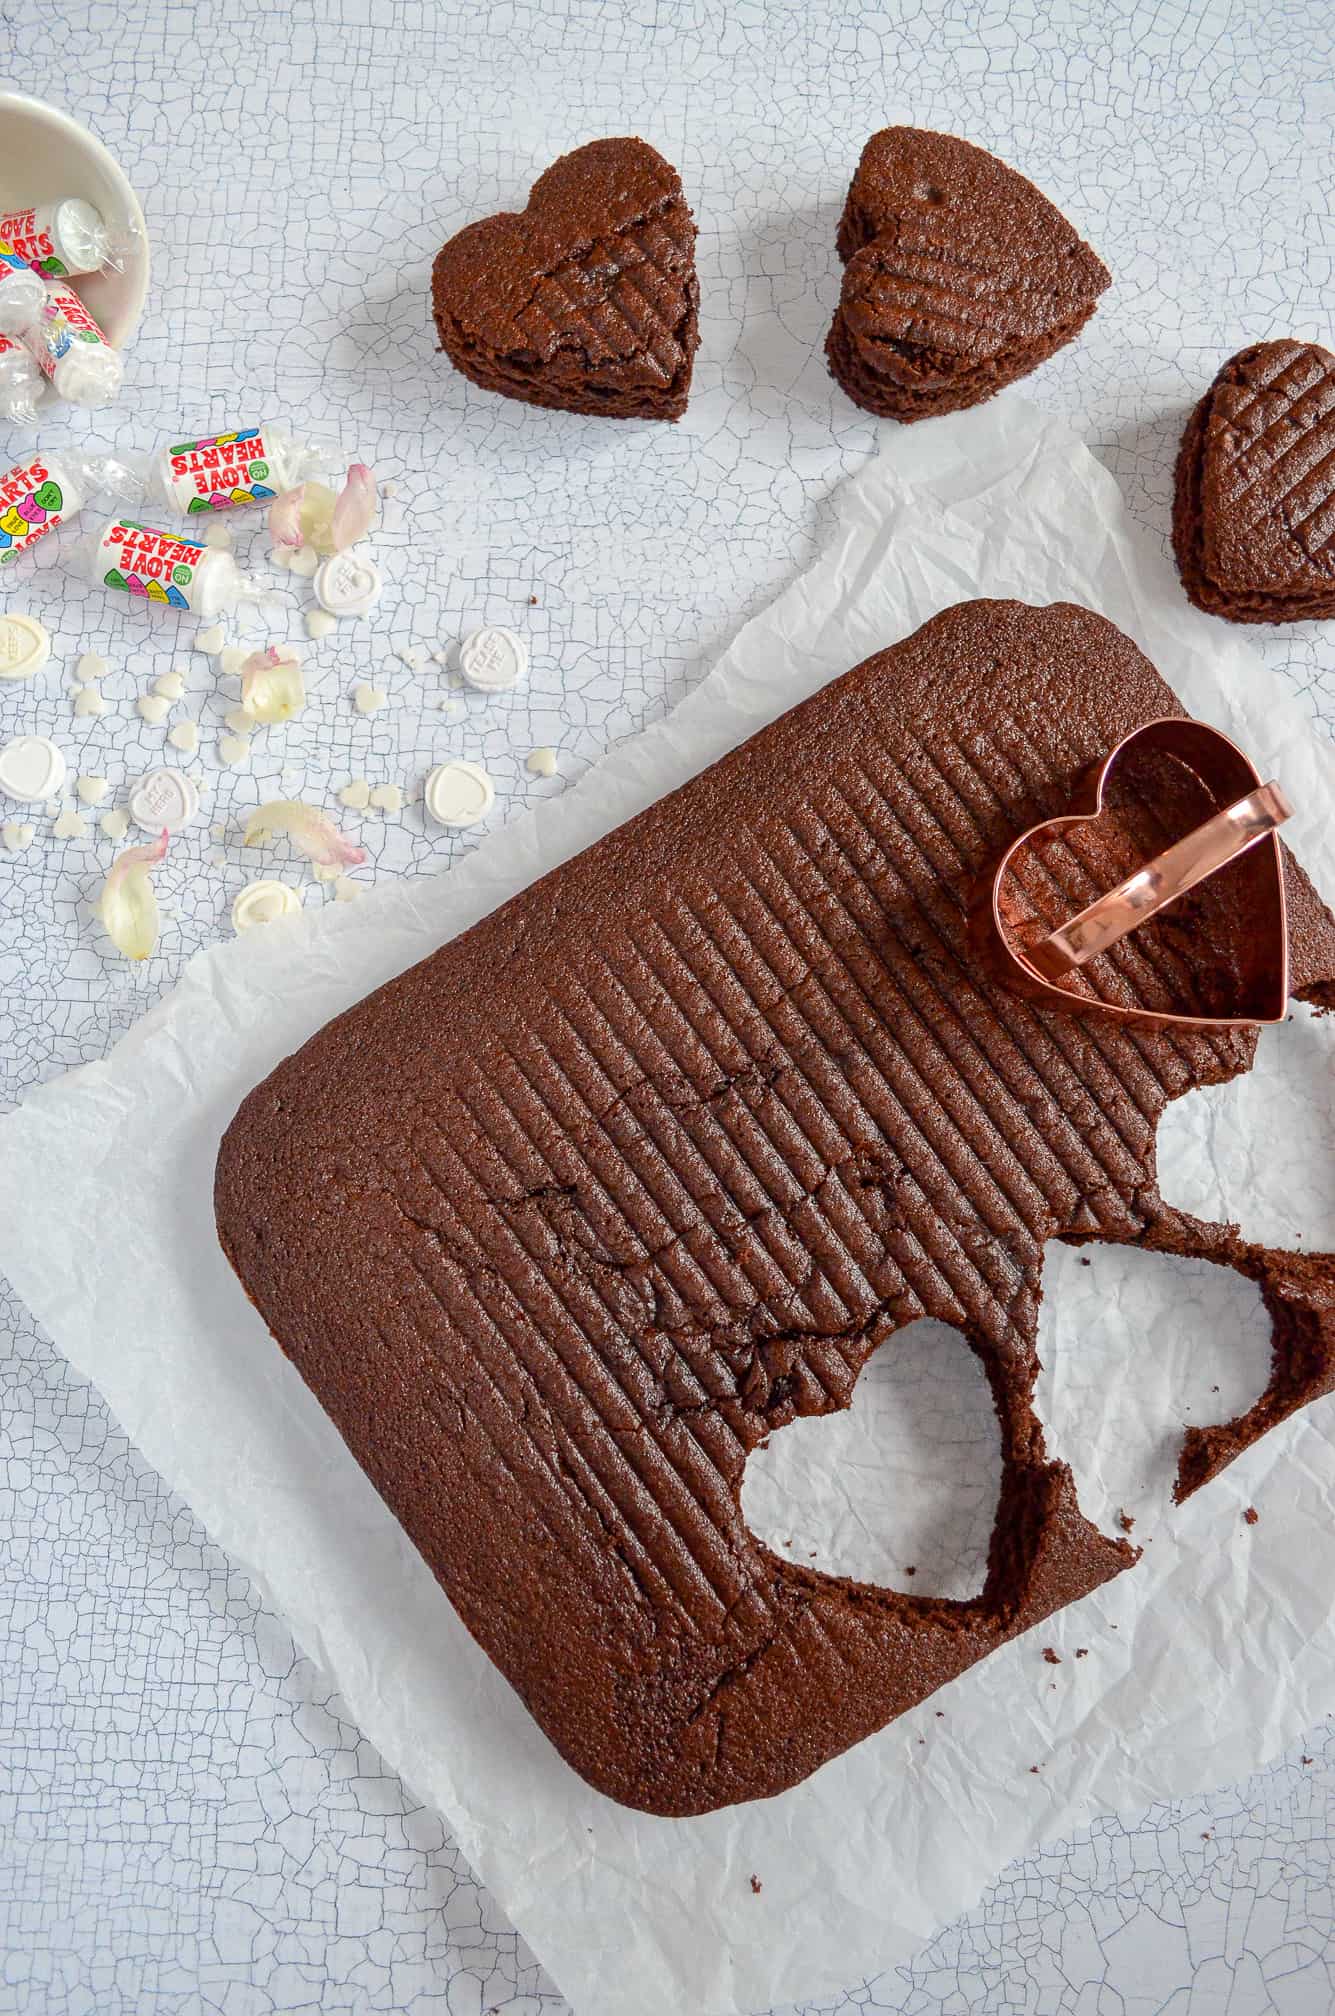
Okay now we’re at the good part. But also the trickiest bit. Making a layer cake is harder with a small cake as its more delicate and more prone to crumbling. So. With that in mind, once you’ve cut hearts out of the cooled chocolate cake, you need to freeze them. I tried to do this without freezing the cake and it was a crumbly mess. Freezing the cake hearts makes them SO much easier to decorate as they’re firmer and edges don’t crumble as easily. But it also doesn’t dry out the cake. Win win.
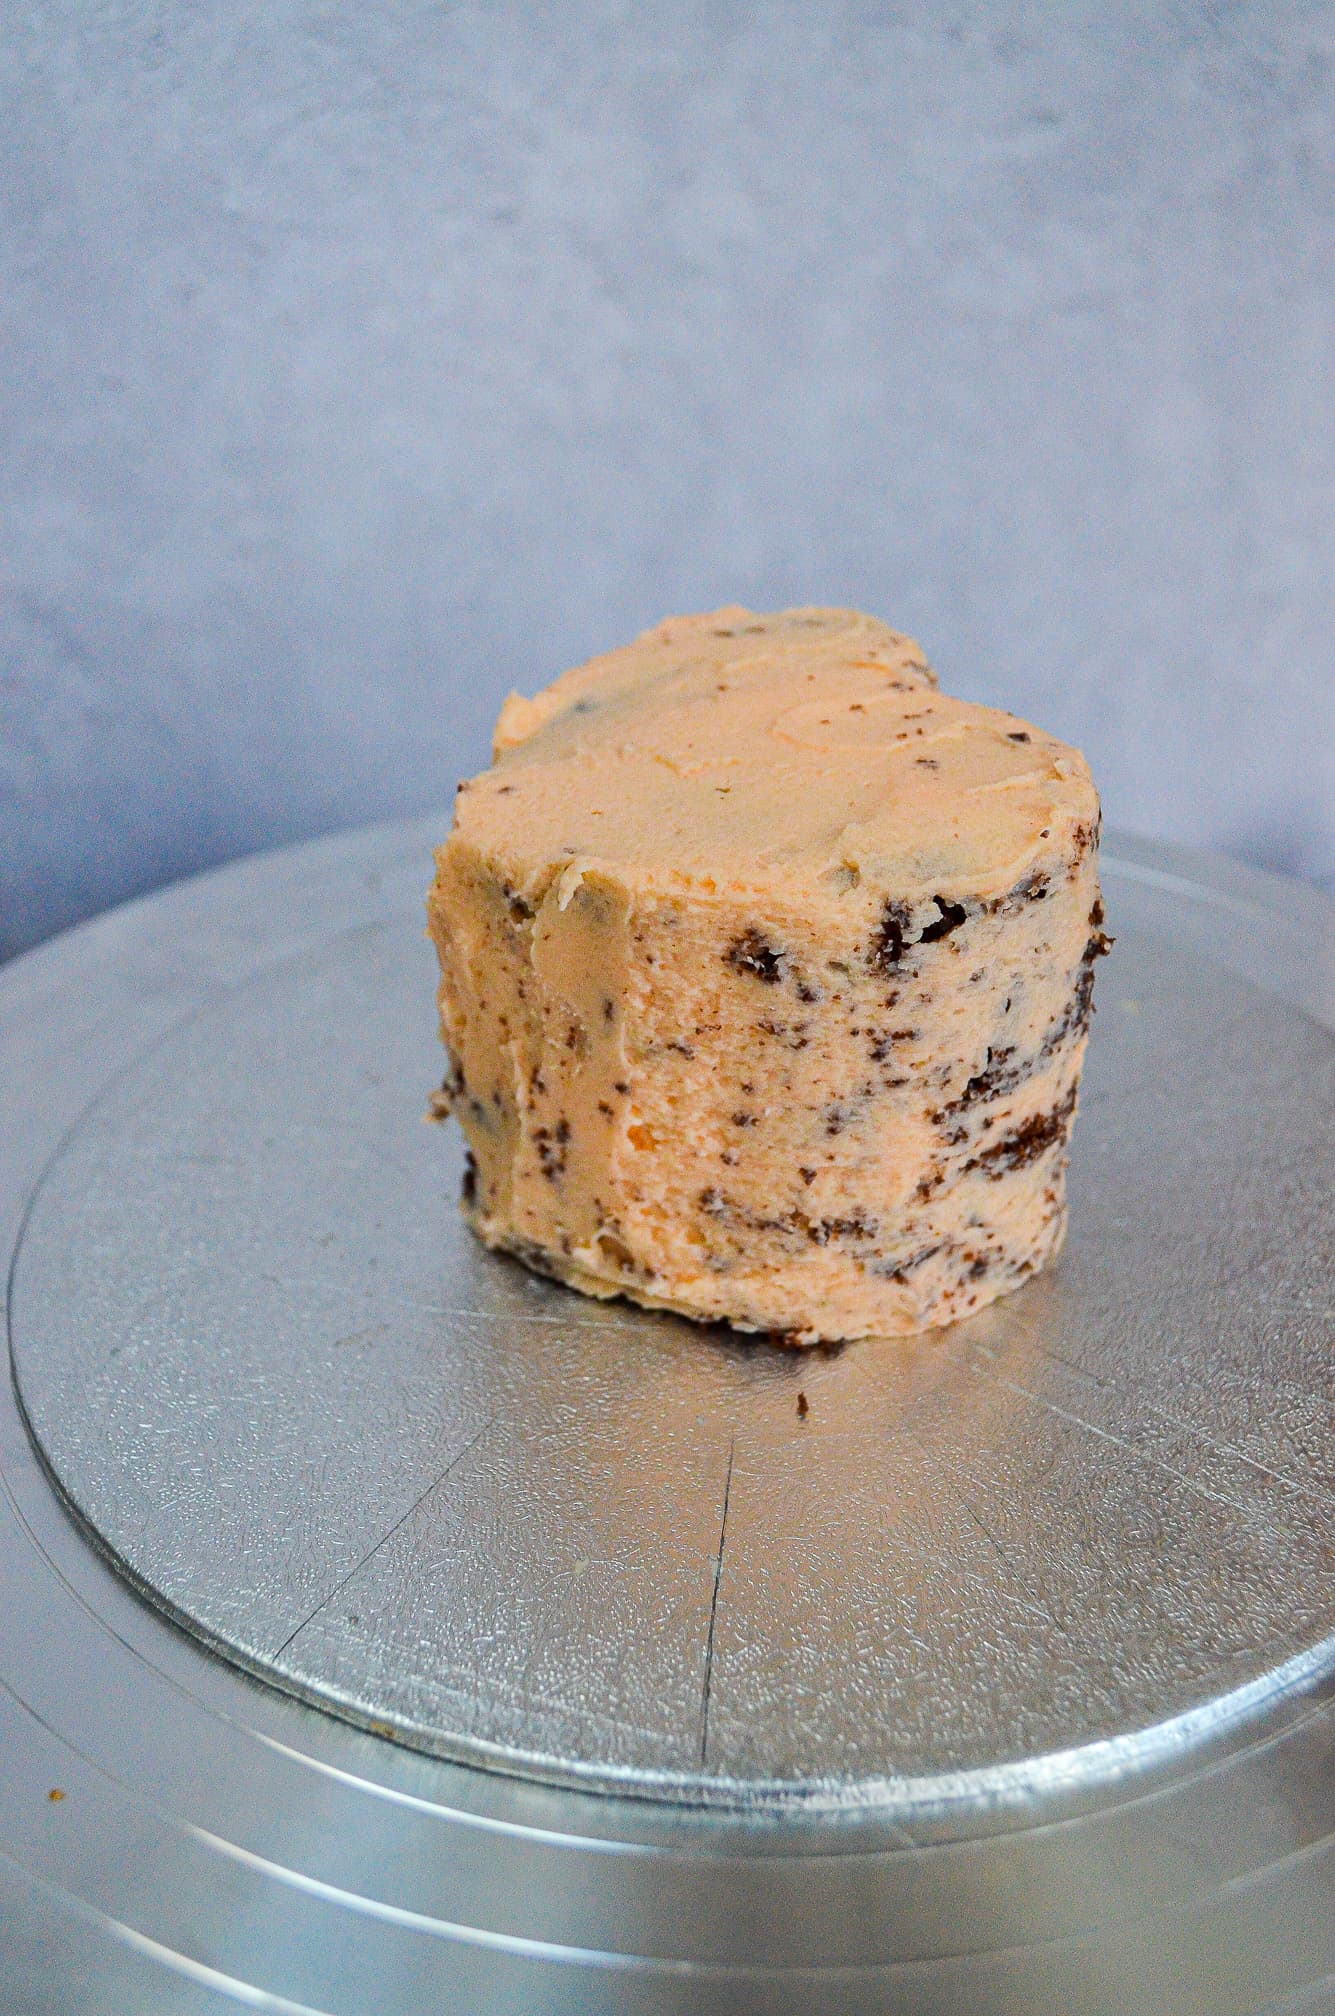
So once you have your chilled cake hearts you can begin assembly. If you have a turntable and a cake board, this will help, but its definitely not essential – a plate will do! Place one of the hearts down (with a little buttercream underneath if you want to help it stick!) and then spread a generous layer of buttercream on top. Then place another chocolate heart on top, to create a sandwich. Then cover the entire cake in buttercream – this will be our ‘crumb coat’ to help trap the remaining loose crumbs and give us an easier surface to work on. Smooth it out as best you can with either a spatula or cake scraper, and then place it into the fridge to chill. At this point you can begin working on your next cake.
Once the cake is chilled and the crumb coat is firm, you can add a final layer of buttercream all over the cake. Smooth it out again with either a spatula or cake scraper. This might take you a few goes, taking buttercream on/off until you reach your desired smoothness. But really, even if its a little imperfect the cake will still be delicious and be so well received by your valentine!
Finally, I made a simple water icing (icing sugar and water) into a thick paste and piped on the classic conversation heart sayings on the top! You can totally go wild here…make them saucy! Make them friendly for a galentine! Make them personal! I love how versatile these can be and still look so cute!
Tips & Tricks
If ever I don’t have a cookie cutter the right shape I need, I ‘make’ one by creating a template out of baking paper. Then you can place it on top of the cake and use a knife to cut around!
Yes! There will be leftover cake as you’re cutting out hearts from a rectangle cake. Firstly, you can make more than three layered cakes, or make some one layer cakes. Or you can make cake balls (which I what I did!) – mix the leftover cake with the leftover buttercream in a large bowl (you just need enough buttercream to make the cake stick together). Roll into small truffle sized balls, then you can freeze for up to 6 weeks. Then when you want to eat them, defrost at room temperature and dip in melted chocolate for a quick cake pop!
Yes absolutely! You can make the chocolate cake a day in advance, wrapped air-tight. And the cakes themselves, once covered in buttercream keep really well for up to 5 days.

These valentines cakes are not only delicious but are so so cute! You can make three full layered cakes out of the sponge and extra single layer cakes too. And still have cake scraps leftover to make the cake balls mentioned above!. So this recipe is really the gift that keeps on giving!
The heart cakes are big enough to share between two for a romantic dessert. Or as a gorgeous gift to the ‘galentine’ or ‘palentine’ in your life! Valentines shouldn’t just be reserved for couples afterall! The cake is so moist and indulgent, and the buttercream so light and creamy, that it needs to be enjoyed by all!
You may also like:
Mini Conversation Heart Cakes
Ingredients
Sponge
- 50 g cocoa powder
- 90 ml freshly brewed black coffee
- 100 g unsalted butter room temperature
- 275 g caster sugar
- 3 large eggs
- 175 g plain flour
- 3 tsp baking powder
- 125 ml milk whole or semi-skimmed
Buttercream
- 300 g unsalted butter room temperature
- 450 g icing sugar
- 2 tsp vanilla extract
- 90 ml milk whole or semi-skimmed
- food colourings
Writing Icing
- 35 g icing sugar
- 1 tsp water
Instructions
- For the sponge: Preheat your oven to 180C/160C Fan/Gas Mark 4 and grease and line a 12x9inch baking tin. In a small bowl, stir together the cocoa powder and freshly brewed black coffee to a thick paste without lumps. Then set aside to cool slightly.
- In a large bowl using an electric hand-whisk, whisk together the cocoa paste, butter and sugar for 1-2minutes until thick and well combined. Then add the eggs one at a time, mixing well between each addition. Gently mix in the flour and baking powder until just combined. Then gently stir in the milk until combined. Pour into the lined tin and bake for 30 minutes until a knife inserted into the centre of the cake comes out clean. Leave to cool in the tin for 10 minutes, then remove and leave on a wire rack to cool completely.
- For the buttercream: Place the butter into a large bowl, and using an electric hand-whisk, whisk butter for 2-3 minutes until very soft and visibly lightened. Then add icing sugar in a few increments, whisking with each new addition until well combined. Keep whipping once all the icing sugar has been added for a few more minutes. Finally, add the vanilla and milk and whisk again until combined. Then, separate the buttercream into three bowls and add food colouring to each.
- To assemble: Using a heart cookie cutter, carefully stamp out 6 hearts from the cooled chocolate cake. Then place them onto a baking tray and place into the freezer to chill for 10 minutes. Then place one heart cake onto a cake board or plate (spreading a little buttercream underneath to help it stick if desired), and spread a generous amount of one coloured buttercream on top. Then place another heart cake on top and press down slightly to sandwich. Spread more of the buttercream all over the top and sides of the heart cakes, and use a cake scraper or offset spatula to smooth it out. This is your crumb coat. Then chill in the fridge for 5-10 minutes until firm.
- Spread another coat of buttercream all over the tops and sides of the heart cake, and smooth it out again until you're happy with the finish. Place the finished cake into the fridge to set, and repeat the process with the remaining four hearts and buttercreams.
- Finally, combine the icing sugar and water in a small bowl until you have a very thick paste. Place this into a piping bag and snip off a small hole at the end. Using this, pipe different sayings onto the tops of each heart cake.