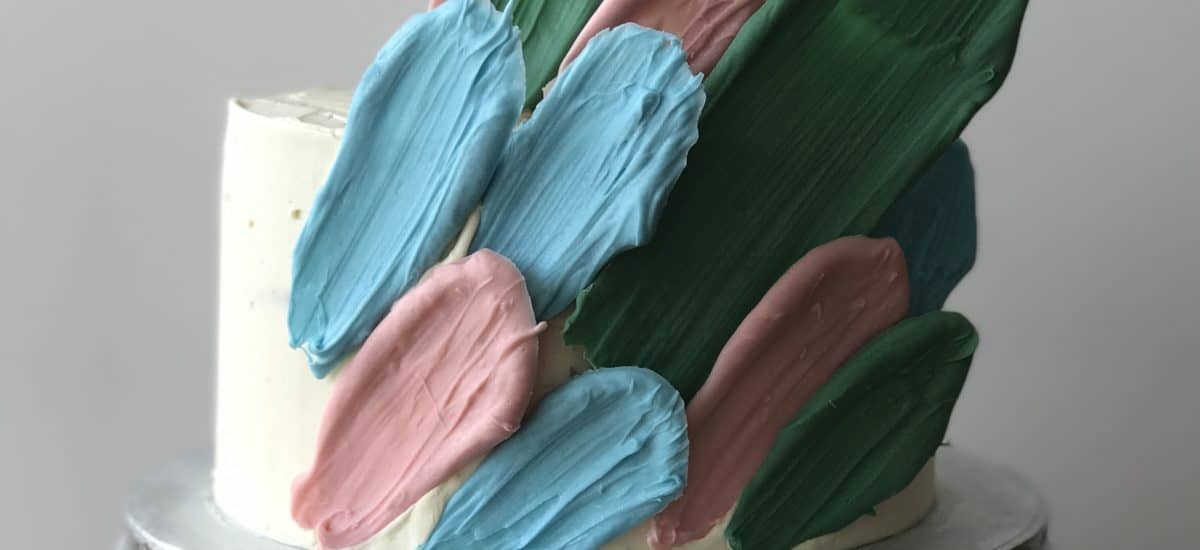
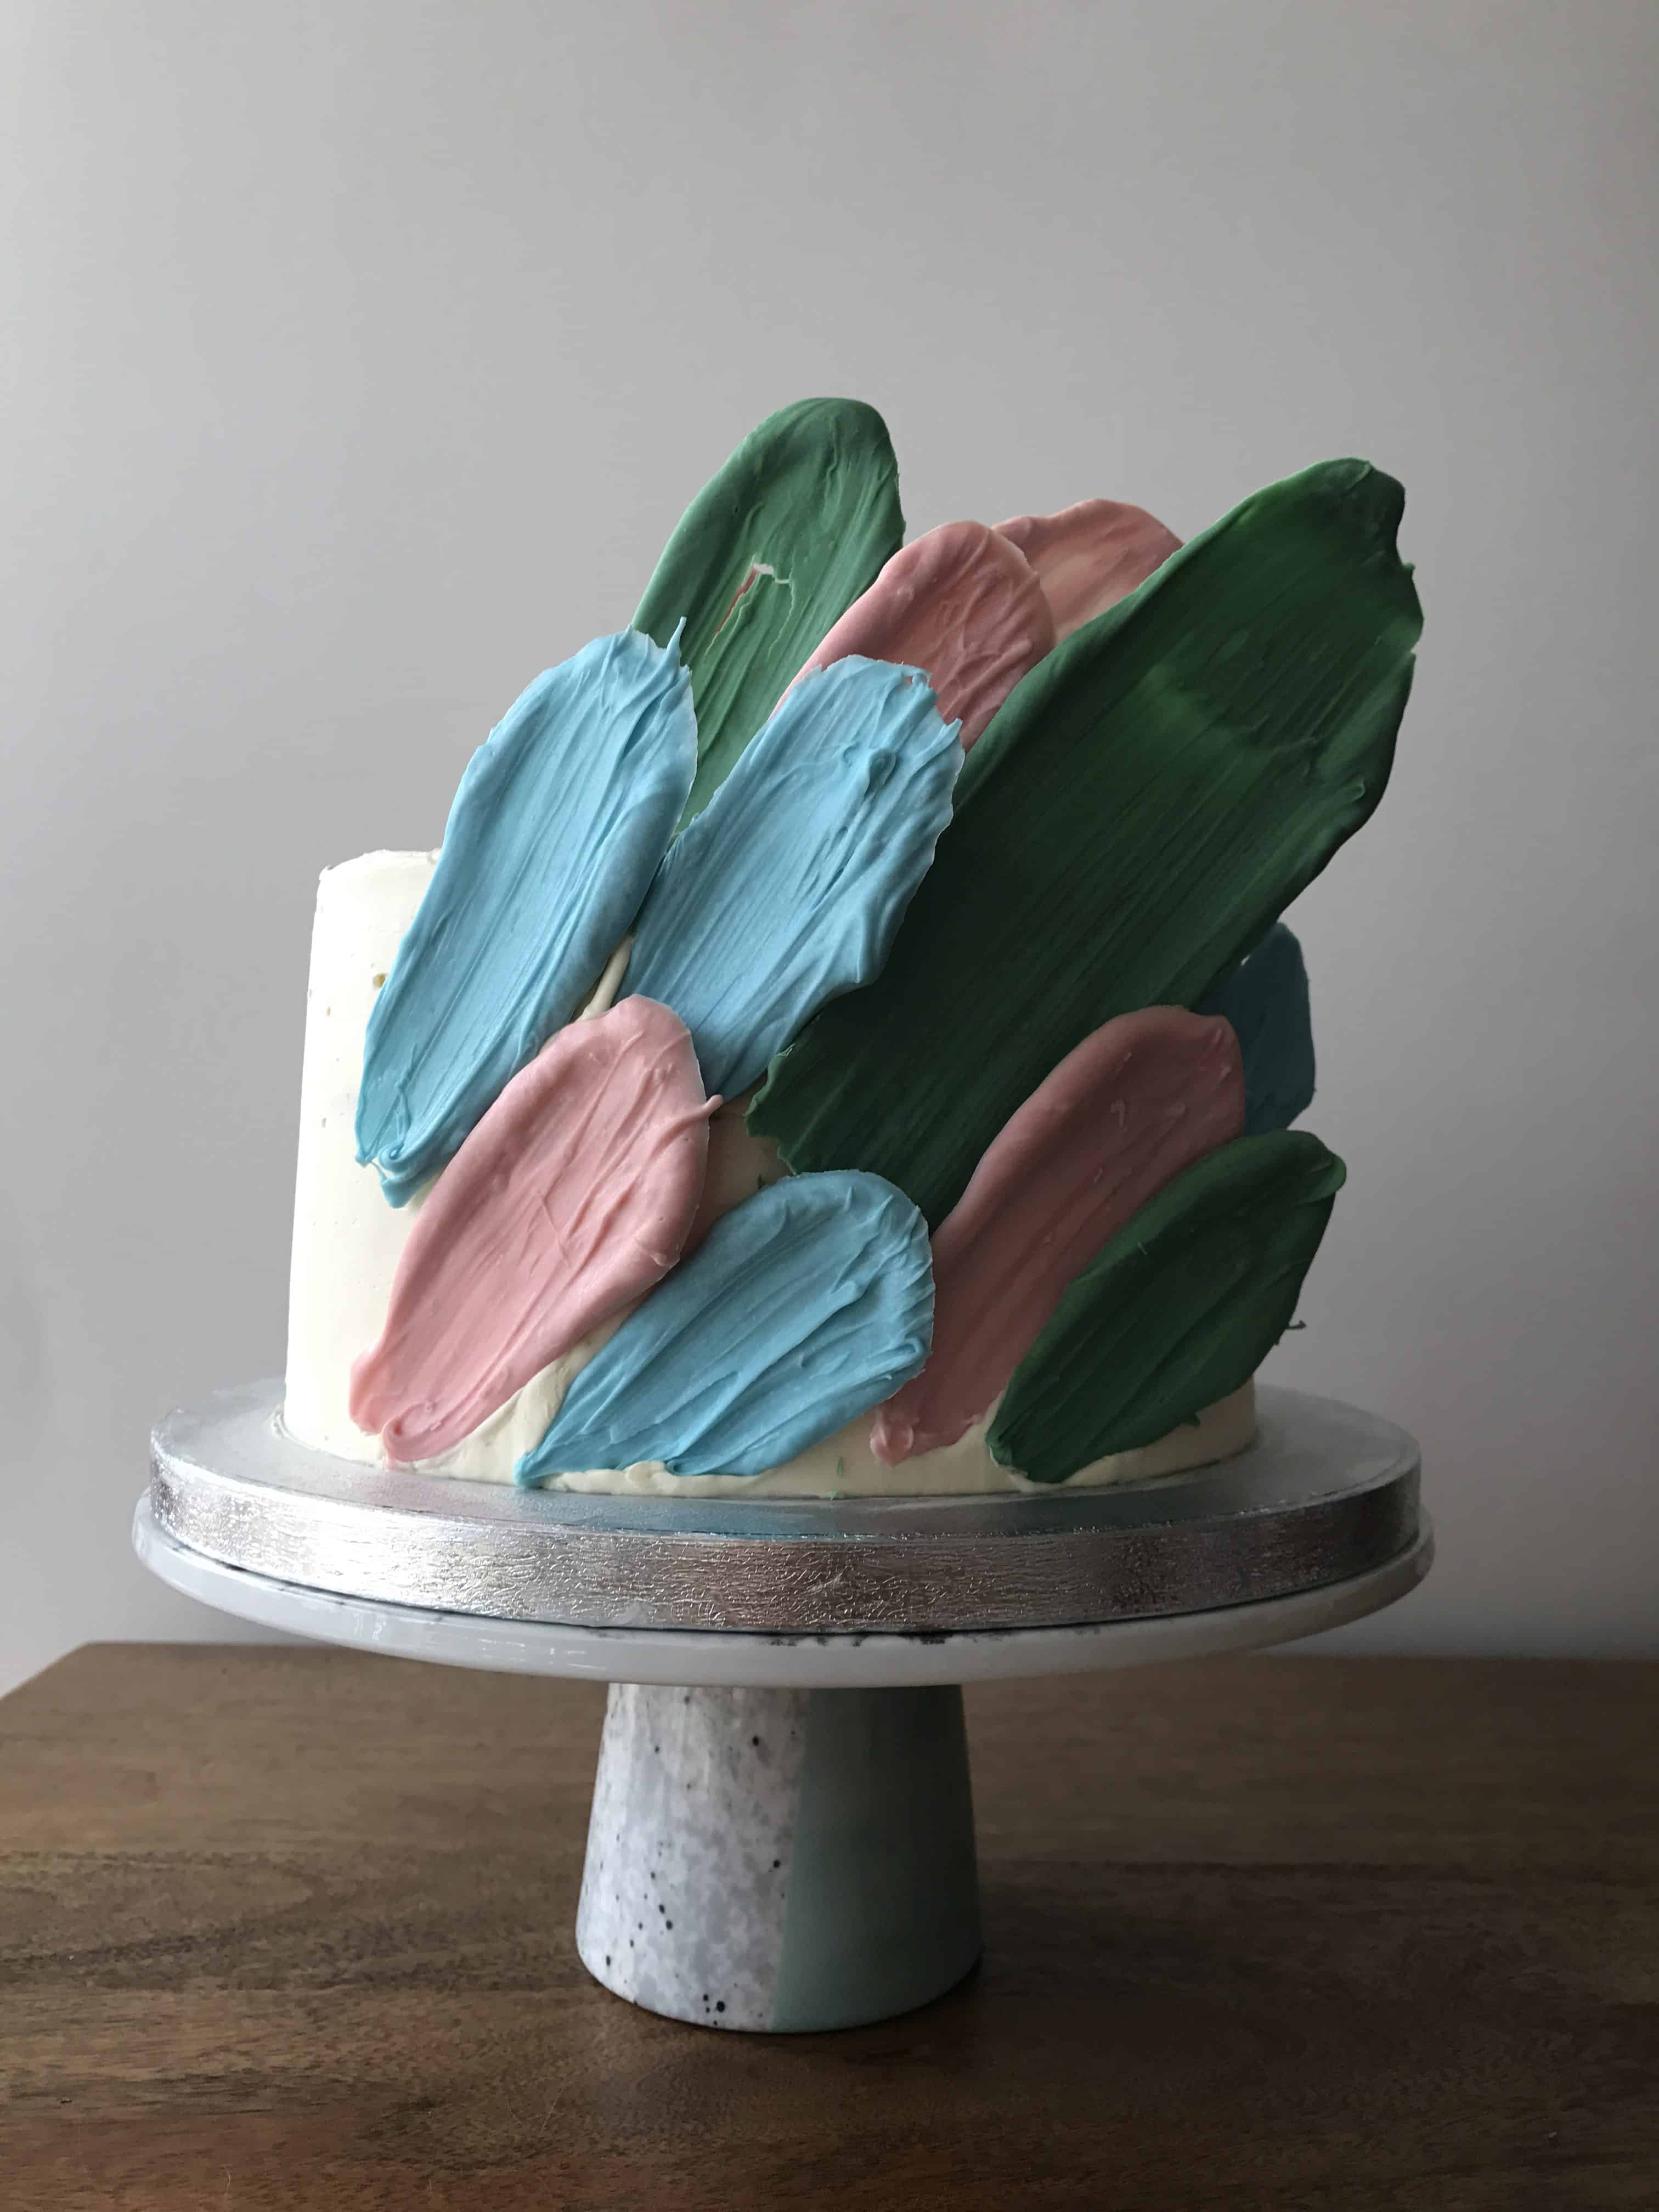
The brushstroke layer cake trend has been everywhere the past few months. With incredible creations on multi-tiered cakes and gorgeous colours, there was no way I couldn’t try my hand at it. Russian bakery Kalabasa pioneered the trend with their ‘painted chocolate feathers’ and its taken by storm over Instagram. Its surprisingly easy to recreate and brings out the artist within you!

I decided to make the brushstroke cake for my sisters birthday, she’s a phenomenal artist (check out her Instagram here!), so it seemed only right that I incorporated her love for art into her birthday cake. I actually had high hopes for the inside of the cake too, with loads of strawberry and chocolate cake balls that I would bake into the three vanilla sponges. I’d have the oohs and aahs for the gorgeous brushstrokes and THEN the surprise polka dot middle!
So there I was, dutifully baking my strawberry and chocolate cake balls the night before, trying to get ahead and save time. I even bought a special cake pop mould to get them the perfect size! But me being me, the next day when I came to bake the vanilla sponges I COMPLETELY forgot about the cake balls until I’d already baked the sponges. I was literally gutted. I had to go and lie down on my bed for 30minutes just to calm down – baking can be stressful guys! (The prepared cake balls did all go to good homes if you were wondering, haha!)
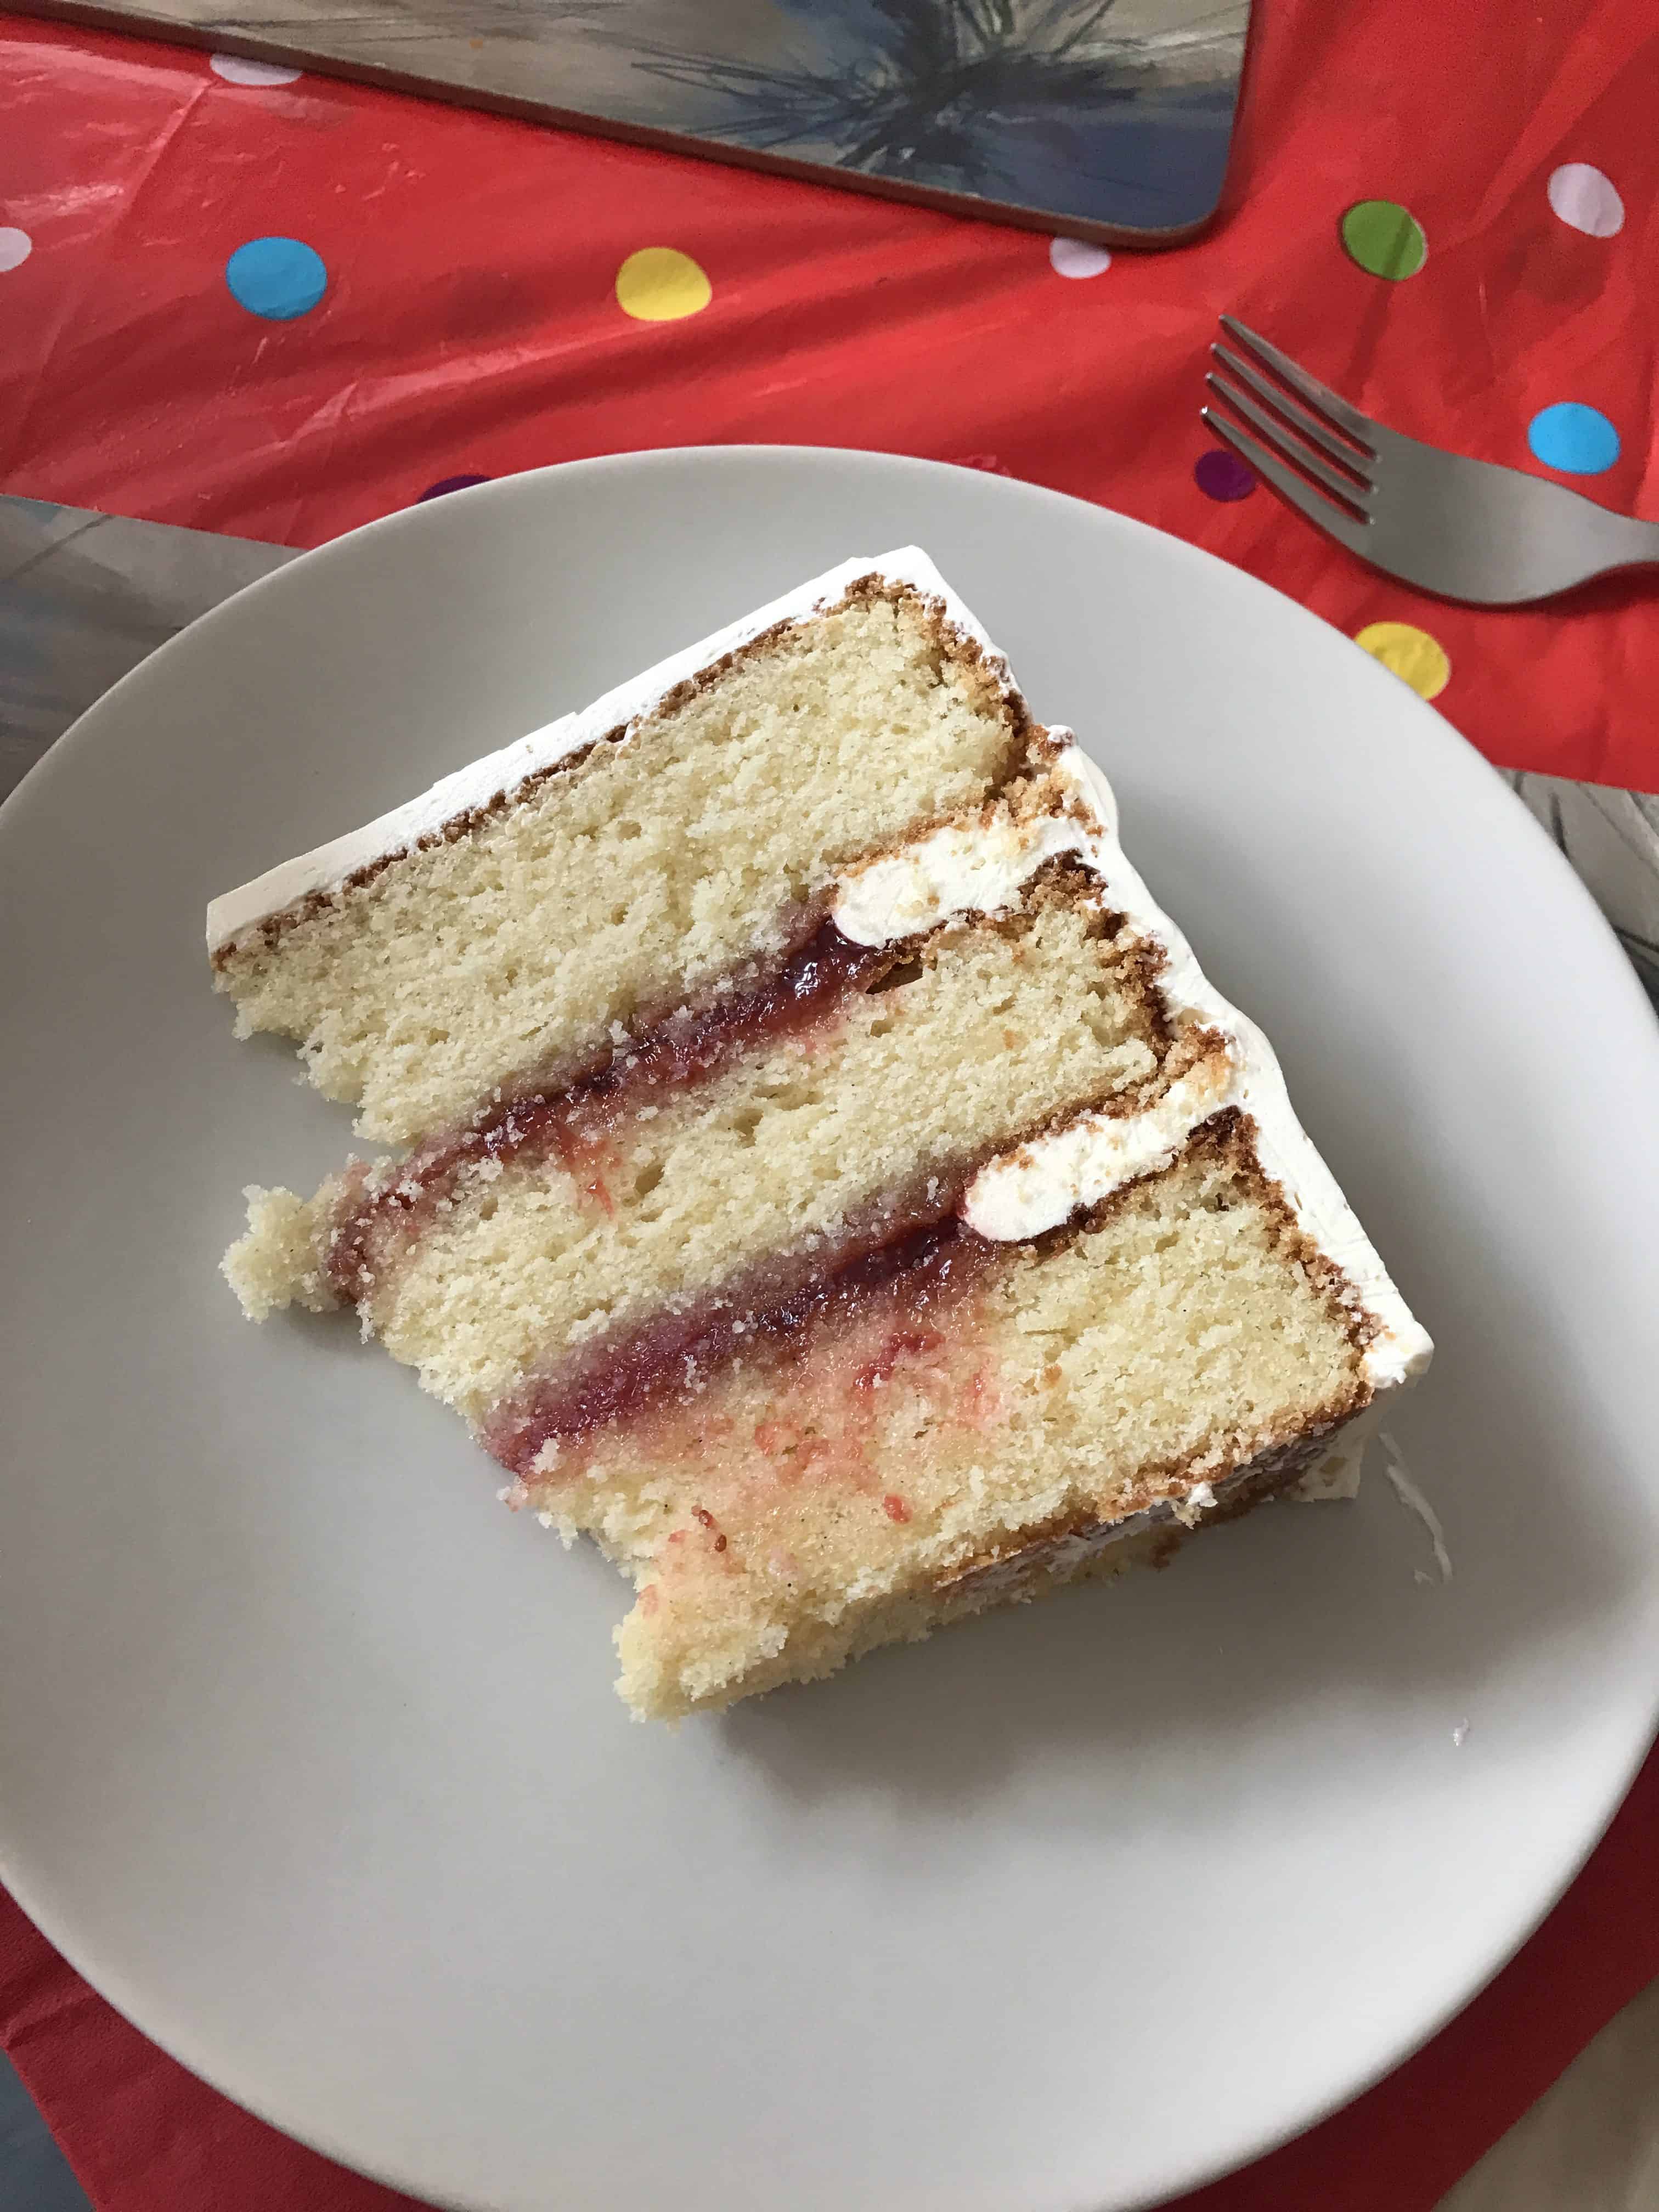
It also meant that I now had a three-layer vanilla cake with vanilla buttercream AND vanilla flavoured chocolate brushstrokes…. Now I love vanilla, but even I felt that was overkill! Luckily I had a fresh batch of homemade strawberry jam that came to the rescue, making it a proper old-school birthday cake. And actually, I really loved the taste of it. The thick jam complemented the sponge and the light swiss meringue buttercream perfectly! It took me back to my childhood days, though back then the thicker and denser the icing the better!!
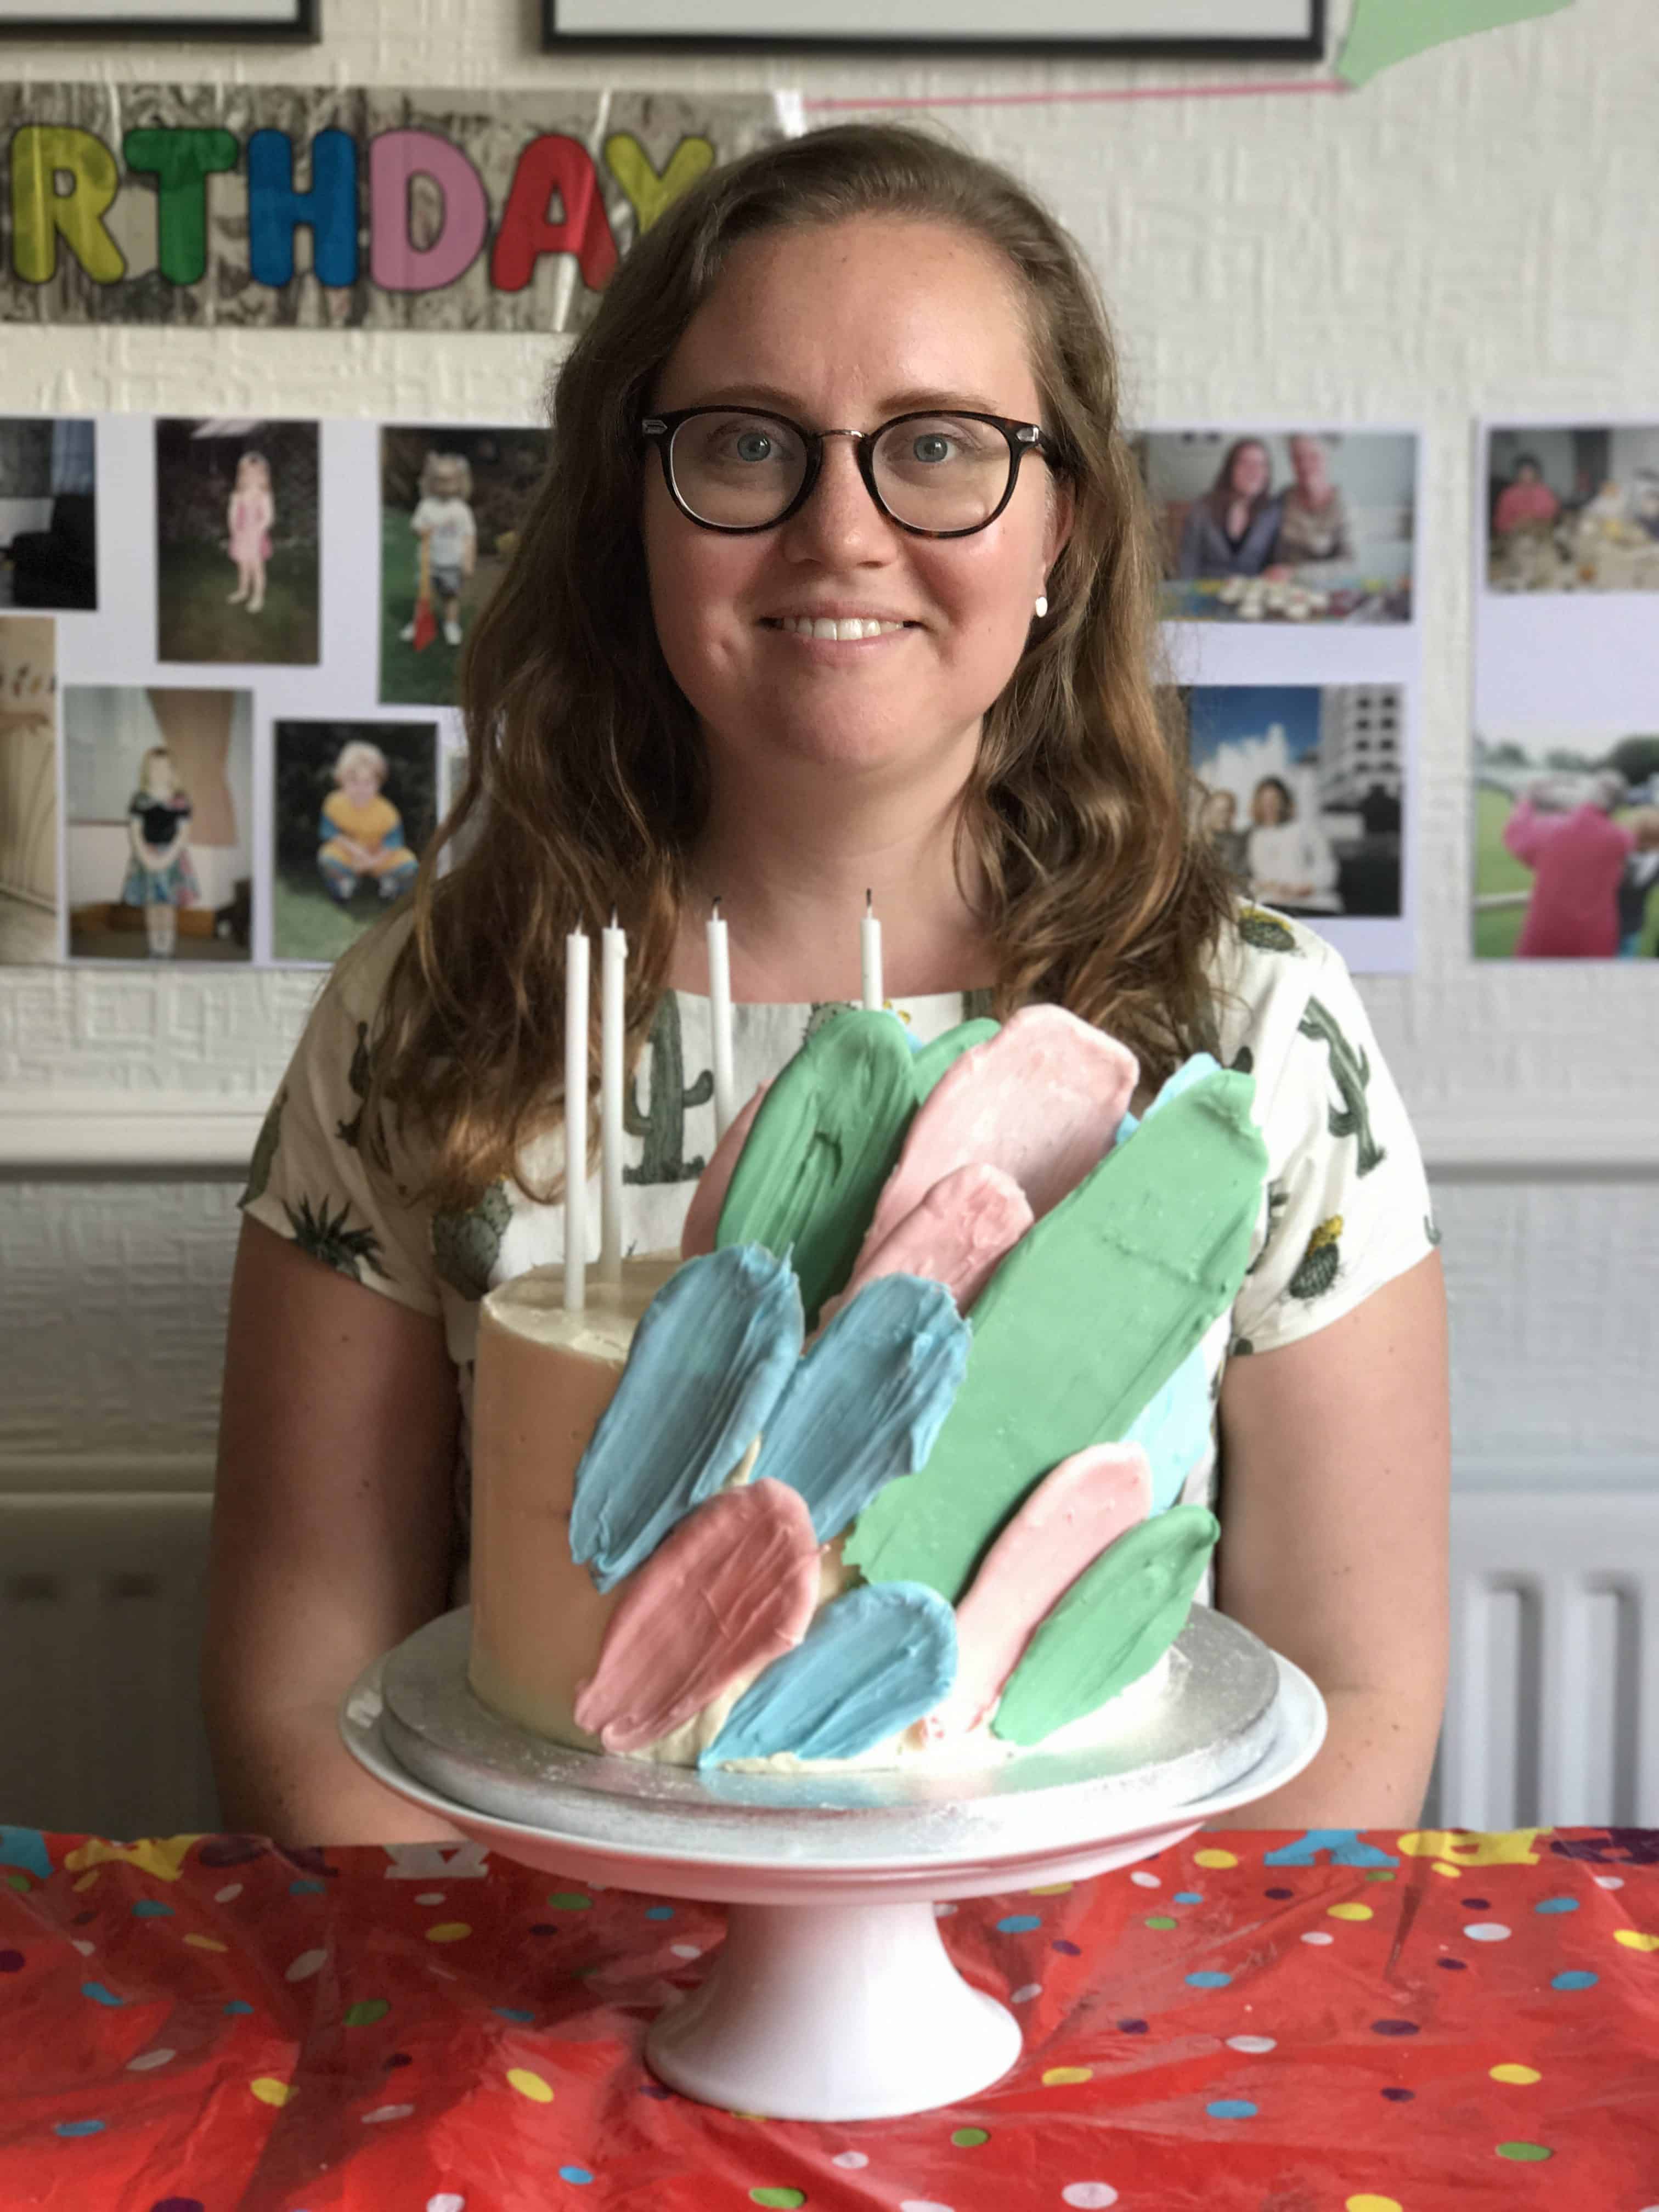
As you can see above, we take birthdays very seriously in my family even in our late 20’s – bunting, banners and confetti tablecloths all come out!
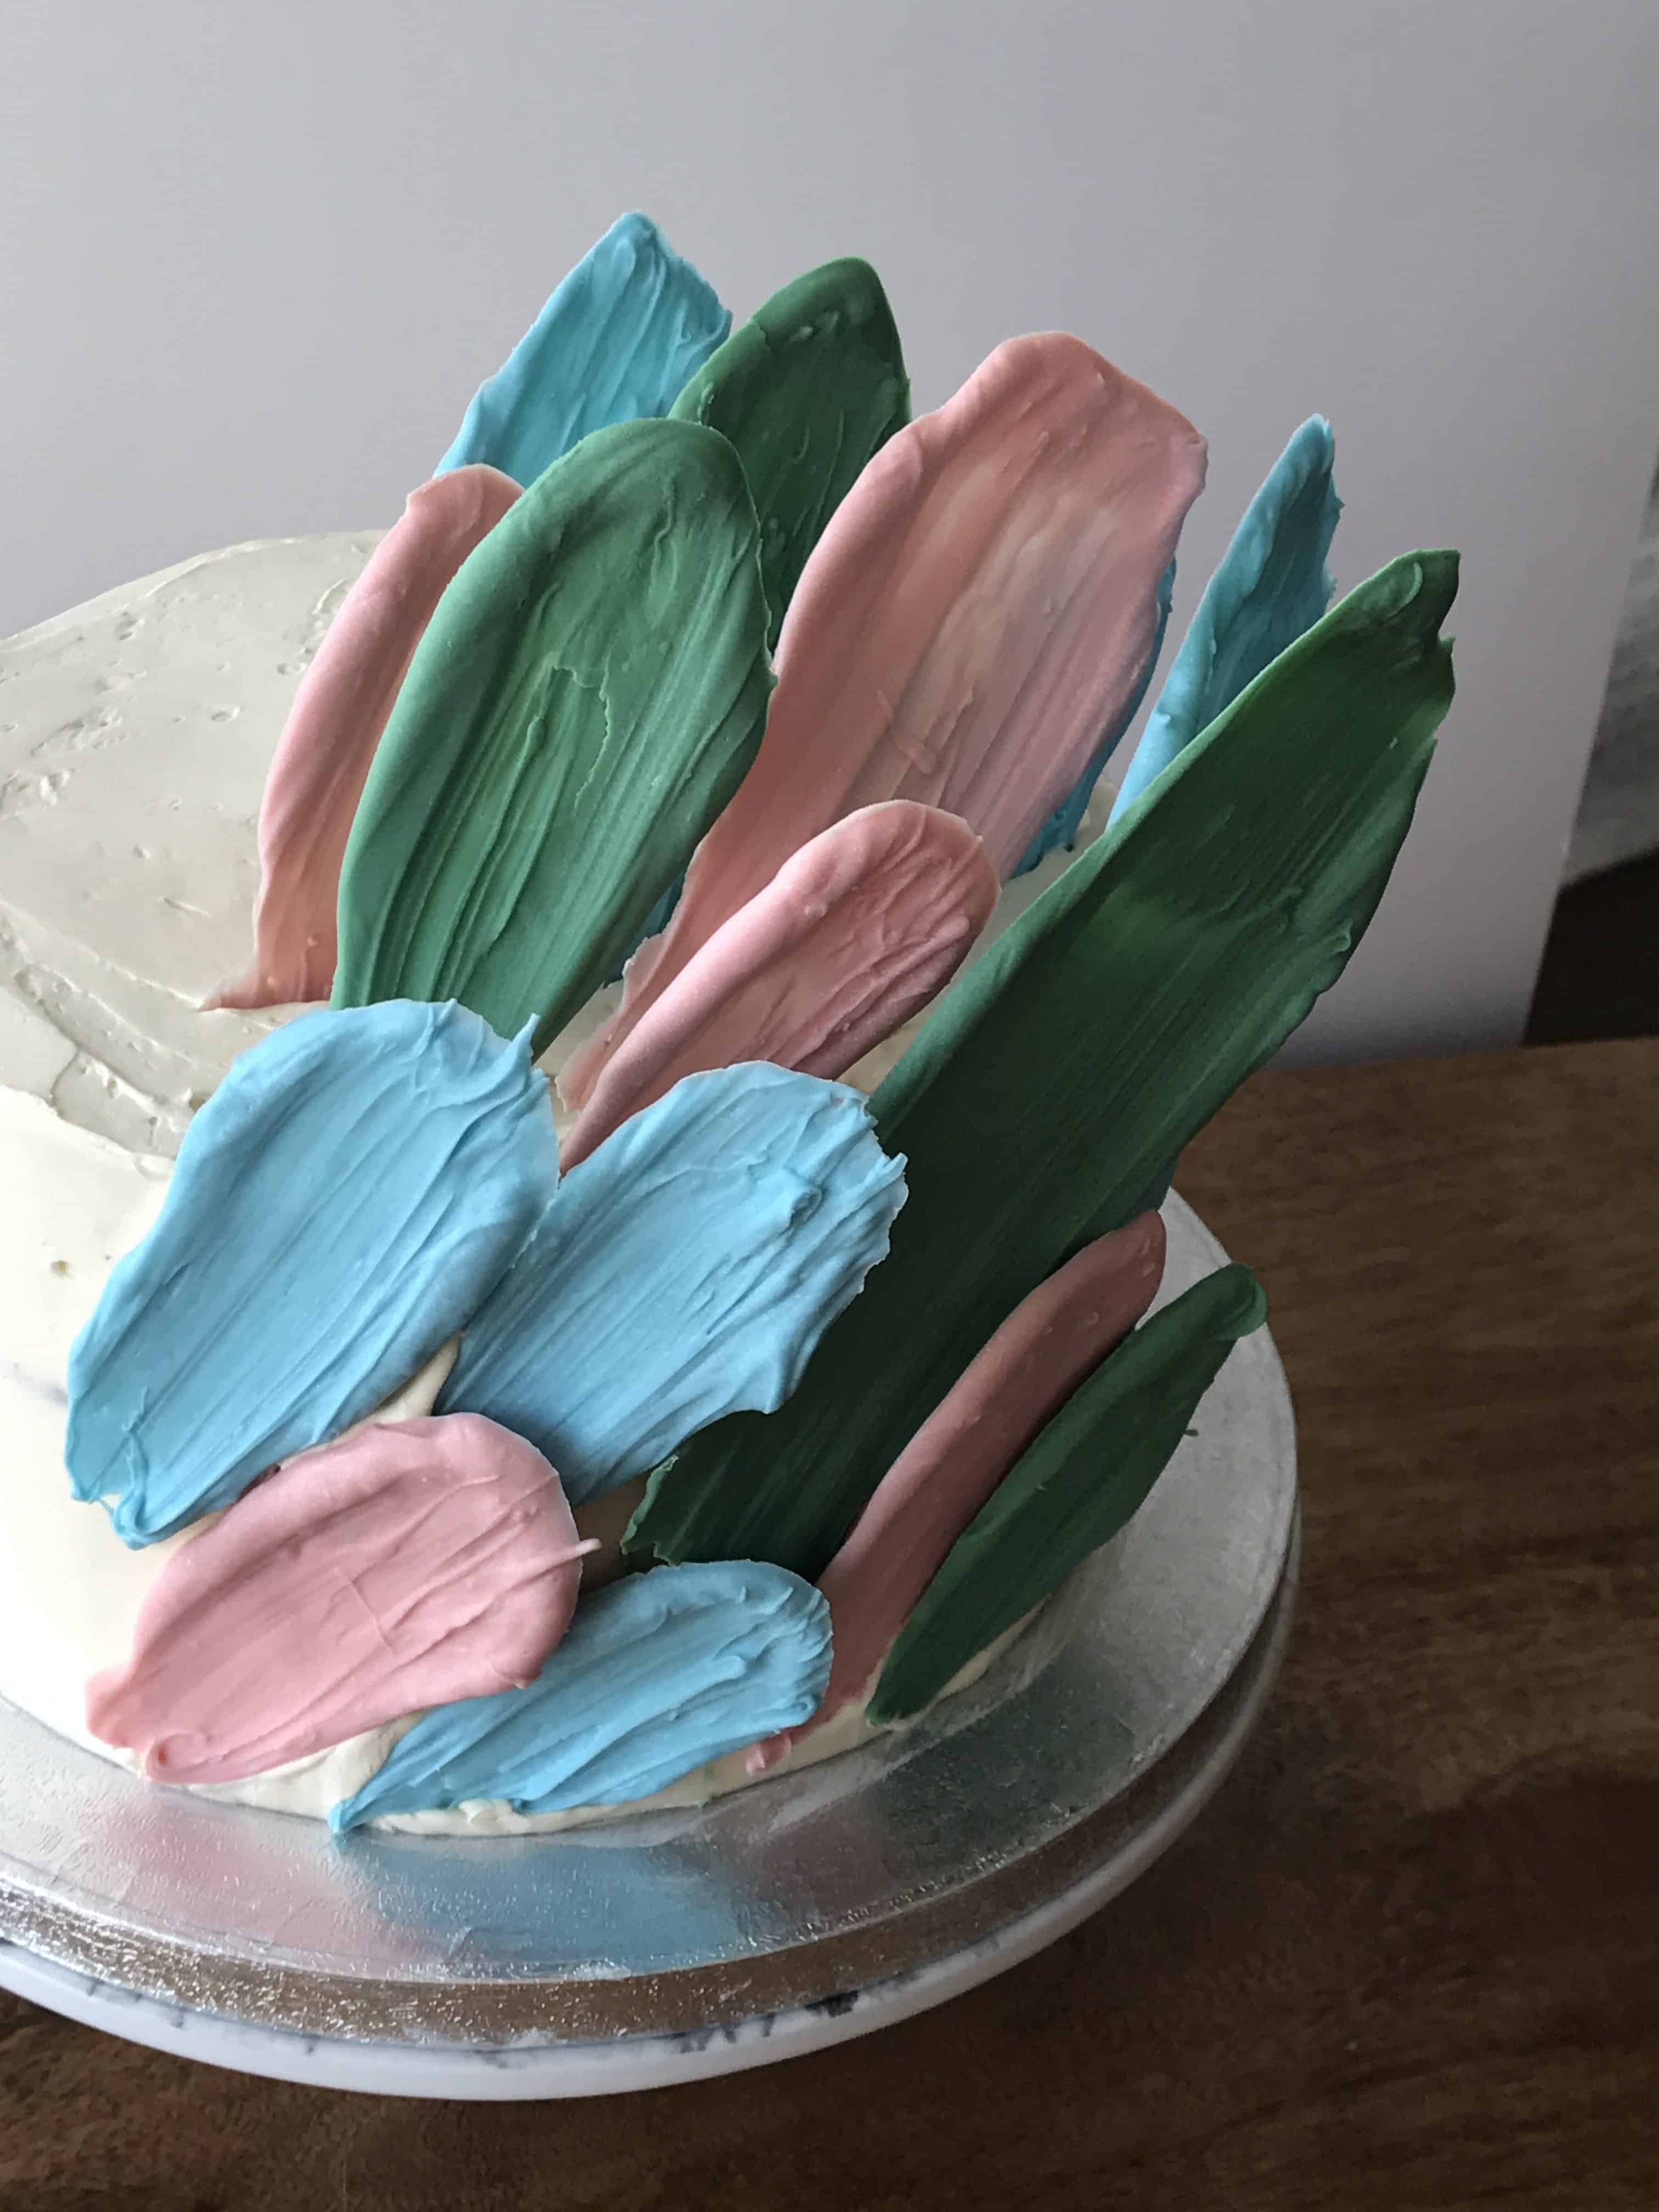
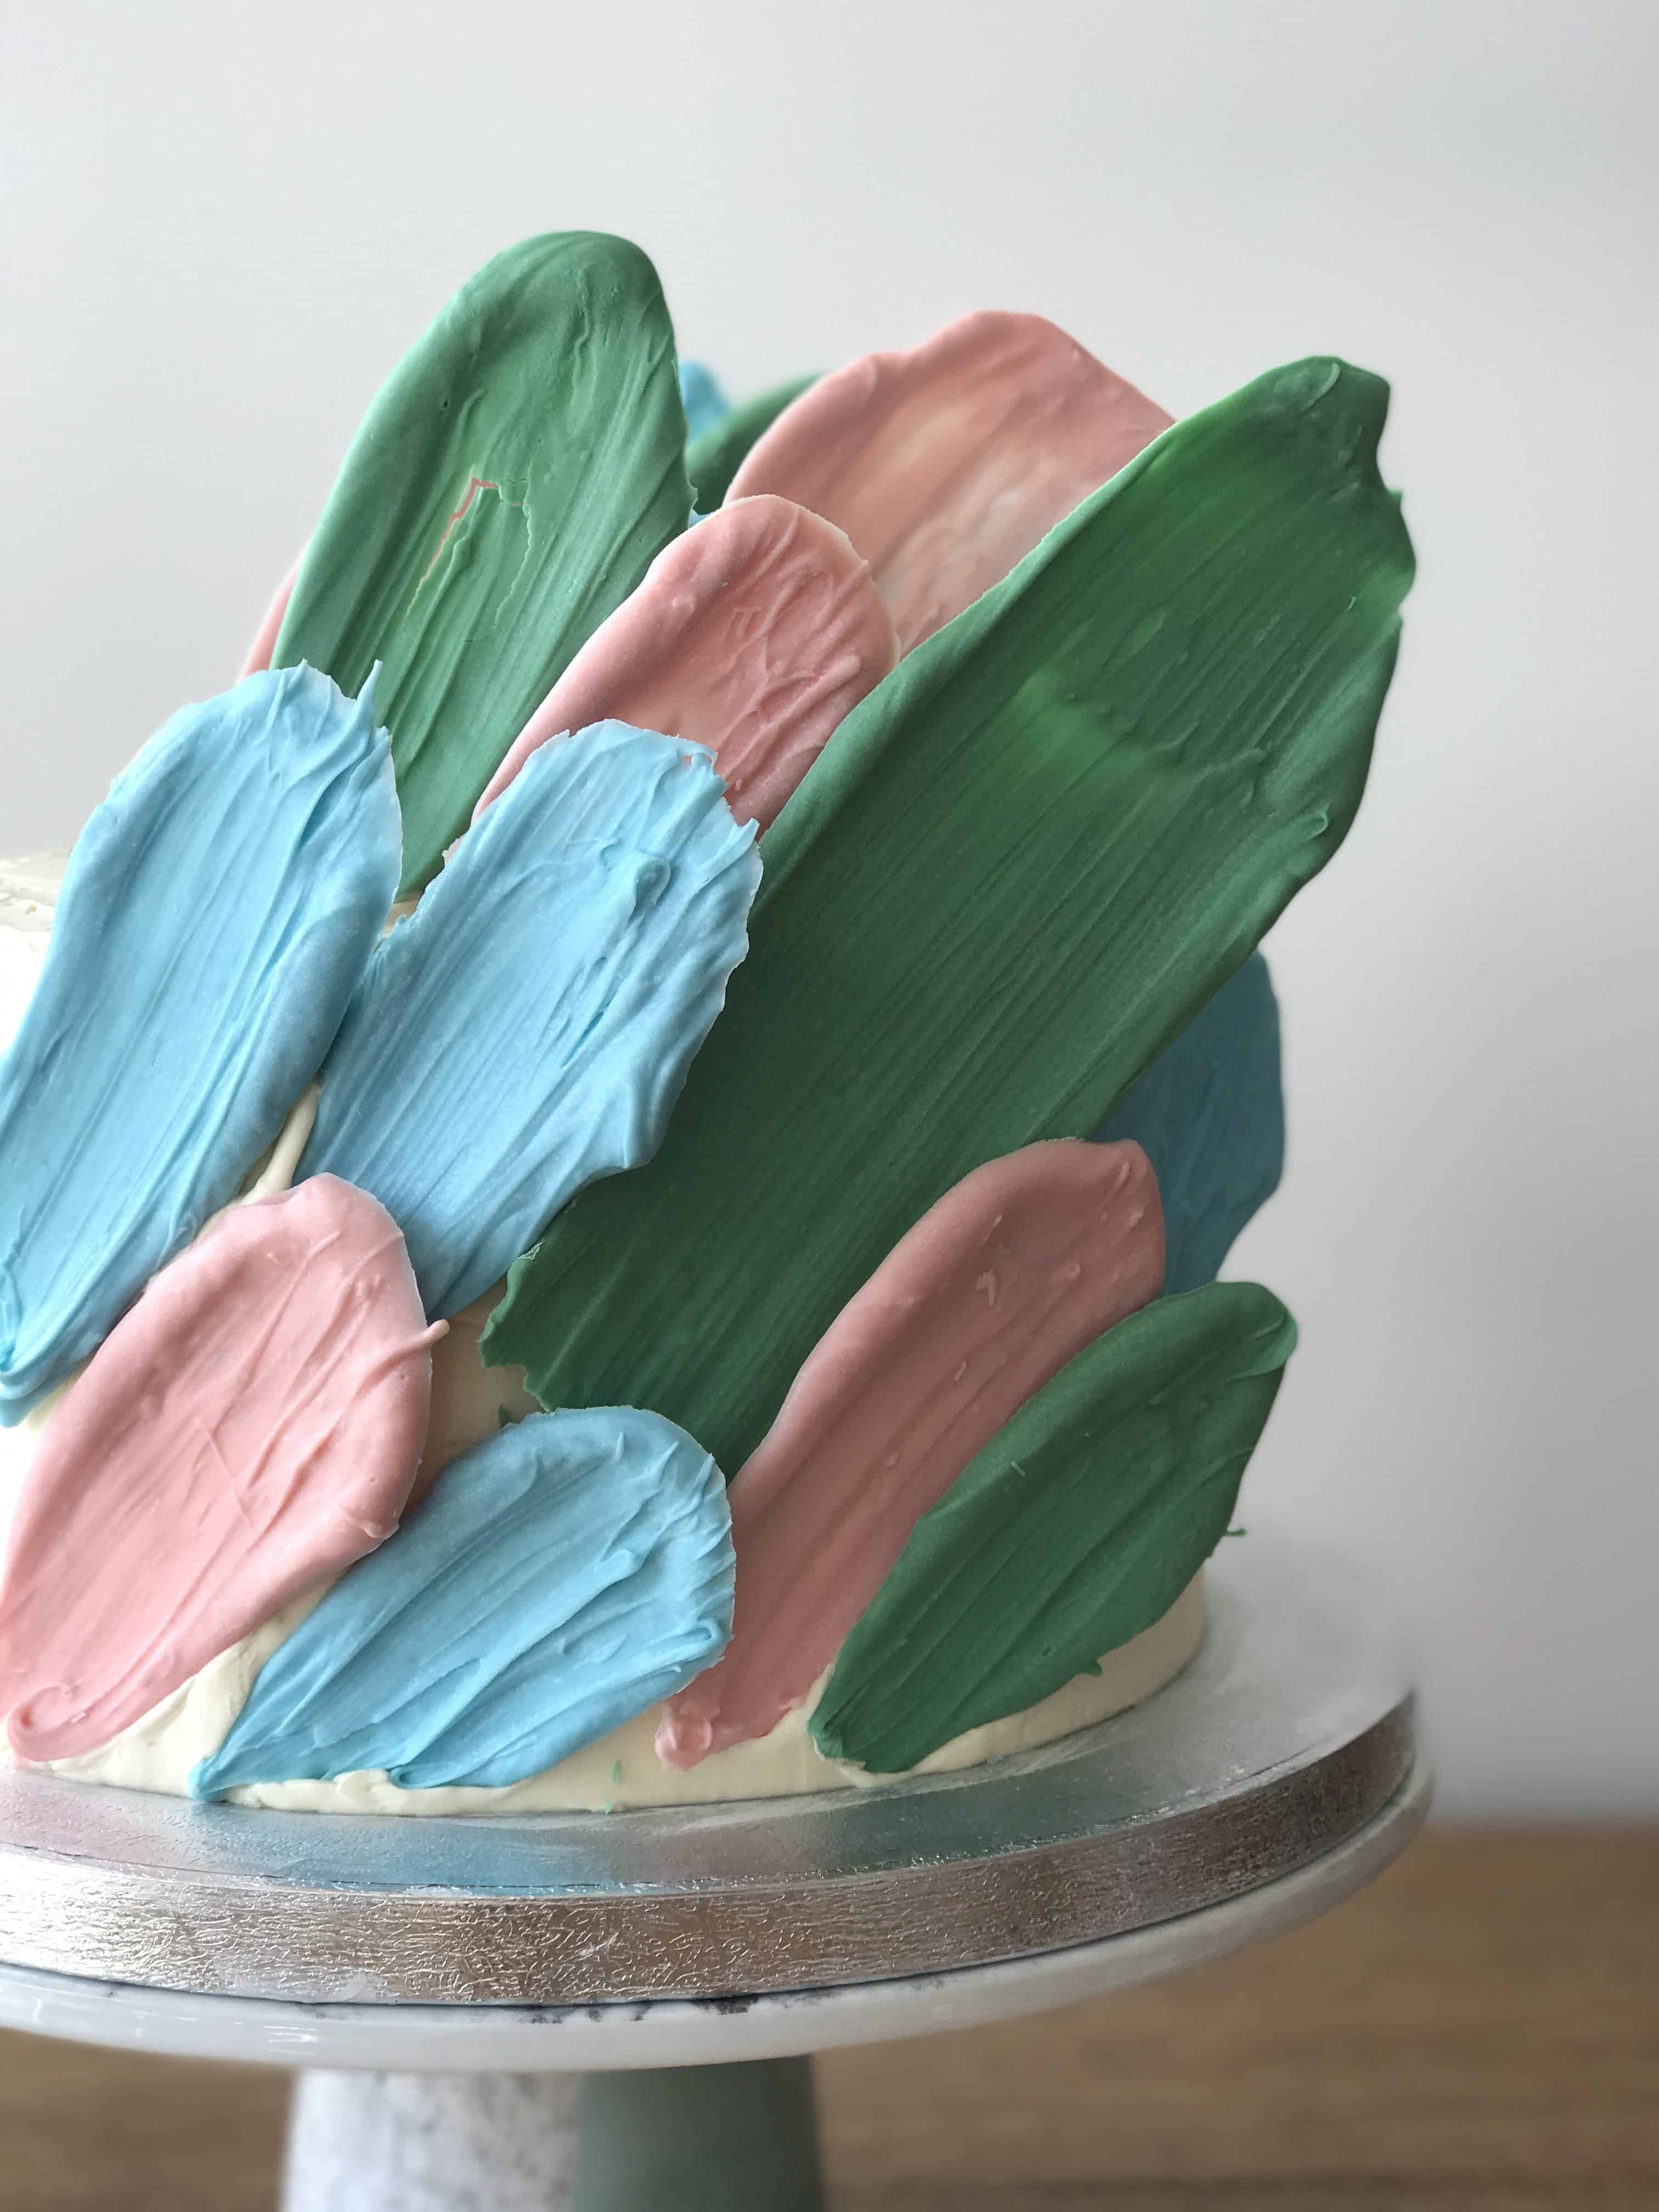
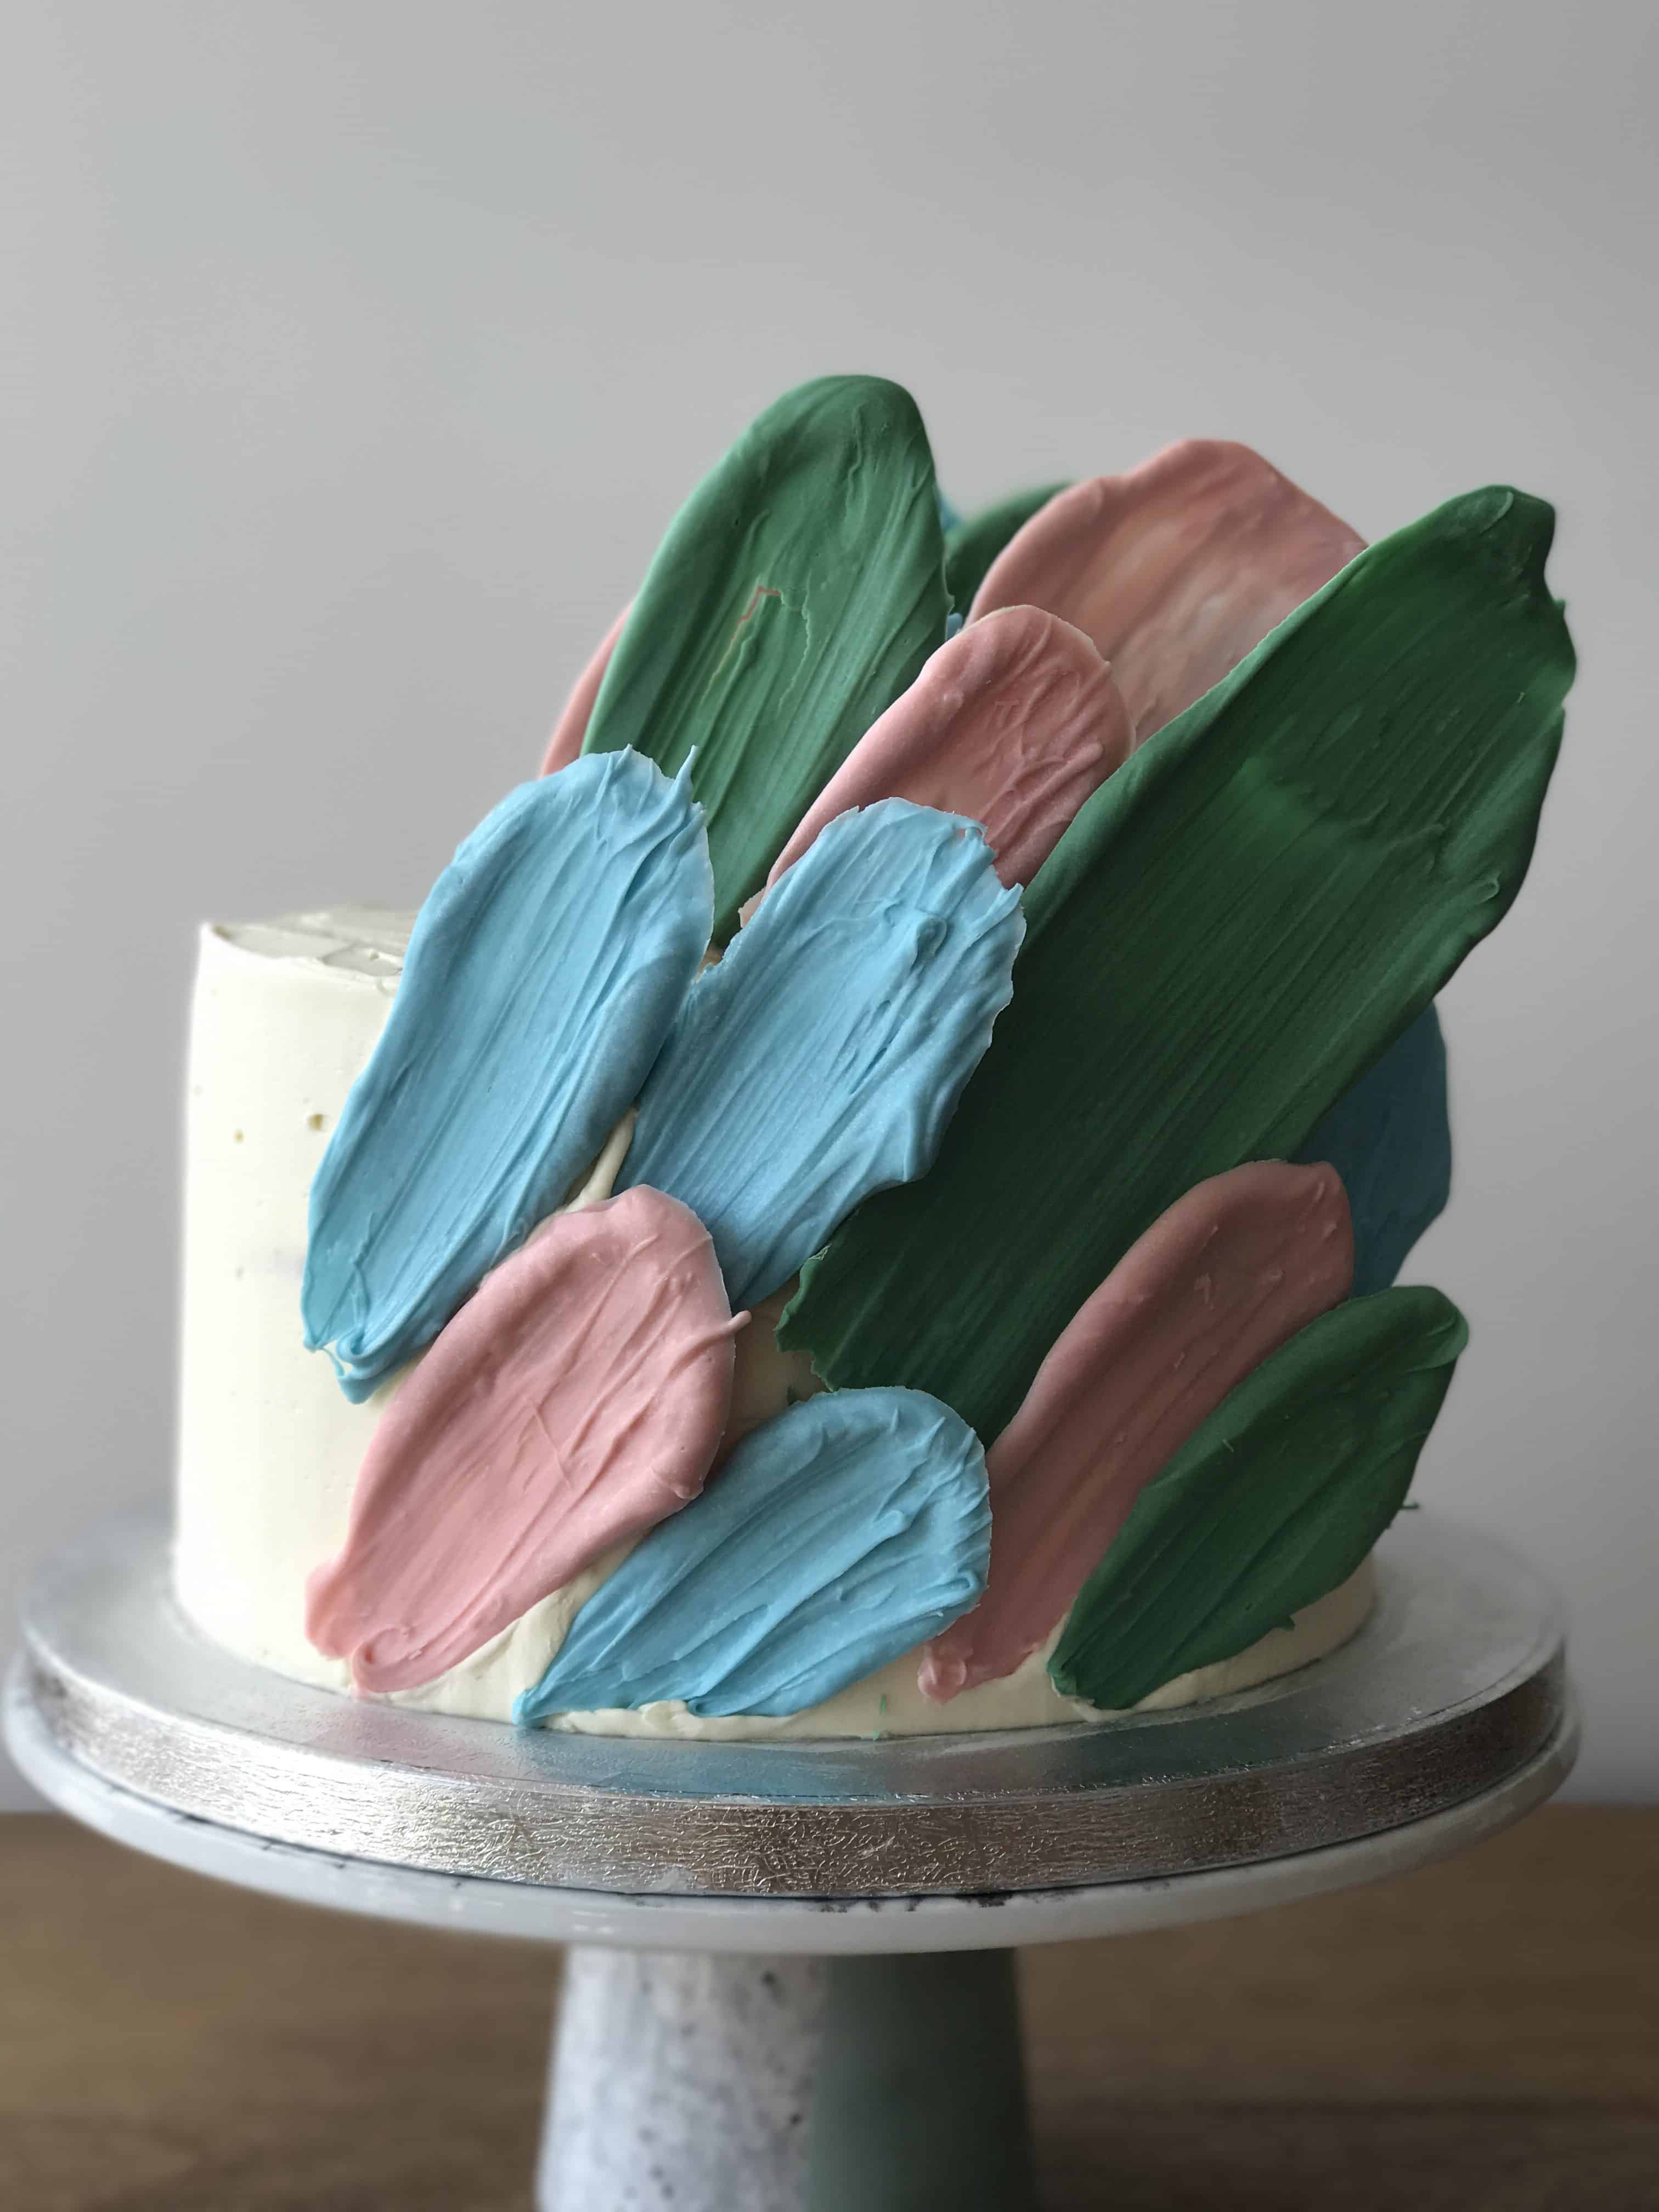
So, I should now explain and tell you how exactly the brushstrokes are made. It really is so simple! All you’ll need is some baking paper and a pastry brush. You could even use an unused (or well washed!) paintbrush if you wanted. You’ll also need either candy melts or chocolate of your choice. I went for candy melts as I knew I wanted pastel colours, and its so much easier than tempering and colouring white chocolate! Once you’ve decided that, you’ll need to prepare a sheet of baking paper on a flat surface and melt your chocolate/candy melts. Then simply dollop some of the melted mixture onto the baking paper and using your brush, ‘brush’ the mixture out to achieve a brushstroke.
You can make each brushstroke as short/fat/tall/thin as you like! The more different sizes you get the better, as you’ll be able to achieve different effects. I found this video by Cake Style really helpful – though they use a palette knife to create the strokes rather than a pastry brush.
I do hope you give the brushstroke trend a try, its super simple but really effective! Check out my timelapse video below of the cake assembly and if you want to see the birthday cake I made Katie last year you can check that out here. Less arty and more flowery, its my take on a buttercream flower wreath cake!
Brushstroke Layer Cake
Ingredients
Sponge
- 425 g cake flour If you can't find that, use 335g plain flour plus 90g cornflour
- 1 1/4 tbsp baking powder
- 3/4 tsp salt
- 225 g unsalted butter room temperature
- 400 g caster sugar
- seeds from 1 vanilla pod
- 1/2 tsp vanilla extract
- 6 large egg yolks
- 360 ml whole milk
Brushstrokes
- 100 g pink candy melts
- 100 g blue candy melts
- 100 g green candy melts
- 150 g white candy melts
Swiss Meringue Buttercream
- 150 ml egg whites
- 250 g caster sugar
- 450 g unsalted butter room temperature
- 2 tsp vanilla extract
Filling
- 150 g strawberry jam
Instructions
- For the cake: Firstly preheat the oven to 175C/155C Fan and grease and line three 8" baking tins and set aside. Sift together the flour, baking powder and salt and set aside.
- In the bowl of a stand mixer, beat the butter on a medium speed until smooth. Add the sugar and mix on high until light and fluffy, this should take 3-5 minutes. Then turn the mixer to medium-low and add the vanilla pod seeds, vanilla extract and the egg yolks one at a time. Make sure to scrape down the bowl between each addition.
- Then with the mixer on low, add the flour mixture in three batches alternating with the milk. Ensure you begin and end with the flour mixture. Only mix until all is just combined and you can no longer see any streaks of flour.
- Evenly divide the mixture between the three prepared tins and bake for 25-28 minutes or until a skewer inserted into the middle of the cakes comes out clean. Let the cakes cool on a wire rack for 10 minutes before removing from their tins to cool completely.
- For the brushstrokes: Prepare a sheet of baking paper on a flat surface and set aside. Melt the pink candy melts with 50g of the white candy melts over a bain-marie until smooth. Dollop some of the mixture onto the baking paper and using a pastry brush, 'brush' the mixture out to create a brushstroke. Repeat this with all the mixture and set aside to set.
- Repeat these steps with the blue candy melts and 50g of the white candy melts, and then the green candy melts with the remaining 50g of white candy melts.
- For the buttercream: Place the egg whites and sugar into the bowl of a stand mixer and whisk them together by hand to combine. Place the bowl over a bain-marie and whilst whisking intermittently heat the mixture on a medium-high heat. Keep whisking until the mixture reaches 160F/70C on a candy thermometer or is hot to the touch. Then, carefully place the bowl into the stand mixer.
- With the whisk attachment, whisk the egg white mixture on a high speed until it reaches medium-stiff peaks. This should take around 10 minutes and the bowl should return to room temperature. Once the mixture is cool and stiff, replace the whisk attachment with the paddle.
- With the mixer on low speed, gradually add the butter in a few tablespoons at a time, then add the vanilla. Once all incorporated, turn the mixer up to a high speed and beat until the buttercream is smooth and silky. Place 1/4 of the buttercream into a piping bag and snip off the end to have a plain round nozzle, then set aside.
- To assemble: Place one of the sponges onto your serving plate and using the buttercream in the piping bag, pipe a 'dam' around the edge of the sponge. Then fill the gap with half the jam. Repeat this process for the next layer, and then add the final sponge on top.
- Using another 1/4 of the buttercream, crumb coat the entire cake and place into the fridge to set for 20 minutes. Then cover the cake with a thick layer of the remaining buttercream and using a bench scraper, scrape off the excess to leave a smooth exterior. Finally, place your brushstrokes on and into the cake to create your desired effect.