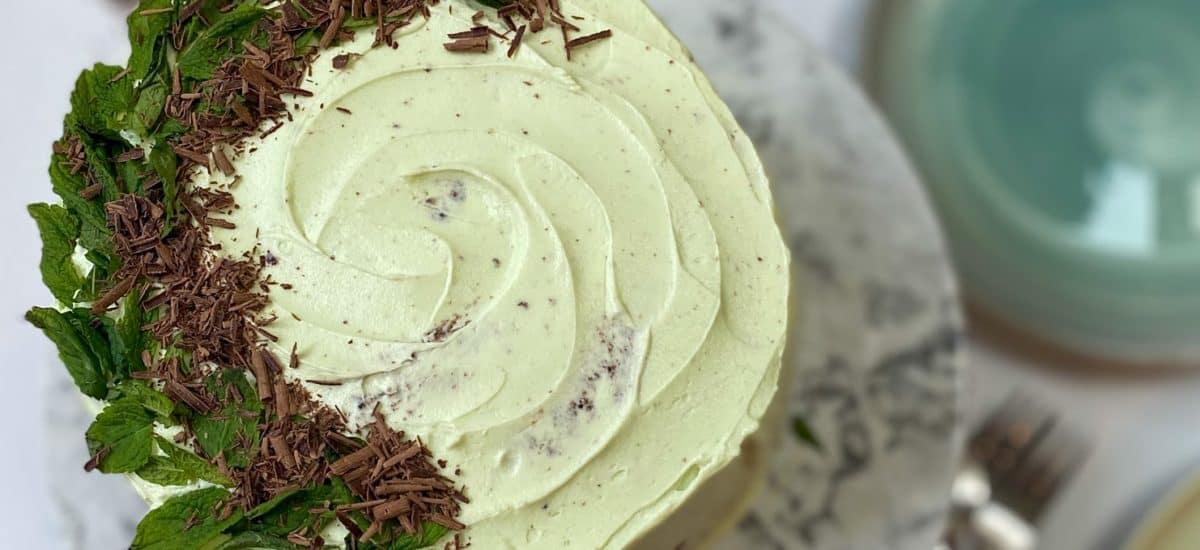
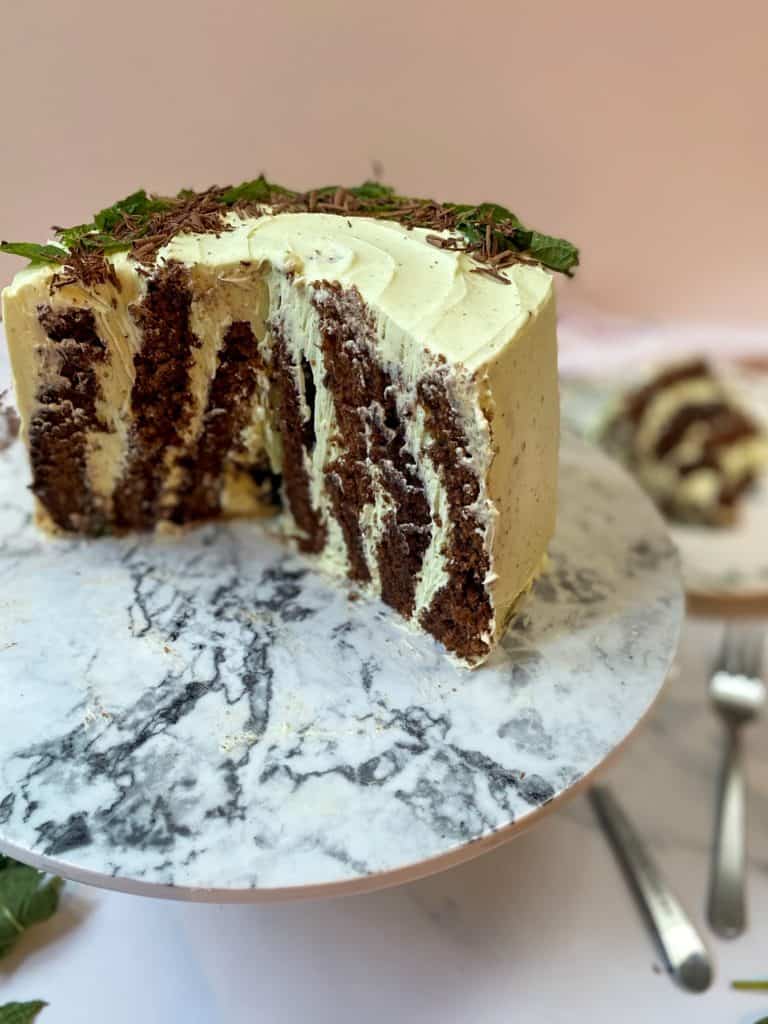
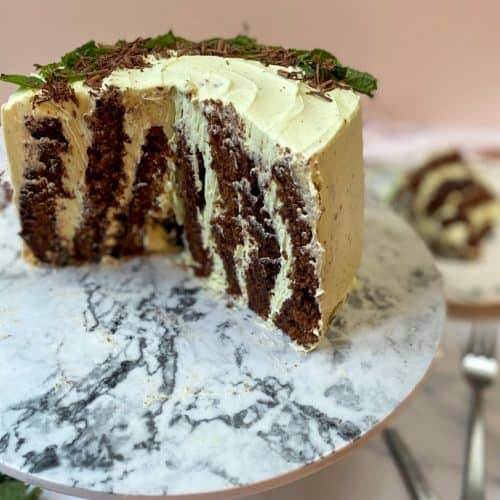
A light chocolate sponge with creamy mint buttercream – this mint chocolate cake is delicious and sure to impress with its vertical layers inside!

Mint chocolate chip was ALWAYS my favourite flavour ice cream as a kid. I’m not sure what it is about the combination that I love so much, but its definitely not just me. This is a beloved flavour mix across the UK. After Eights, Matchsticks, Aero….I could go on. Mint is seeping into chocolate all over the shop, and I’m all for it. So when I wanted to create a new layer cake, it seemed like the perfecttt choice.
My boyfriend proclaimed that its ‘basically Vienetta as a cake’ which was a BIG compliment from him. So I’m chuffed and will be using that as the official tagline from now on. Because we all know Vienetta is the best thing ever.
So lets get to it…
How do you make a vertical cake?
Now lets be clear, I think I still have some way to go in nailing a perfect vertical cake. There are some beautiful cakes on the internet with perfectlyyy straight lines. However, most things I bake have a certain rustic charm and this cake is no exception! 😉
So back to the technique. When I first saw a picture of a vertical cake it confused me SO much. I honestly couldn’t understand how it was made. But its so much simpler than I realised, and honestly makes alot of sense.
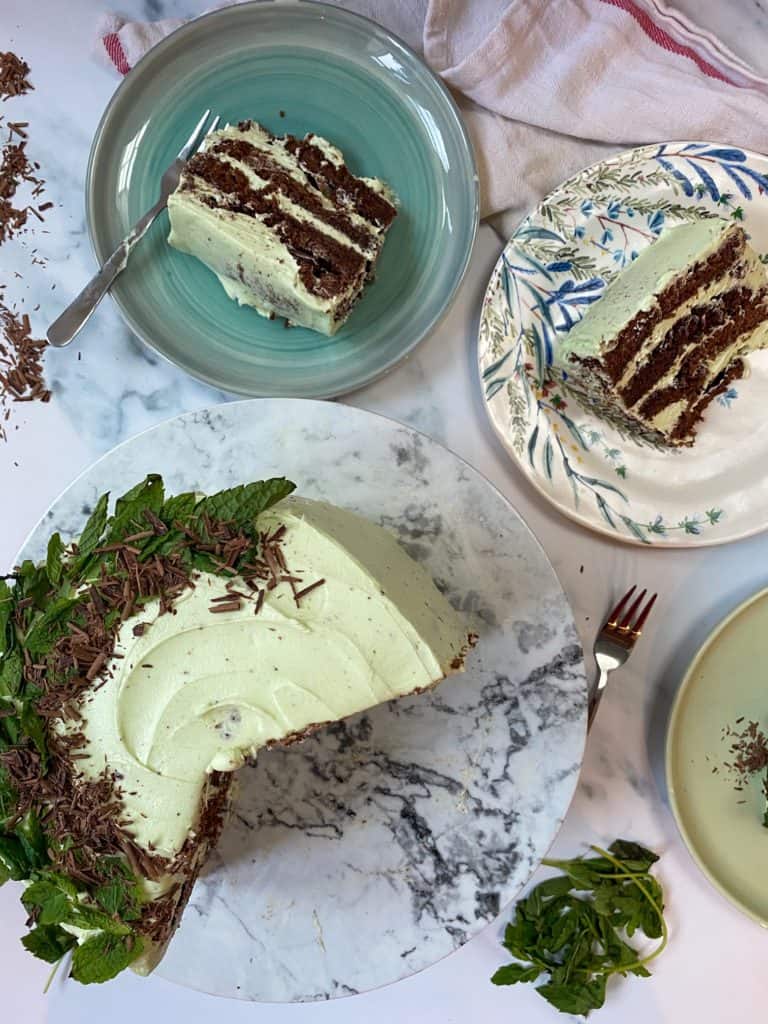
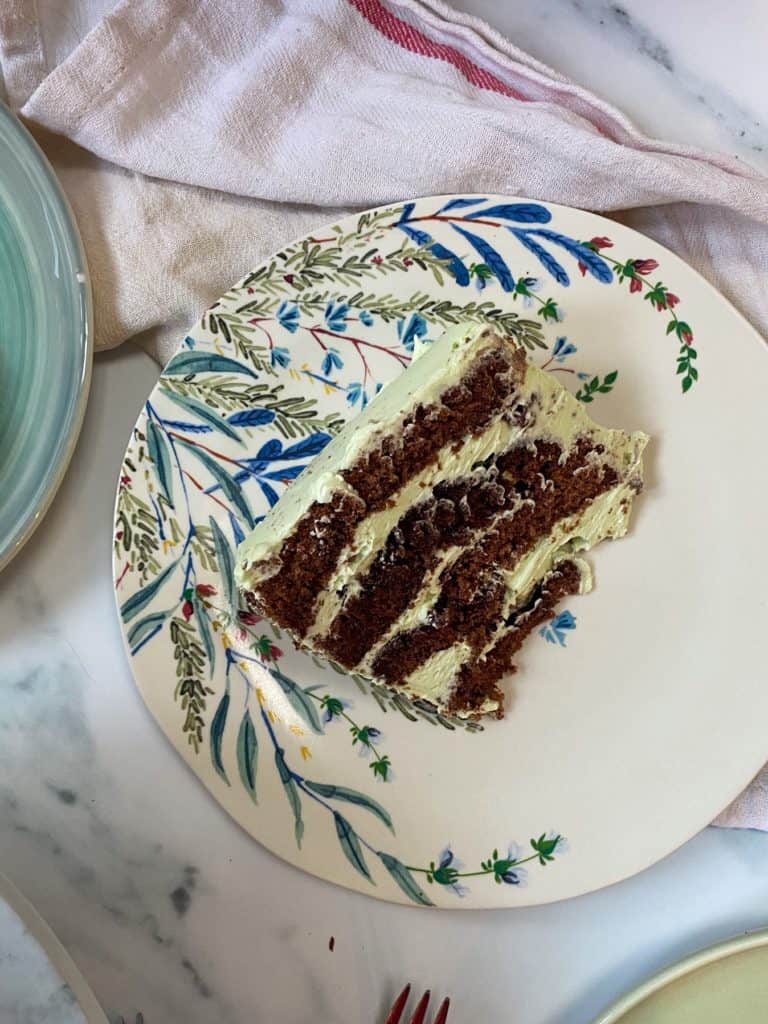
A vertical cake is essentially a massive swiss roll. You bake two sponges in a swiss roll tin, cut them each in half to create four thin strips. And then roll them up and around eachother to create a cake. It’s shorter than a usual three-layer cake but a little wider. Now you may wonder how the cake stays in the curved position, but just like you would for a swiss roll you roll the cakes while they’re still warm so they ‘remember’ their position.
I decided to film the assembly of my mint chocolate cake, because I knew it would be a little tricky to explain. But of COURSE this particular time my sponges cracked – disaster. I’m not gonna lie to you though, I didn’t have the time/energy/resources to make it again to re-film so I’ve left it as is. Partly because I feel like it actually helps to see that even if the cake cracks, once you’ve assembled it and covered it in buttercream you really can’t tell. It will still look beautiful 🙂
I hope that helps – at some point in the future I’ll try and re-film it to show you how it should look not cracked..:/ As I said though, rustic is always more my style haha
So what’re my top tips for the perfect mint chocolate cake, that also happens to be vertical!?;
- Don’t overbake your sponge as it’ll be prone to cracking (though as explained above, it doesn’t mean disaster!)
- Make sure your eggs and sugar are whipped until they’ve tripled in volume. You need all that air incorporated to make a beautifully light sponge!
- Be extremely careful with your mint extract. You really do only want 1/2tsp, otherwise you’ll end up toothpaste for buttercream. And that is NOT a delicious flavour combo.
I really hope you like this and give it a go! The cake is delicious but its the vertical sponges that really make this an impressive bake!
On with the recipe!
Mint Chocolate Cake (with Vertical Layers!)
Ingredients
Sponges
- 8 large eggs
- 300 g caster sugar
- 55 g unsalted butter
- 165 g plain flour
- 65 g cocoa powder
- 2 tsp ground coffee
- 2 tsp baking powder
- 1 tsp salt
- 1/2 tsp ground cinnamon
- 180 ml whole milk
- 60 ml vegetable oil
- 1 1/2 tsp vanilla extract
- icing sugar for sifting on the warm sponges
Buttercream
- 300 g unsalted butter room temperature
- 400 g icing sugar
- 1/2 tsp peppermint extract
- 3 tbsp whole milk
- green gel food colouring
Decoration (optional)
- mint leaves
- chocolate shavings
Instructions
- For the sponges: Firstly, pre-heat the oven to 175C/155C Fan/Gas Mark 3 and line two 9x13inch tins with baking paper and set aside. (If you don't have two tins, split the recipe in half and make them one at a time).
- In a large bowl, place the eggs and caster sugar. Then with an electric hand-whisk or a stand-mixer, whisk on a high speed until the mixture triples in volume and is extremely airy. This will take around 8 minutes. Stop the mixer and set the bowl to the side.
- Melt the butter in a microwave or in a saucepan, and leave to cool a little. Meanwhile, sift the flour, cocoa powder, coffee, baking powder, salt and cinnamon into the whipped egg mixture. Gently, using a spatula fold the mixture until combined and there are no pockets of flour.
- In a small bowl, pour in the melted and cooled butter, milk, oil and vanilla extract until combined. Then in two increments, fold into the batter until combined. Then evenly divide the batter between the prepared trays and bake for 12-15 minutes until the sponge springs back when gently touched. Try not to overbake, as your sponges will be prone to cracking.
- Once the sponges are baked, remove them from the oven and sift the icing sugar generously over. Then place either a clean tea towel or baking paper over each sponge and carefully flip them upside down to release from the baking tins. Peel off the baking paper carefully, and then sift more icing sugar over the bottom of the sponges. While the sponges are still warm, roll them up in the baking paper starting at the short ends. Set the sponges seam side down and leave to cool completely.
- For the buttercream: Place the butter in a large bowl and using an electric hand-whisk or a stand-mixer, whisk on a high speed until the butter is creamy and light. Then add the icing sugar, and whisk on a slow speed until combined. Then increase the speed to high and whisk for a few minutes until creamy and light. Add in the peppermint extract and milk and whisk again until combined. Finally, add a small blob of food colouring and whisk until combined. Then set aside.
- To assemble: Unroll the sponges and cut each in half to create four long and thin strips. Then using a palette knife, spread some of the buttercream on each strip. Then roll one strip, from the short end, to make a swiss roll and place upright onto your serving platter. Then wrap the remaining three strips around the centre roll, starting each strip at the end of the last. You will end up with a large spiral of cake and filling. Then cover the entire cake in a thin layer of buttercream and place in the fridge to chill for 15minutes. Then cover the cake with the remaining buttercream. Finally, decorate with mint leaves and chocolate shavings if desired.
Notes
Looking for more mint chocolate? Why not try my twist on the classic Viennese whirls?!