Who ever said white chocolate was basic, clearly hasn’t tried these Caramelised White Chocolate Cupcakes with hidden caramel filling!

Caramelised white chocolate is something I’ve only been aware of in the past few years or so. But its the thing of dreams. Perfect for those who think white chocolate is too sweet, as it adds another dimension to the chocolate. And also perfect for people who LOVE white chocolate, as caramelising it only improves the flavour!
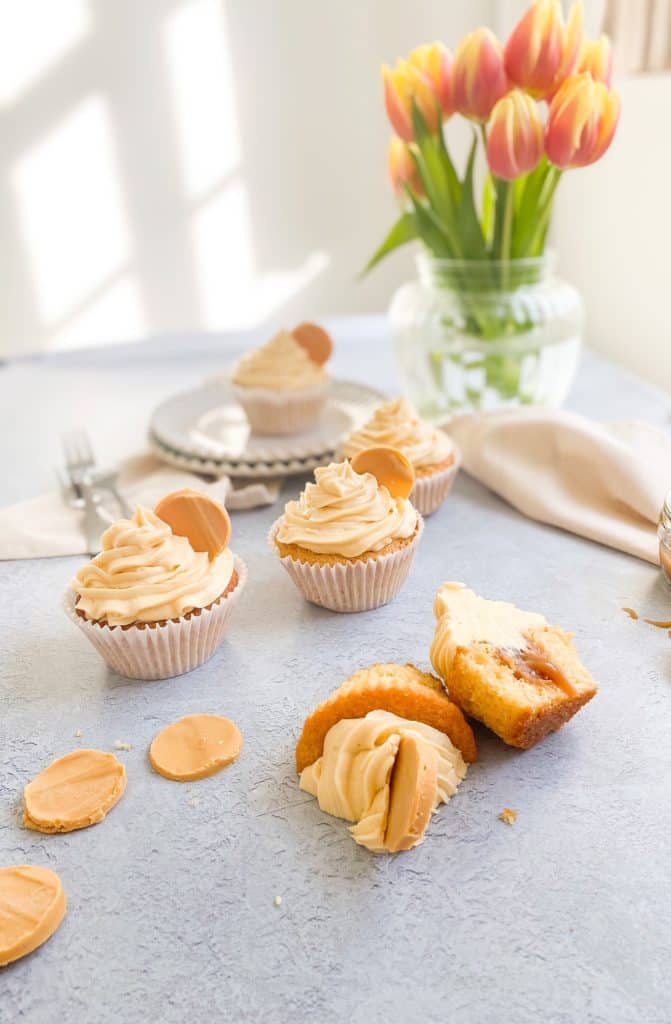
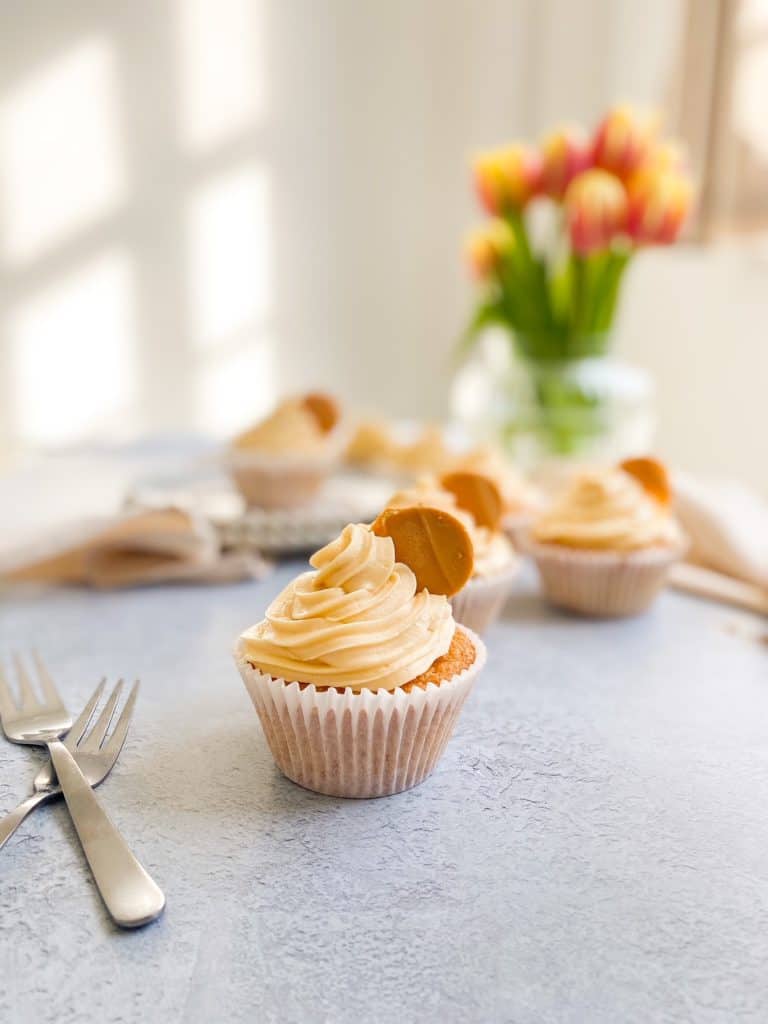
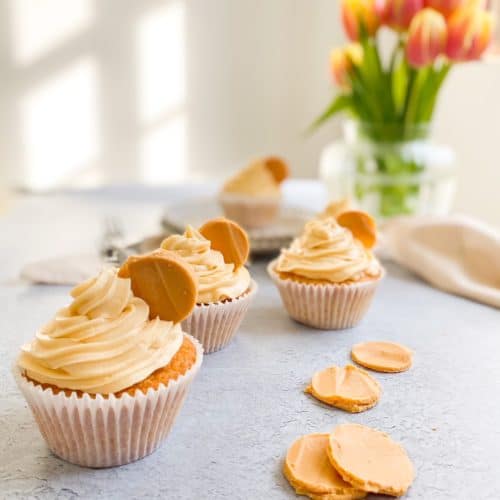
These cupcakes use the caramelised white chocolate to its fullest extent! Its beaten into the sponge, whipped into the buttercream and added as little disc decorations! Honestly, it may seem abit much but the flavour is subtly gorgeous. I’ve also added a hidden caramel centre, which oozes out gorgeously.
How do you caramelise white chocolate?
Caramelisng white chocolate is surprisingly easy, but you do need two things:
- Good quality white chocolate
- Patience
To caramelise the chocolate, we need to continually heat it and stir with 10 minute intervals for about 40-50 minutes. You can do this in the microwave, but I find it much easier in the oven, so that’s the method I’ll be sharing today.
First up, the chocolate. You need white chocolate that has a high cocoa butter content, ideally between 29%-32% (at the very least 28%). I’ve used Menier White Chocolate (30%) before, which is available in supermarkets and it was great! But my favourite chocolate to use has been Callebaut’s W2 callets. This has a minimum cocoa butter content of 29.5%, so actually slightly less than the Menier but its such a gorgeous chocolate to work with – the flavour and texture are just sublime. Also, the chocolate is in callets (i.e. small drops formulated for melting) which makes it perfect for this process as the chocolate is evenly sized which makes for even melting.
A chocolate with a lower cocoa butter content will not melt evenly and may dry out – making for a sad caramelised white chocolate!
Caramelised white chocolate cupcakes are the FUTURE!
So once you have your chocolate, set your oven to 125C/105C Fan/Gas Mark 1/2 (basically your lowest setting) and get a large lipped baking tray out. If your baking tray is non-stick and free from any scratches you can go ahead and place your chocolate directly onto the tray. If not, line it with baking paper or a silicone baking mat. Then place in the oven for 10 minutes.
The key here is, that after those 10 minutes are up you need to THOROUGHLY stir the chocolate. Get every last bit mixed, and make sure the whole thing is liquid before you place it back in the oven for another 10 minutes. This step will become clearer as the process goes on, as the longer the chocolate cooks the harder it will be to stir when it first comes out the oven. If it looks a chalky dry mess, DONT WORRY. Just keep stirring and it will come back together.
But remember. Don’t put it back in the oven until its completely liquid again.
As the chocolate cooks it will take on a gorgeous golden brown colour. I find it best to repeat the process 4 times, but you could keep going for 5 or 6 if you really want to deepen that flavour.
And there you have it! Gorgeous, silky caramelised white chocolate. Once its cooled a little, its ready to use in the cupcake batter and the buttercream. Then the remainder can be spread onto a baking tray and left to set, to create the cupcake decorations.
I really hope you love these cupcakes as much as I do! It was so fun to use the caramelised white chocolate in the sponge AND buttercream. And of course the oozy caramel filling adds a delicious surprise and keeps the cupcakes nice and moist (sorry!).

On with the recipe!
Caramelised White Chocolate Cupcakes
Ingredients
Caramel
- 100 g caster sugar
- 50 g golden syrup
- 75 g unsalted butter
- 75 ml double cream
Caramelised White Chocolate
- 300 g white chocolate Minimum 28% cocoa butter
Sponge
- 170 g unsalted butter
- 170 g caster sugar
- 3 large eggs
- 170 g plain flour
- 1 1/2 tsp baking powder
- 1 pinch of salt
- 60 g melted caramelised white chocolate cooled
- 1 tbsp milk whole or semi-skimmed
Buttercream
- 175 g unsalted butter
- 350 g icing sugar
- 4 tbsp milk whole or semi-skimmed
- 1 pinch of salt
- 100 g melted caramelised white chocolate cooled
Instructions
- For the caramel: Add the sugar and golden syrup into a small saucepan. Let it simmer over a medium heat for 3 minutes, stirring often until the sugar has dissolved and turned a golden amber colour. Take off the heat and add the butter and cream, whilst stirring continuously. The mixture will bubble up at this point. Once the butter and cream have been fully combined, pour into a heat-safe bowl and set aside to cool to room temperature.
- For the caramelised white chocolate: Preheat the oven to 125C/105C Fan/Gas Mark 1/2. Then finely chop chocolate and pour onto a large non-stick (or lined) baking tray. If using callets, there is no need to chop the chocolate. Bake for 10 minutes, then remove from the oven and stir thoroughly until the chocolate is liquid again. Repeat this process 3 times, making sure to stir the chocolate thoroughly before placing back in the oven. Once the chocolate has turned a golden brown colour remove from the oven and leave to cool to room temperature.
- For the sponge: Preheat the oven to 180C/160C Fan/Gas Mark 4. In a large bowl, cream the butter and sugar together until light and fluffy. Then add the eggs one at a time, beating between each addition. Then add the flour, baking powder and salt, mixing again until just combined. Finally, add the melted chocolate and milk, mixing again until just combined. The mixture will be thick! Divide the mixture between 12 cupcake cases, and bake for 20 minutes until springy to the touch. Leave them to completely cool.
- For the buttercream: In a large bowl, using an electric whisk beat the butter until very light and pale. Then add the icing sugar (covering your bowl with a tea-towel to stop an icing sugar cloud!) and beat until well combined – at least 5 minutes. Finally, add the melted chocolate and milk, mixing until combined.
- With the remaining melted chocolate, spread thinly onto a baking tray lined with baking paper. Leave to set in the fridge for 5 minutes. Then mark out circles – I used a small piping tip – then place back in the fridge for 15 minutes. Then snap out the circles you marked, and place back in the fridge until you're ready to assemble the cupcakes.
- To assemble: Using an apple corer remove the middles of the cupcakes – you can also do this with a small knife. Then place your room temperature into a piping bag (or just use a spoon) and fill the cupcake holes up to the brim – you won't need all the caramel. Then place the buttercream into a piping bag fitted with a star tip, and pipe swirls on top of each cupcake, covering up the caramel filling. Finally, press a caramelised white chocolate circle into the buttercream of each cupcake.