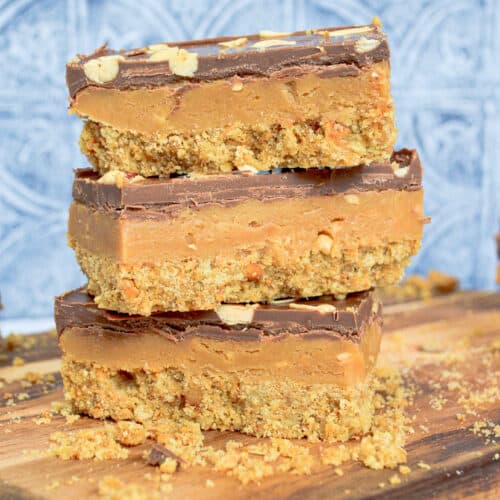
Crumbly, creamy and so so delicious. These peanut butter caramel biscuit bars are the best crowd pleasing no-bake recipe! Perfect for lunchboxes or an afternoon treat!
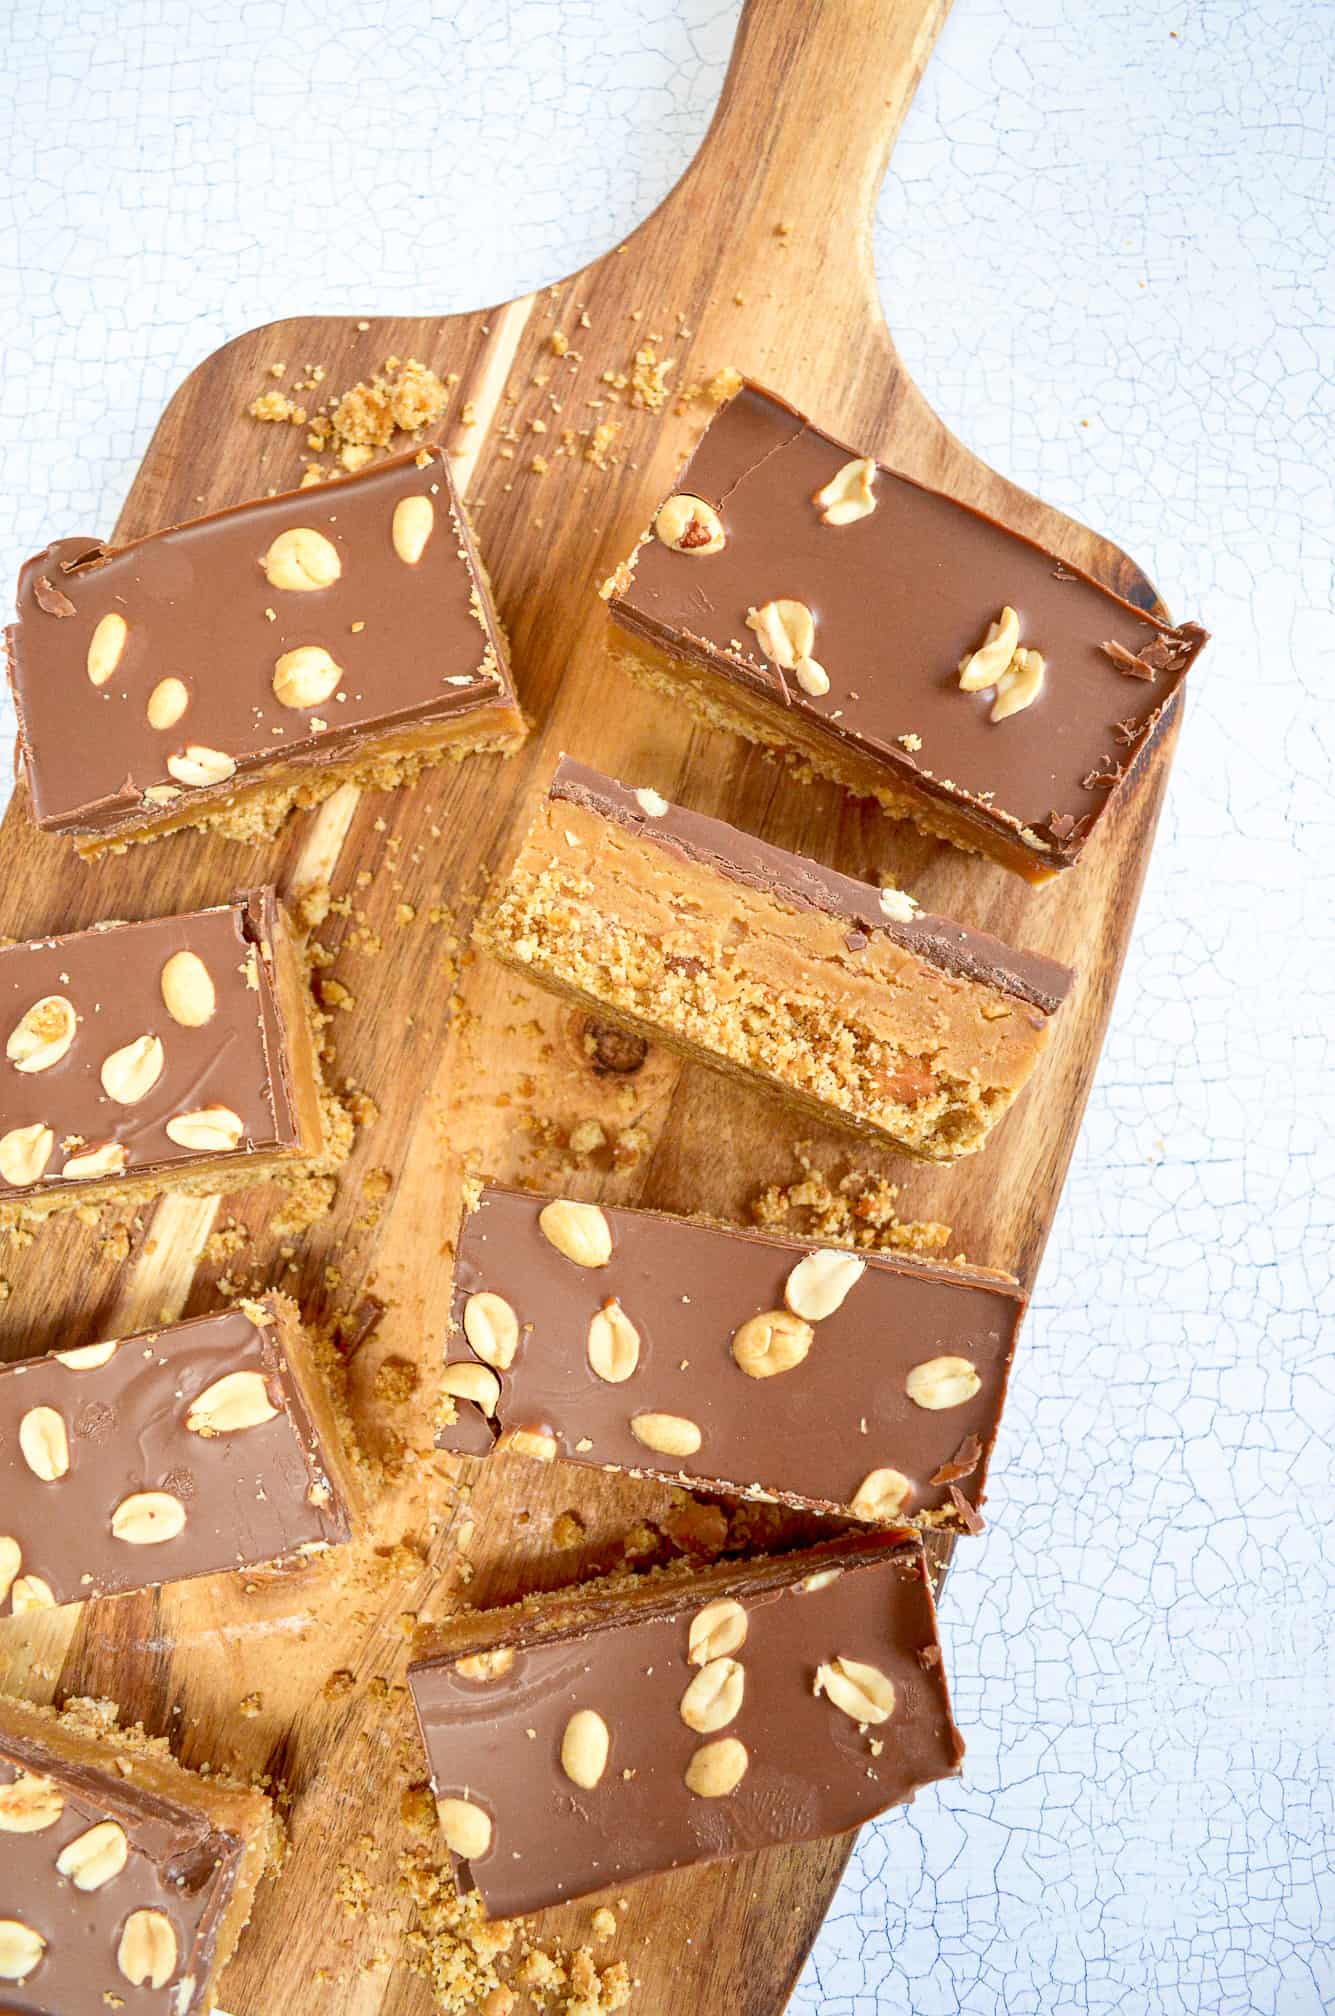
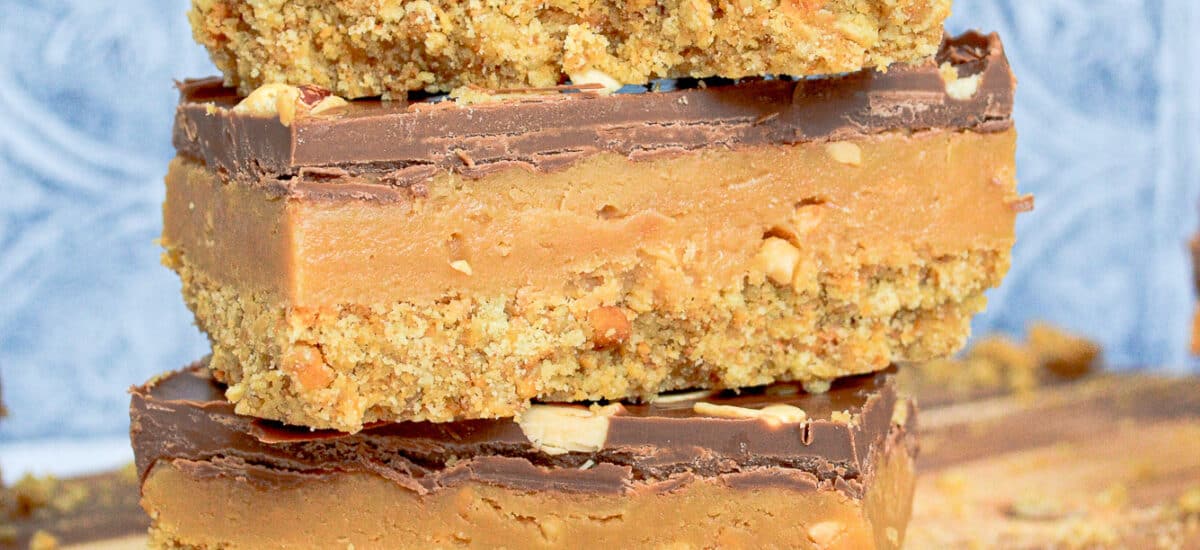
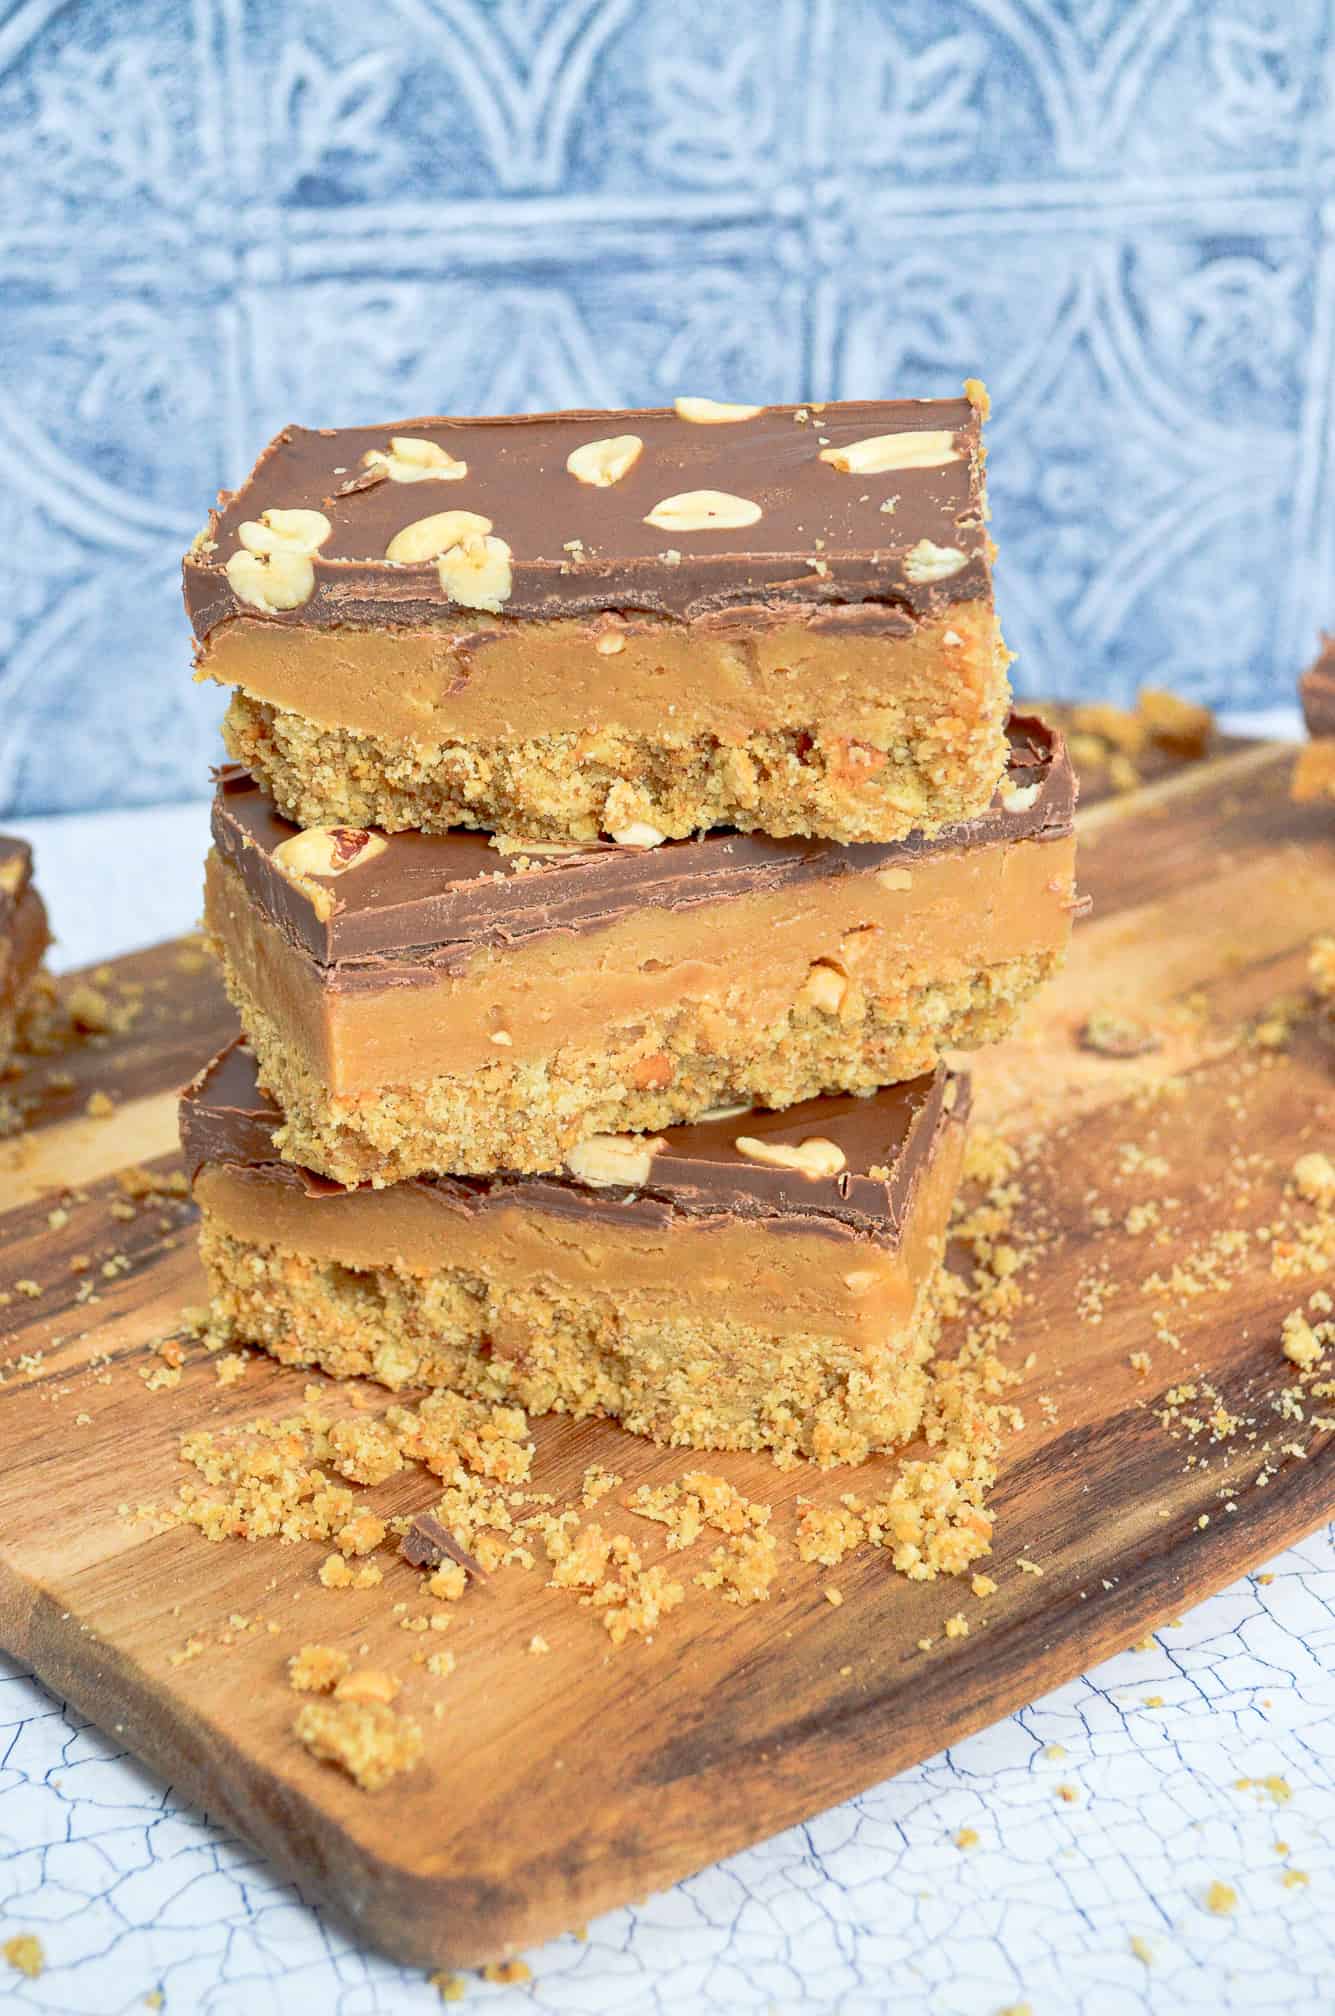
Millionaires slice, caramel shortbread, caramel squares…whatever you call it, they’re all delicious. These biscuit bars are made with crushed up digestives, so not a true shortbread. But thats what makes this a no-bake recipe and so simply delicious! Crunchy peanut butter is mixed into the caramel to make a salty sweet filling, and its all smothered in silky melted milk chocolate. Oh and a smattering of chopped peanuts too! The combination of a crumbly buttery biscuit base, smooth and creamy peanut butter caramel, silky milk chocolate and crunchy peanuts is soooo moreish. The perfect sweet treat!
Key Ingredients You’ll Need
- Digestives – This is for the biscuit base. Mixed with melted butter it creates a delicious and crumbly texture – exactly like you would use for a no-bake cheesecake.
- Condensed milk – You’ll need a full tin of condensed milk to make the caramel filling. Condensed milk already has sugar in it, which helps to prevent crystallisation occurring when you make the caramel, making it much easier to make! It also makes for a wonderfully rich and thick caramel, that is exactlyyy what you need for a millionaires/caramel slice.
- Crunchy Peanut Butter – The peanut butter is mixed into caramel before you pour it onto the biscuit base, so you want to choose your favourite brand. I used a crunchy version for these biscuit bars as I wanted a little additional crunch in the filling, but if you prefer smooth you can use that instead.
How to make peanut butter caramel biscuit bars
This really is a quite a simple recipe, especially as it’s easily broken down into three stages. The biscuit base, the caramel filling and the chocolate topping. The caramel filling is the only stage where you need to be a little more careful and prepared, as you’ll need to stir the mixture almost continuously to prevent it catching and burning! But don’t worry, as long as you read the full recipe first you will be absolutely fine and well on your way to the most delicious salty/sweet biscuit bars before you know it!
Making the biscuit base
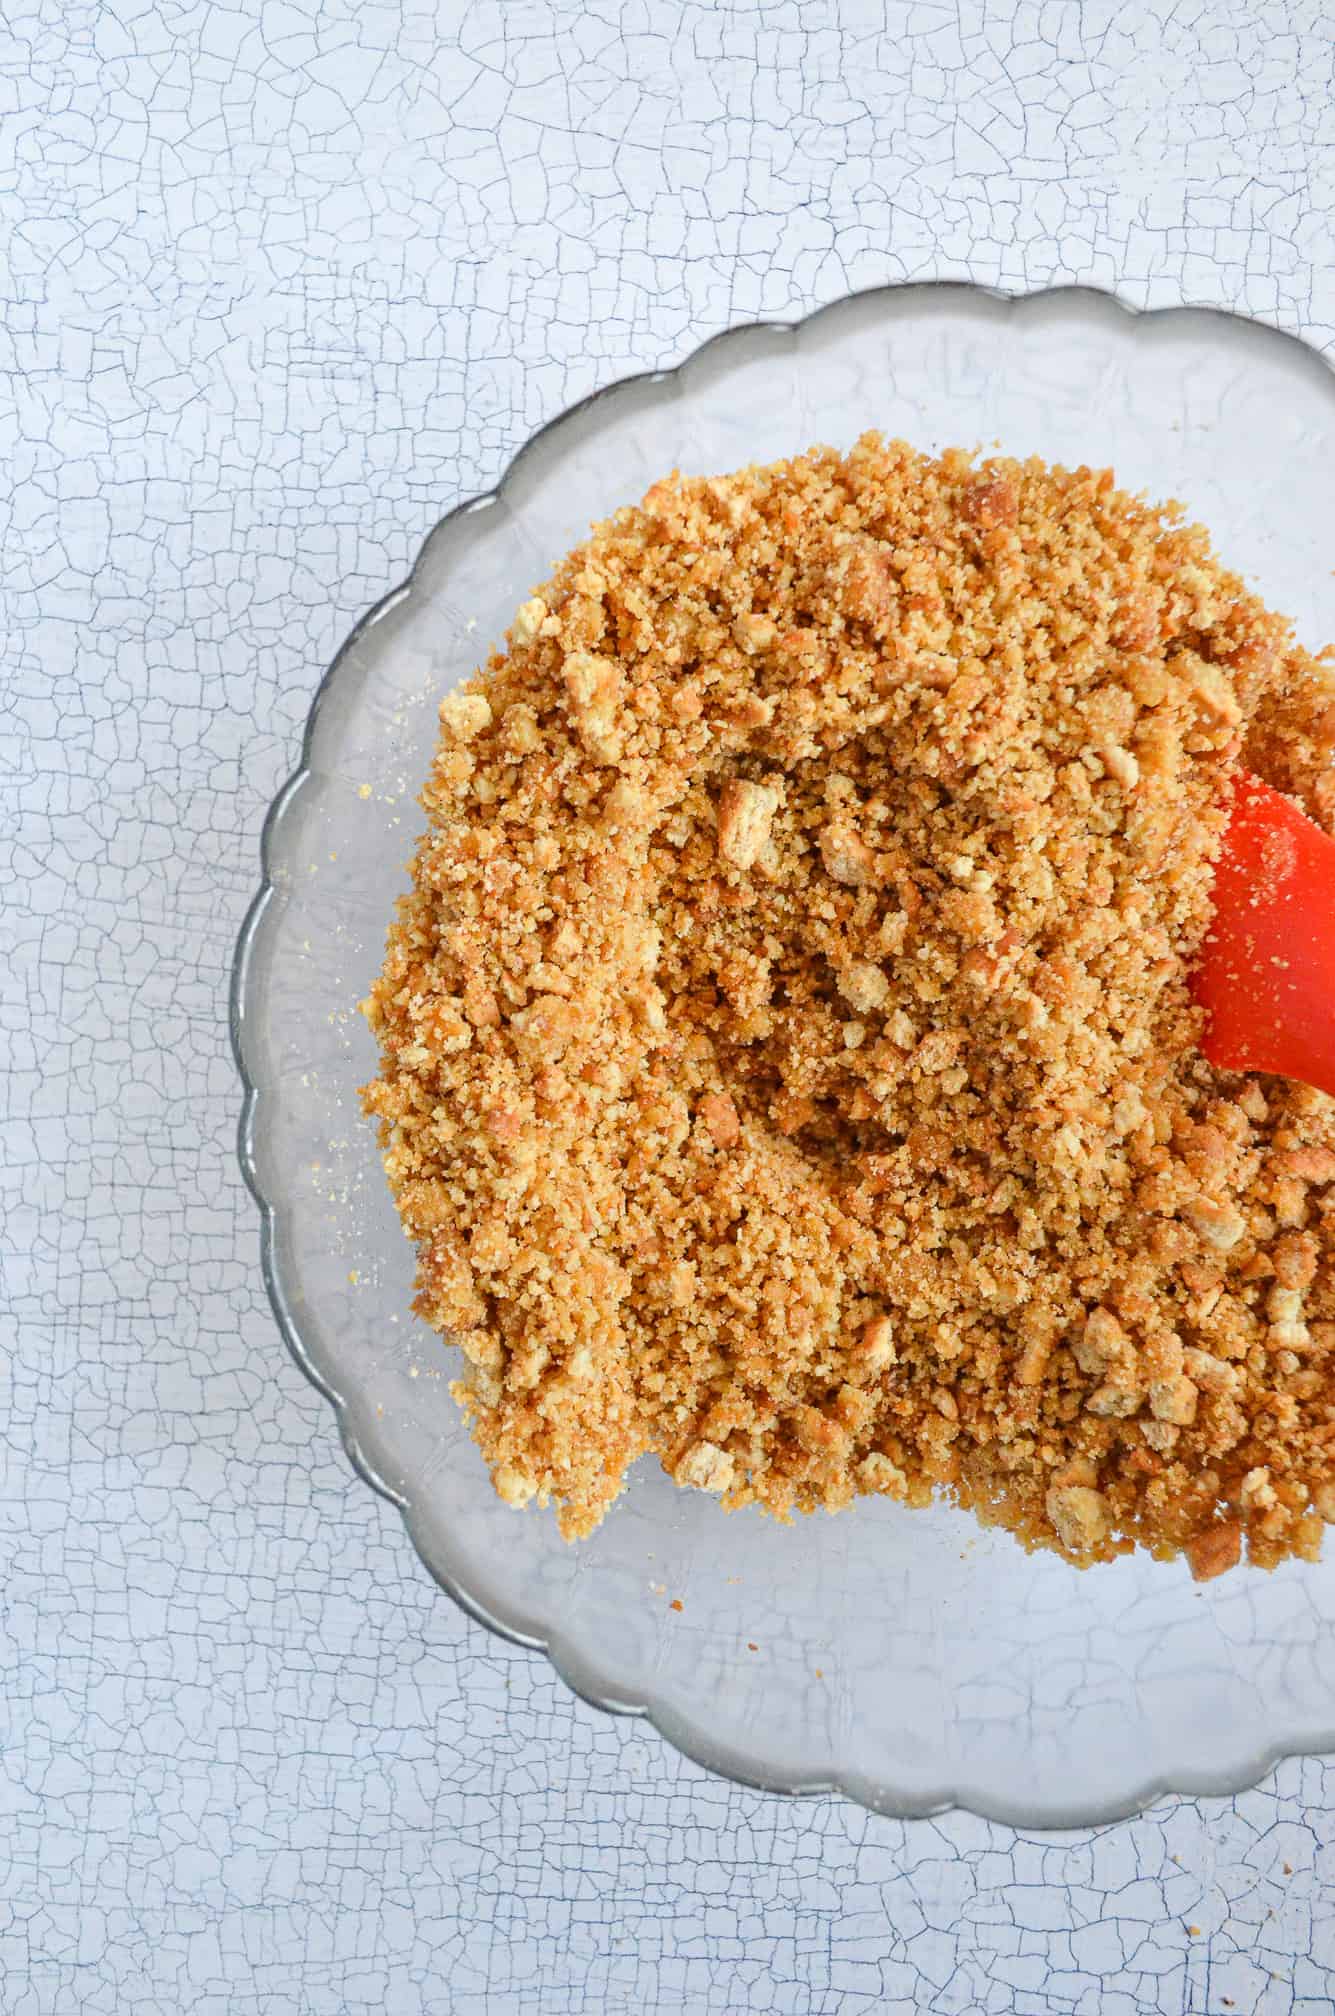
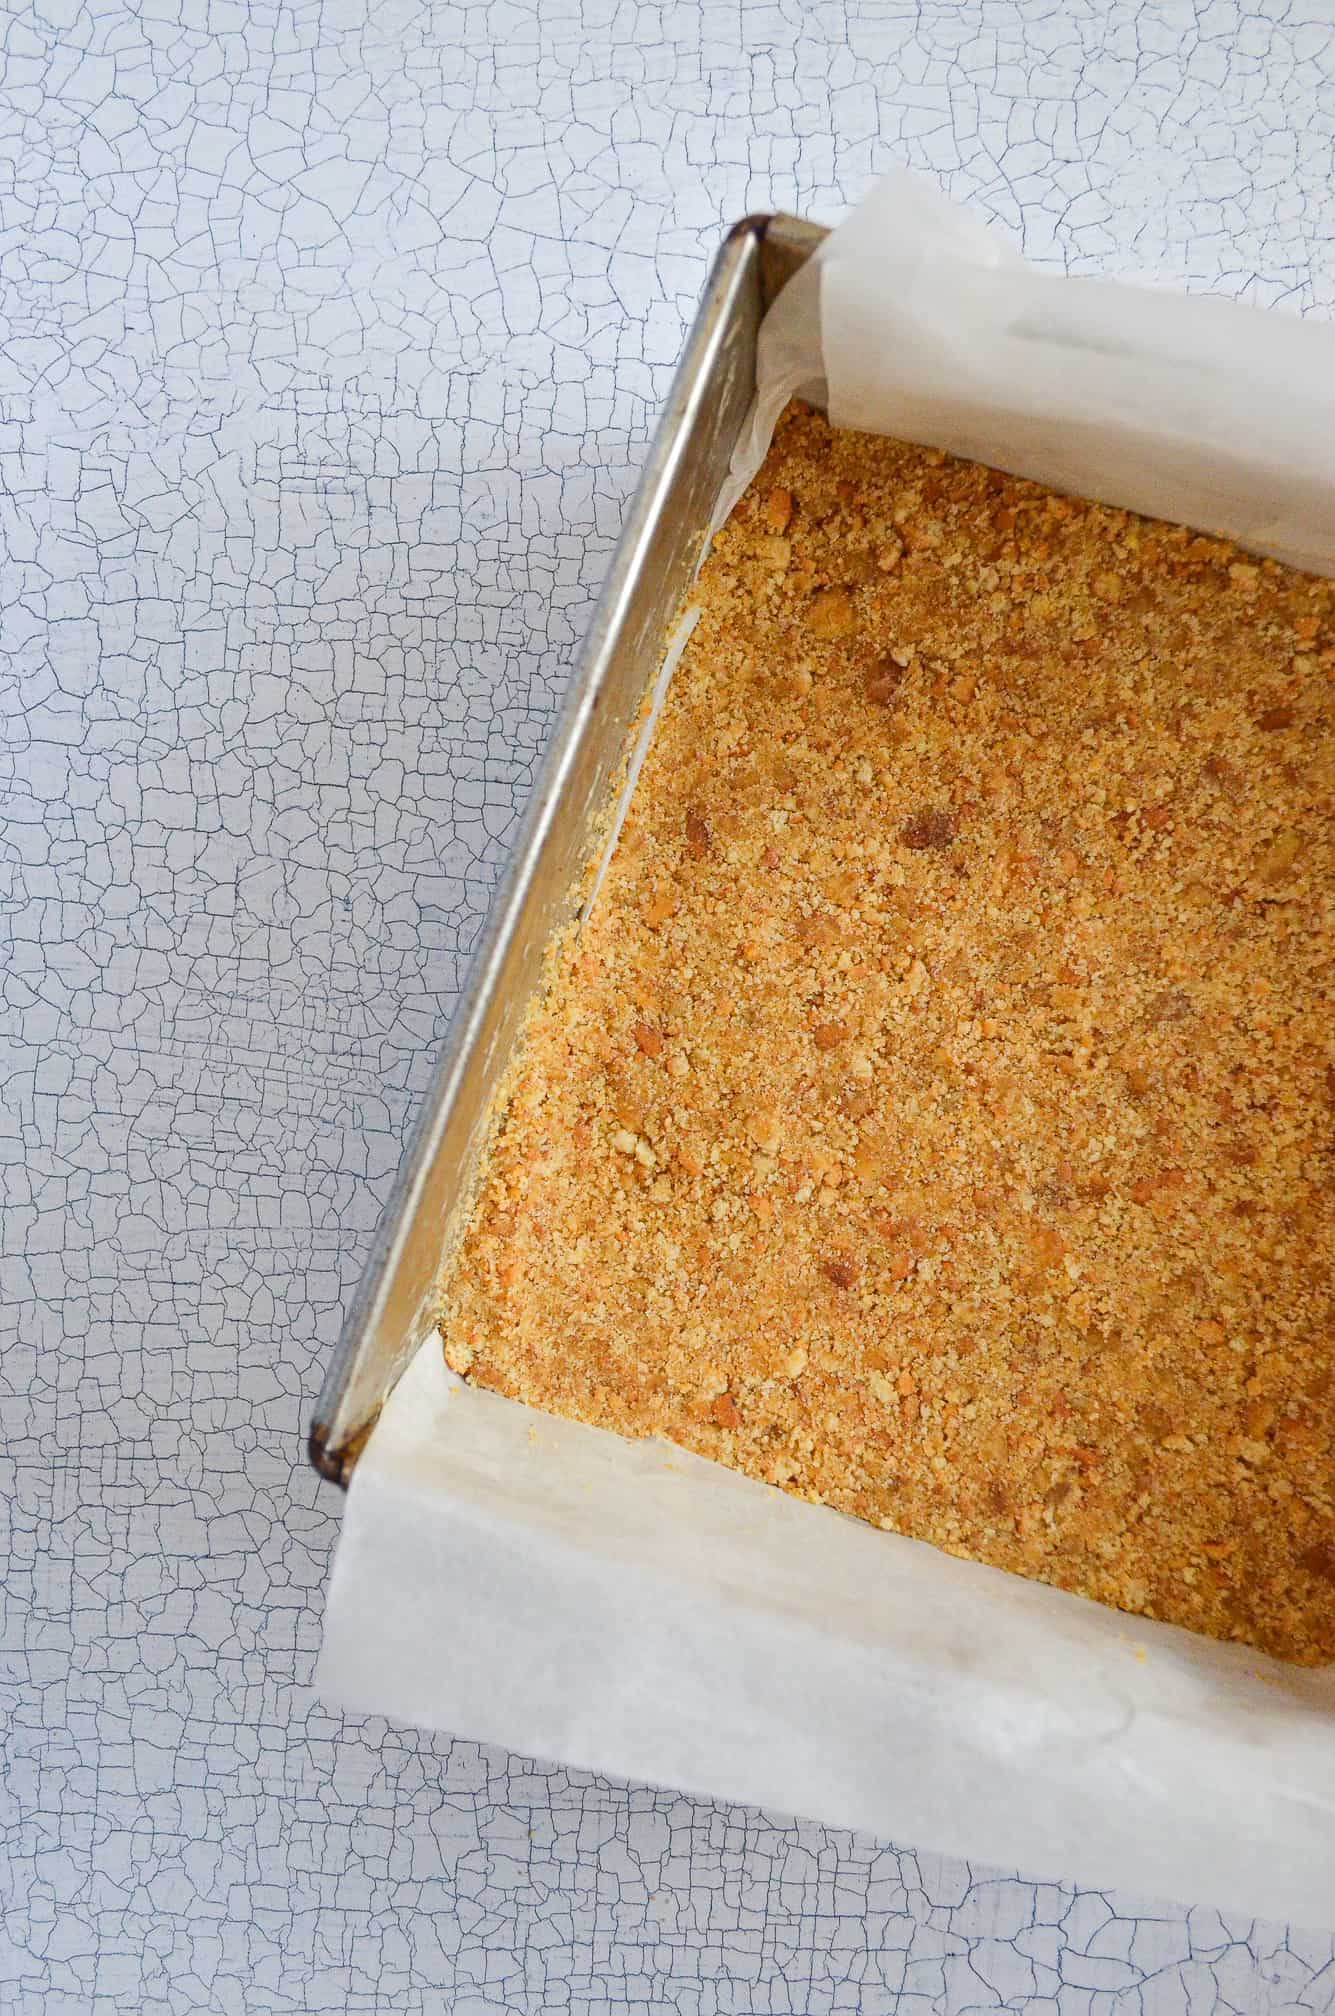
The first step is undoubtedly the easiest. The biscuits need to be crushed to fine crumbs – either using a food processor, in a sealed sandwich bag with a rolling pin, or even just in a bowl carefully using a rolling pin again! Once the biscuits are all crumbs you can stir in melted butter, until it starts to clump slightly. The mixture should then be poured into a prepared tin. Now what do I mean by a prepared tin?
Because this bake will be setting in the fridge, you need to line the tin with baking paper, tall enough so you can use the edges like ‘handles’ to remove the finished bake. Without baking paper it will be an absolute nightmare to get out of the tin – so don’t skip this step!!
Once you’ve poured the biscuit mixture into the tin, it needs to be pressed down to make a compact even base. You can do this with the back of a spoon, the flat base of a measuring cup or even just your hands! Either way it needs to be nice and even, as this is the base your caramel and chocolate will be poured onto. Finally, the tin should go into the fridge to set while you begin making the caramel.
Making the caramel filling
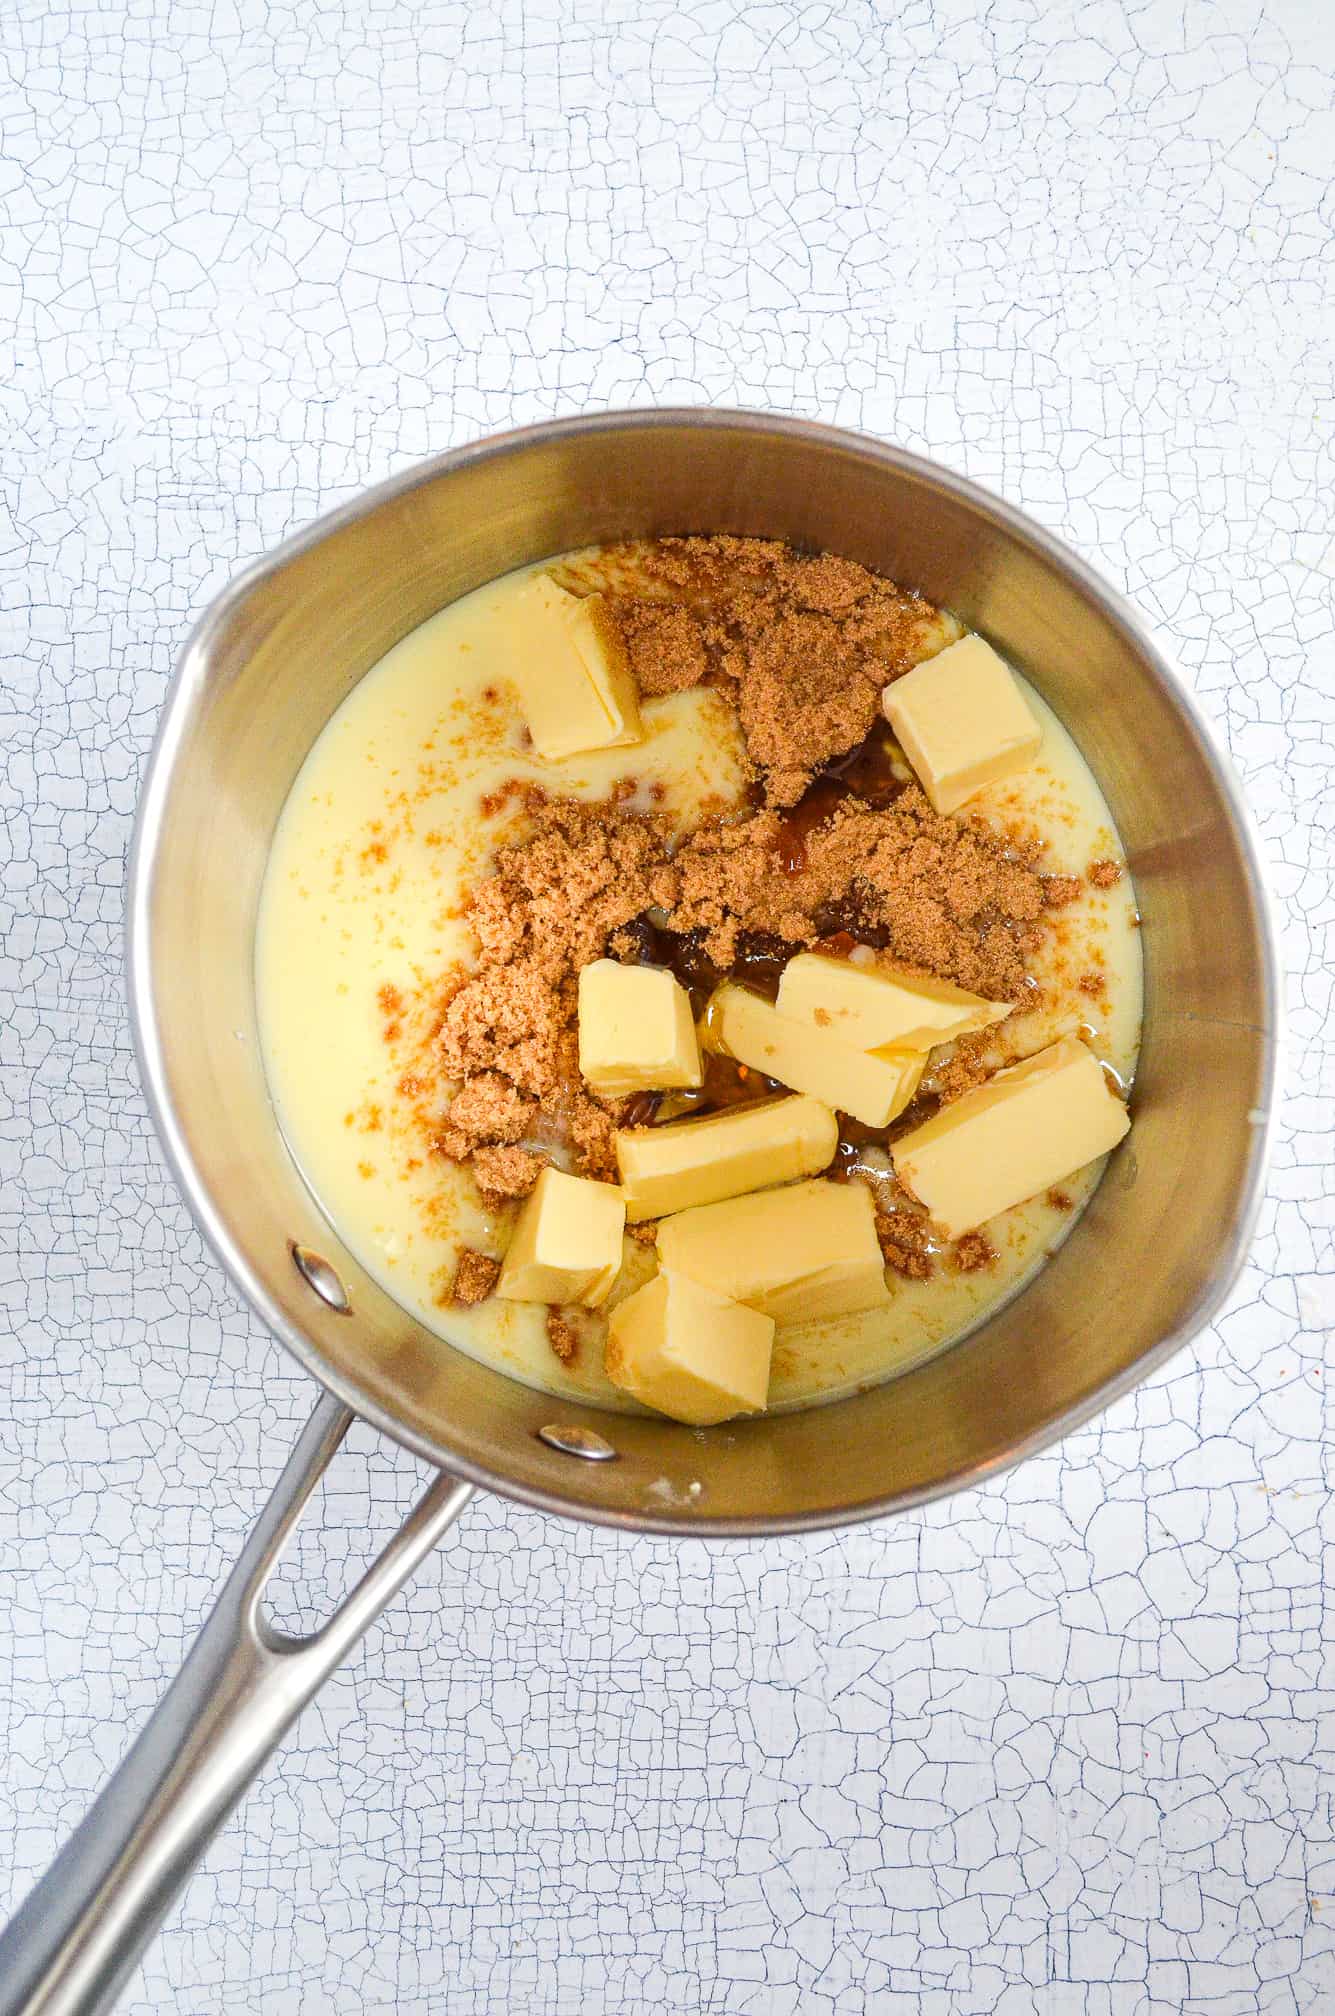
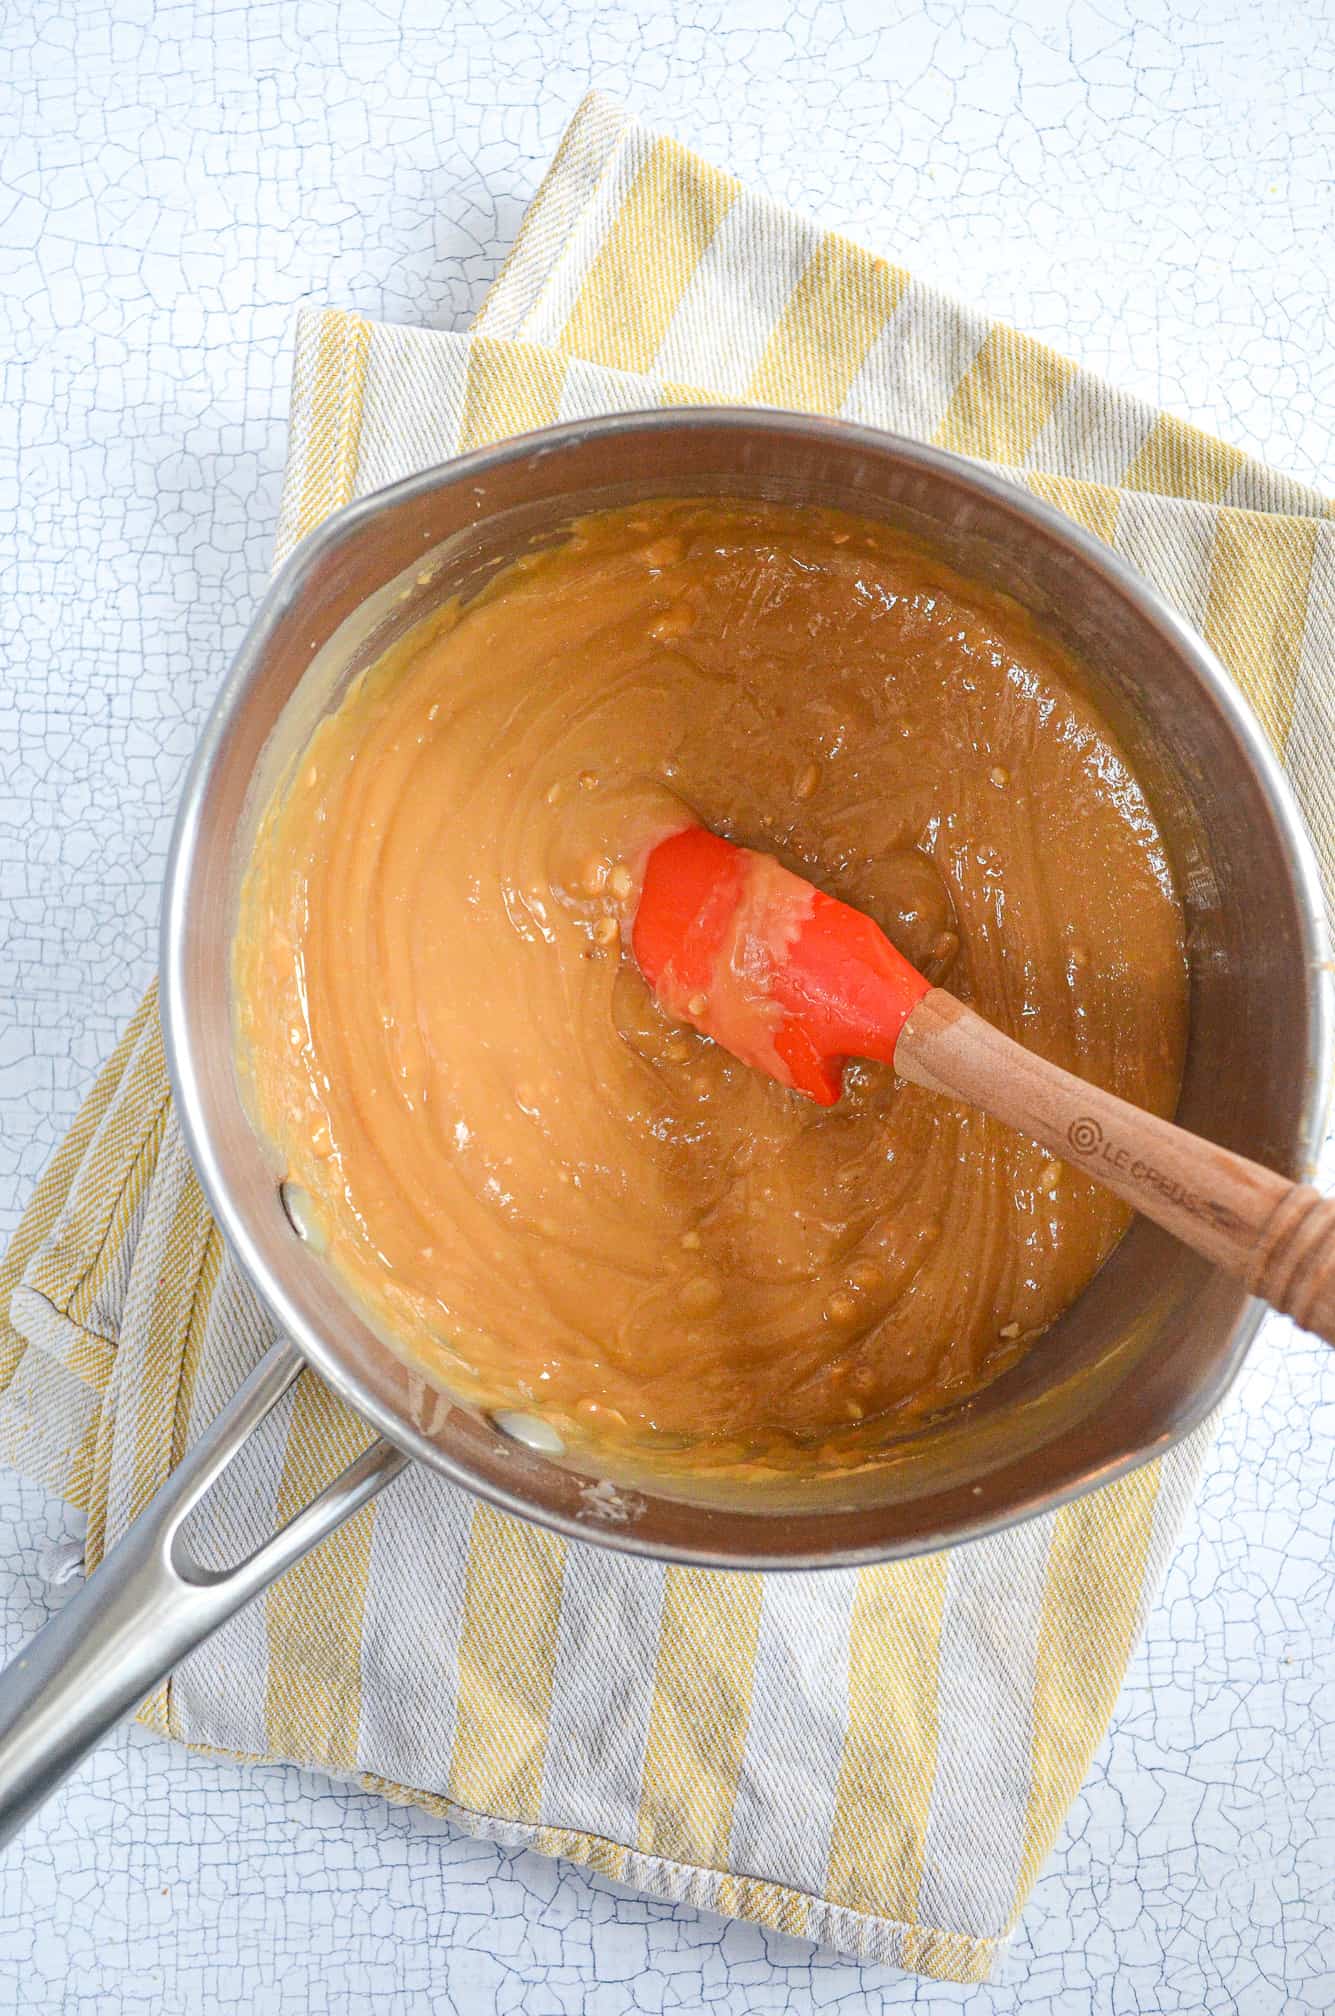
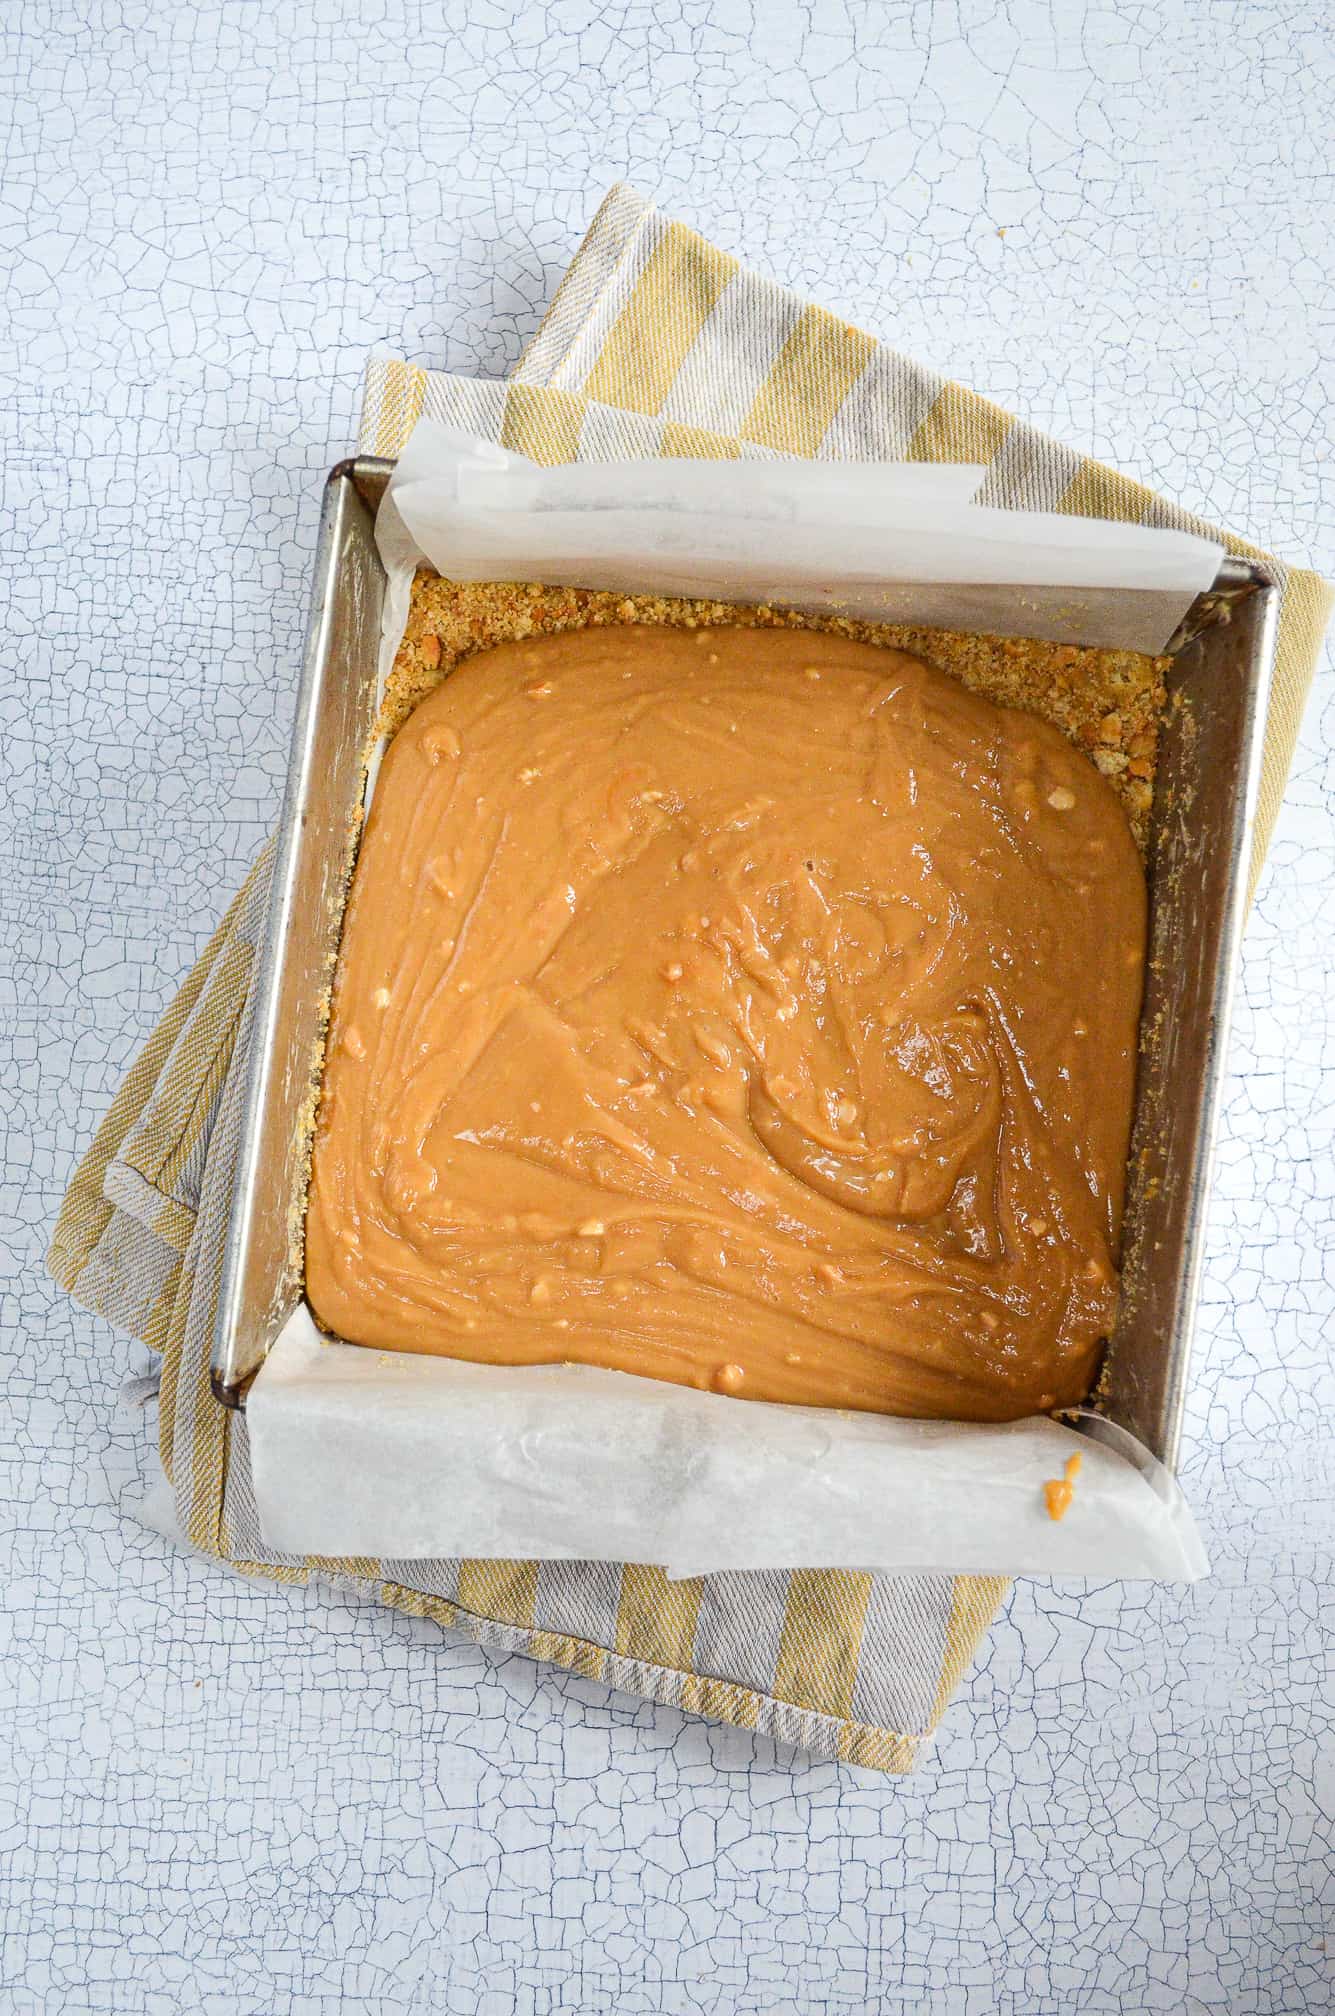
For the caramel step you’ll need to have a large heavy-bottomed saucepan ready. Having a heavy-bottomed pan really helps to prevent your caramel from burning. If you don’t have one, you’ll just need to be a little more careful and keep the heat slightly lower to help prevent it catching. You can then combine all your ingredients in the pan (bar the peanut butter!) – so that’s the full tin of condensed milk, soft light brown sugar, golden syrup and butter. I find it best to cut the butter up into chunks so it melts quicker and more evenly. At this point I would also weigh out the peanut butter separately, so you have that ready to go once the caramel is made.
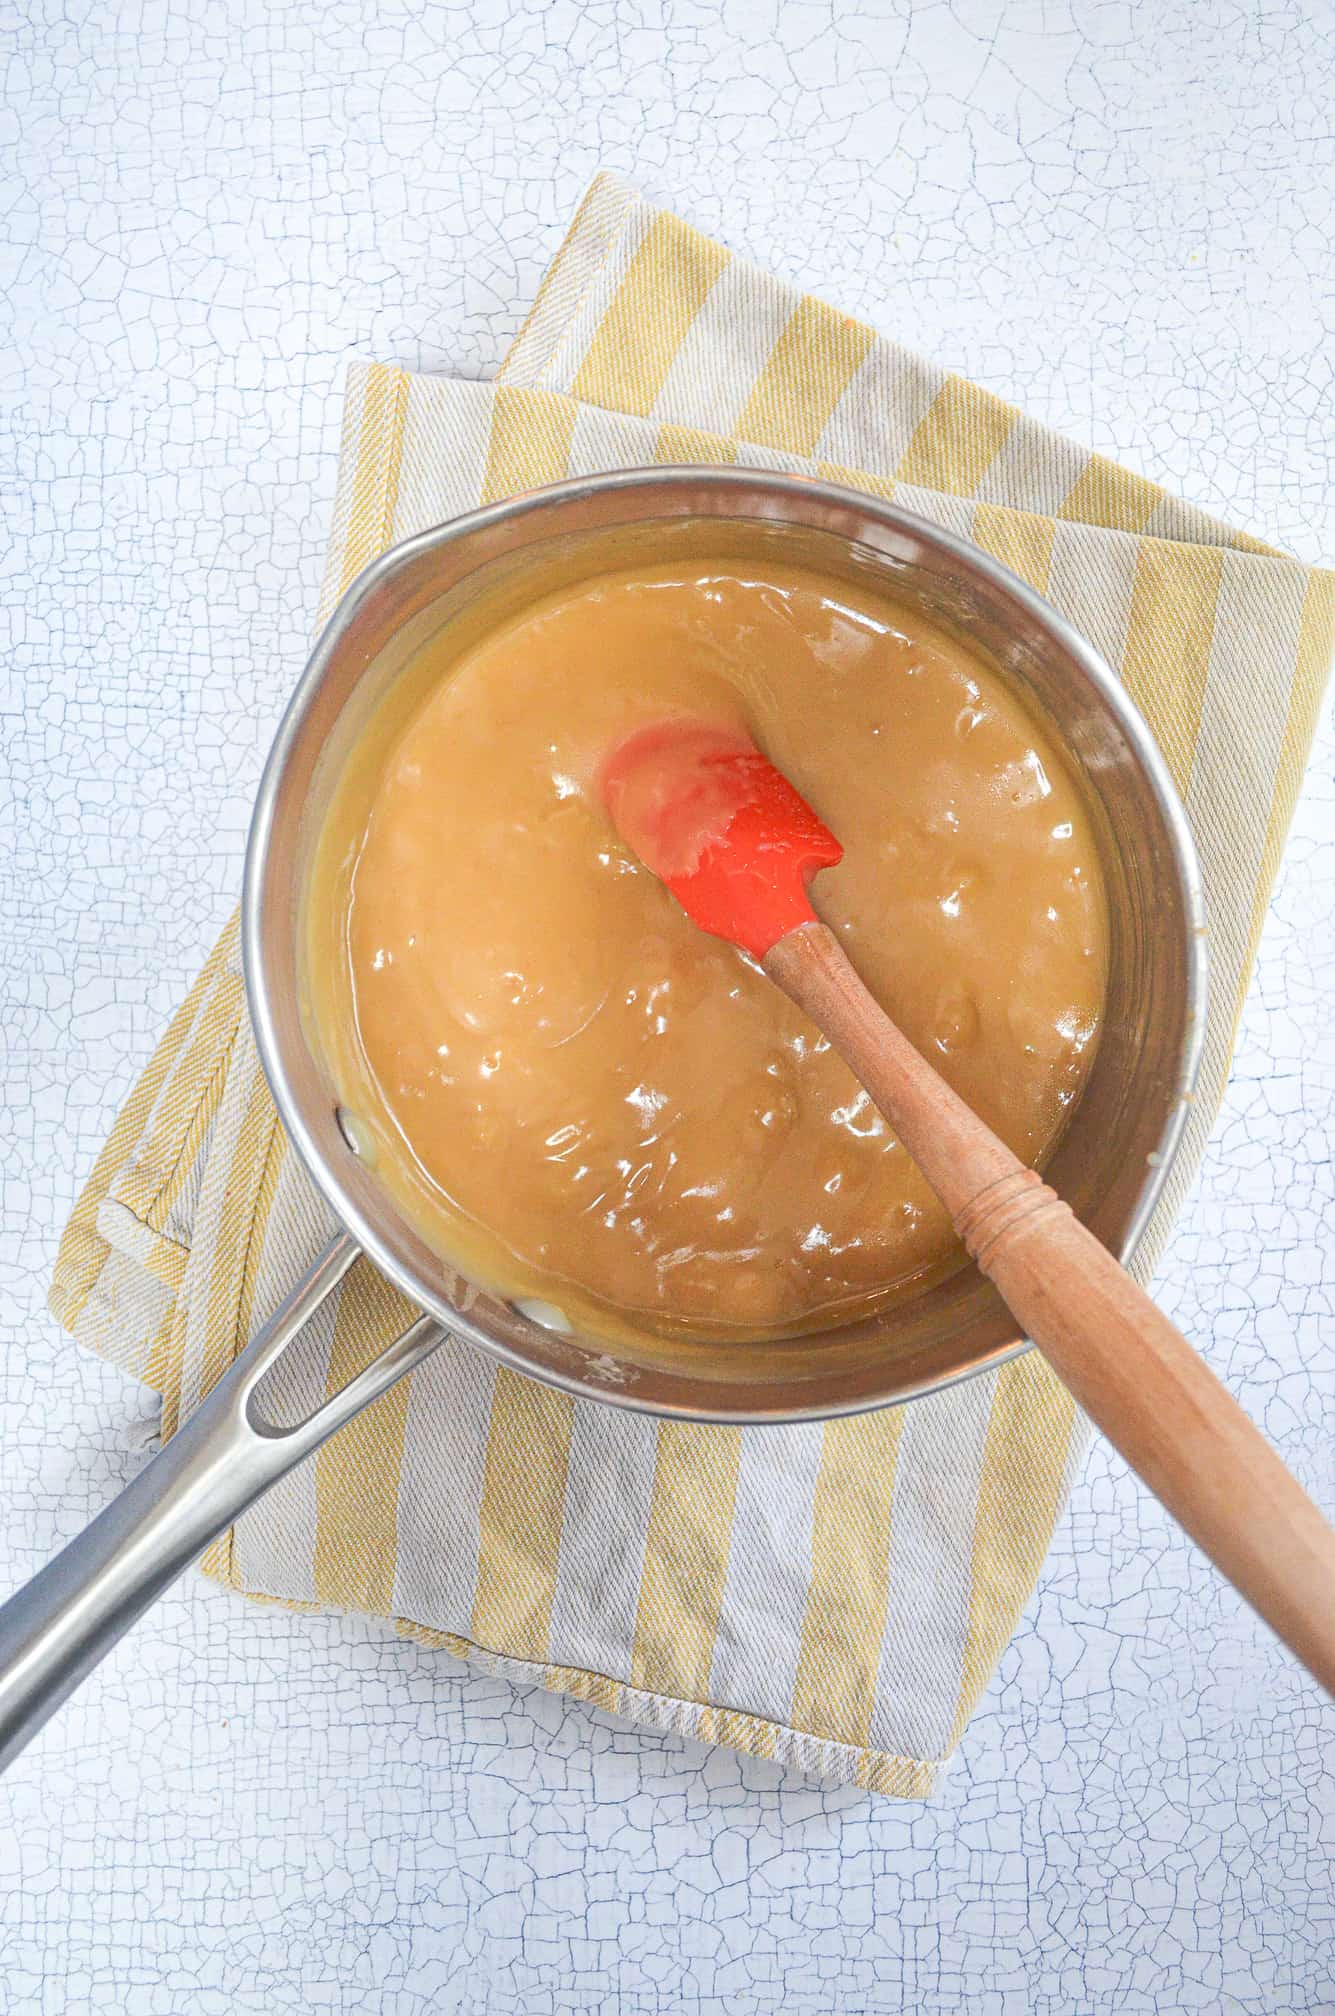
The mixture should then be placed over a medium-low heat and cooked, until its turned a gorgeous caramel colour and is thickened. This will take about 10 minutes, but this will depend on how big your saucepan is/how hight a heat you have it on, so use the middle picture below as a colour guide. The idea here is to thicken the caramel so it sets enough to hold in a bar shape and develop the caramelly flavour.
Personally, I hateee it when the caramel filling oozes out of a caramel slice every single time you go to take a bite, so I make my caramel a little thicker. But it is a personal preference, you may enjoy that runny caramel! Remember though, that once the caramel is ready you will be stirring in the peanut butter, and this will thicken the caramel a little. So take the caramel off the heat when its slightly looser than you’d like.
You can then pour the peanut butter caramel over the set biscuit base, and pop it back into the fridge till set – about one hour!
Making the chocolate topping
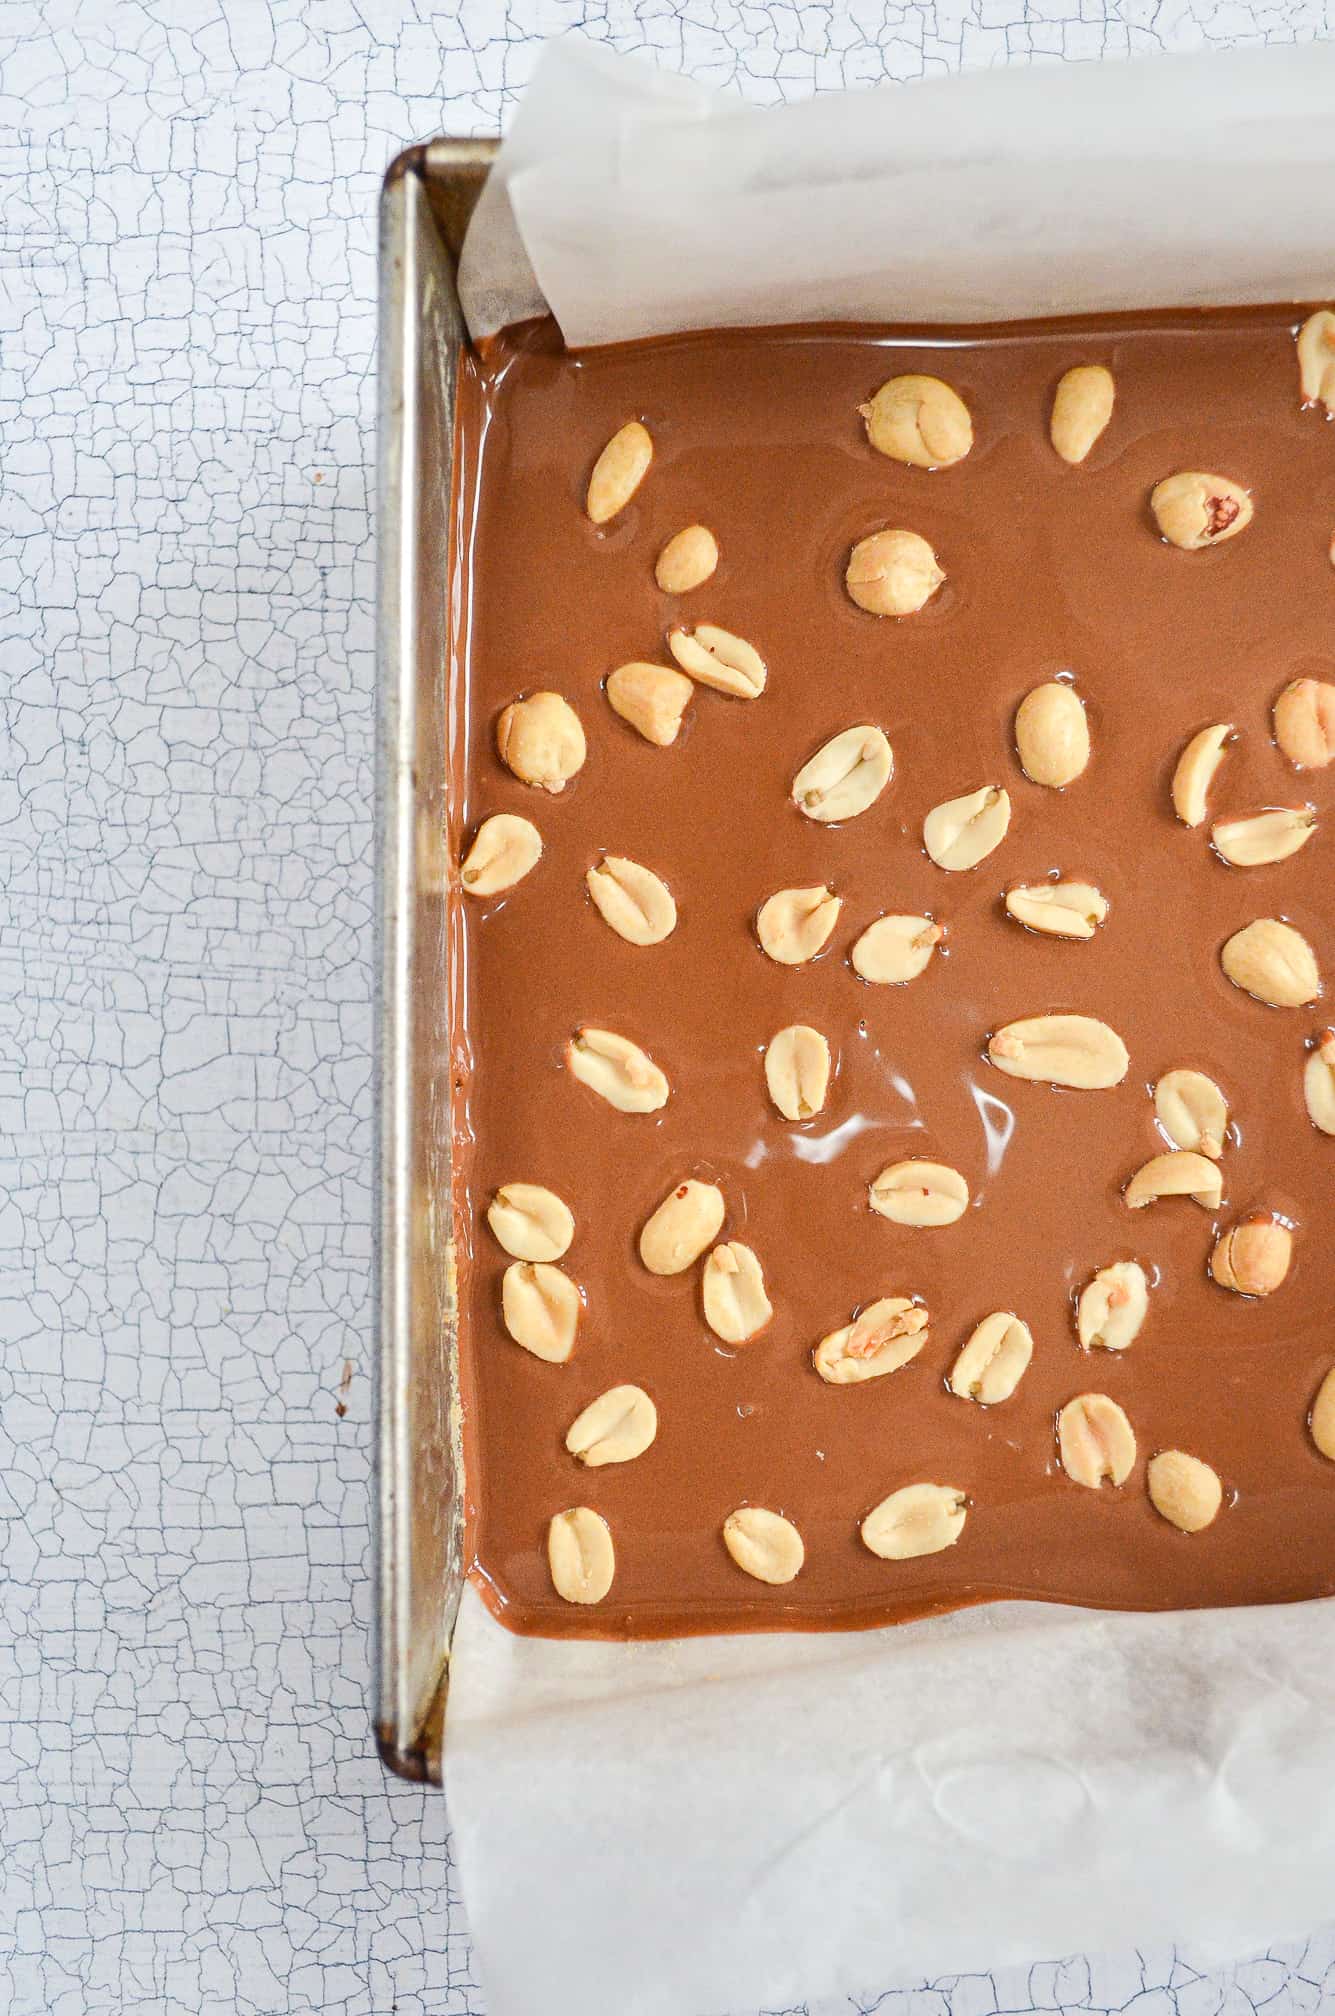
The final step is simply to pour melted milk chocolate on top of the set caramel and then sprinkle unsalted chopped peanuts on top. If you were feeling fancy, you could swirl two different chocolates together – milk and white chocolate would be especially nice! Or even use dark chocolate instead if you prefer a bitter chocolate.
The decoration is really up to you. Personally, I really like a caramel biscuit bar being an entirely sweet affair with the milk chocolate – especially as you have the saltiness from the peanut butter! But you can really do what you like here, and make it your own!
Once you’re happy with your decoration it will need to go back into the fridge one final time for the chocolate to set – this should take about one hour. Then you can slice and enjoy!!
Tips & Tricks
If your caramel is too runny its likely you didn’t cook it for long enough.- it should be on the heat for about 10 minutes. If your caramel is too thick, its likely you cooked it too long and at too high a heat. The caramel should be on a medium-low heat and for about 10 minutes, until its a medium brown colour.
To help avoid this, you can stir in 1tbsp of vegetable/neutral oil into the melted chocolate. This will help to avoid any cracking.
Yes! There are vegan substitutes for all of the ingredients available in most supermarkets. I haven’t tried it out myself, but I’d love to know if you do!
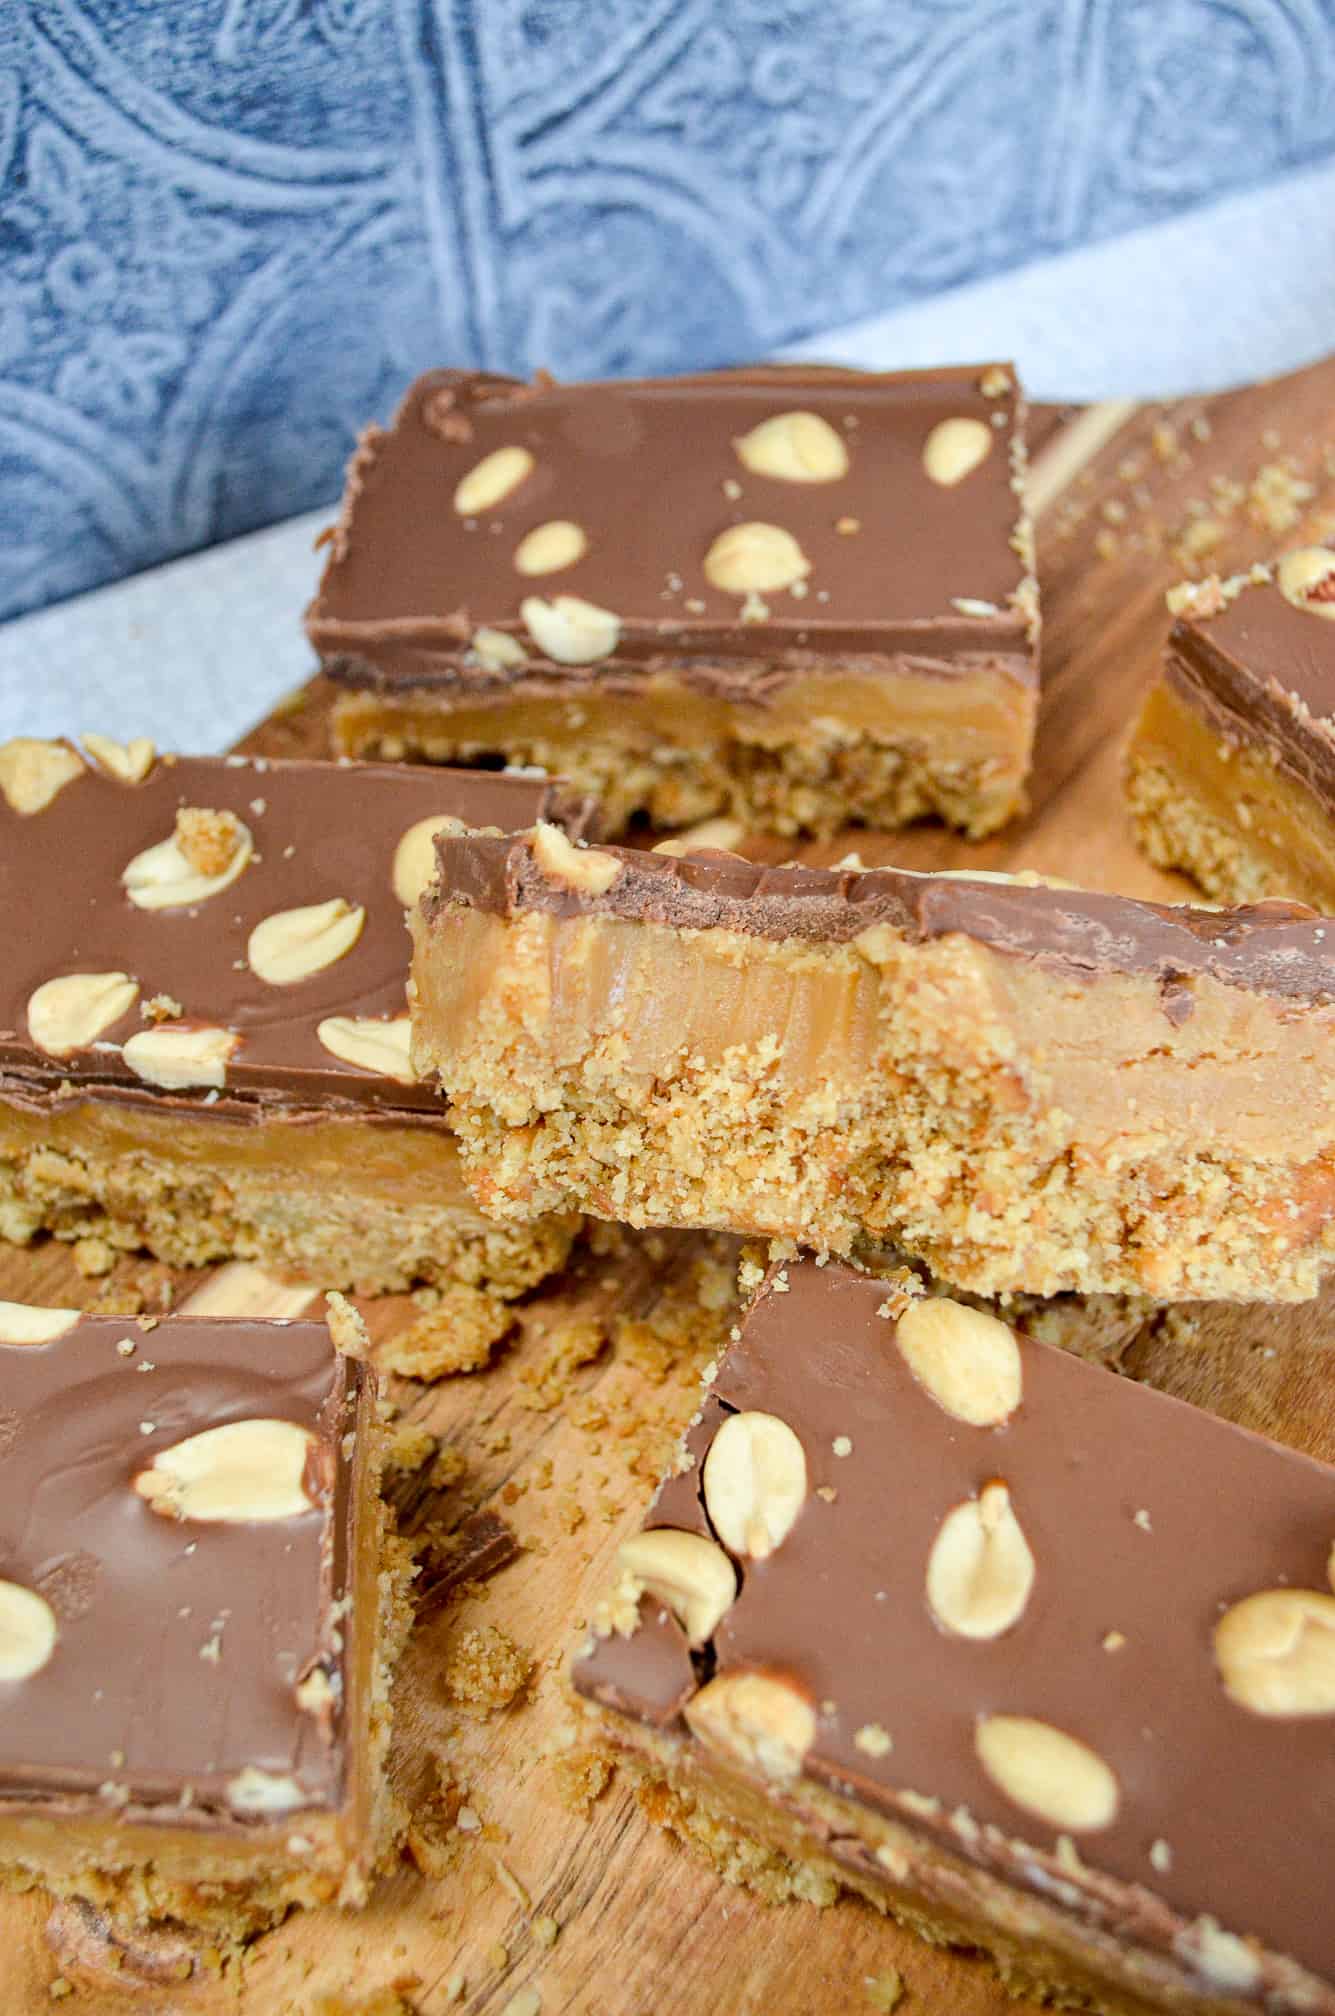
I absolutely love how these peanut butter caramel biscuit bars turned out. The base is buttery and crumbly, the peanut butter caramel is thick and creamy. The milk chocolate topping is silky and smooth, and the chopped peanuts add a great crunch! It’s salty, sweet, and soooo moreish. Seriously, you won’t be able to just have one!! But best of all, they’re so easy to make and look so impressive! Win win!
You may also like:
Peanut Butter Caramel Biscuit Bars
Ingredients
Base
- 300 g digestive biscuits
- 120 g unsalted butter
Caramel Filling
- 397 g condensed milk one tin
- 80 g light soft brown sugar
- 3 tbsp golden syrup
- 100 g unsalted butter chopped into small chunks
- 50 g peanut butter
Topping
- 300 g milk chocolate
- 30 g unsalted peanuts
Instructions
- For the base: Lightly grease a high-sided 20cm square baking tin and line with baking paper, ensuring the paper folds over the edge of the tin slightly, so you can use it to help remove the bars once set. In a food processor, or using a rolling pin and bag, crush the biscuits to a fine crumb. Then melt the butter, either in a heat-proof bowl in a microwave or in a saucepan on the hob. Then pour this into the biscuit crumbs and mix together until combined and starting to clump.
- Pour into the prepared baking tin, and press down with the back of a spoon or measuring cup to make a level base. Then place into the fridge to chill for 30 minutes.
- For the caramel filling: Combine the condensed milk, brown sugar, golden syrup and butter in a medium heavy-bottomed saucepan. Using a silicone spatular or wooden spoon, stir constantly over a medium-low heat until the mixture has thickened and turned a caramel colour. This will take about 10 minutes. Take off the heat and stir in the peanut butter. Then pour over the chilled biscuit base, spreading evenly and place back in the fridge to chill completely – about one hour.
- For the topping: Finally, melt the chocolate either in a heat-proof bowl in a microwave or on the hob using a bain-marie. Then pour over the top of the set caramel, and scatter on the peanuts. Place back into the fridge to chill until set, this should take about 1 hour. Then cut into 8 bars or 16 squares and serve.