Autumn is officially here guys. The leaves are falling…literally... and I’ve got the perfect recipe for you to cuddle up with a big mug of tea!

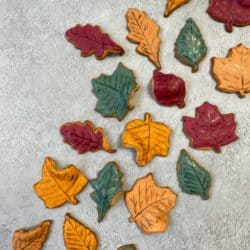
I’ve always been a fan of the colours of autumn. Everywhere looks so gorgeous and as a child lots of fallen leaves meant great fun crunching them on the way home from school. So when I found these leaf cookie cutters, I couldn’t resist turning them into a delicious treat.
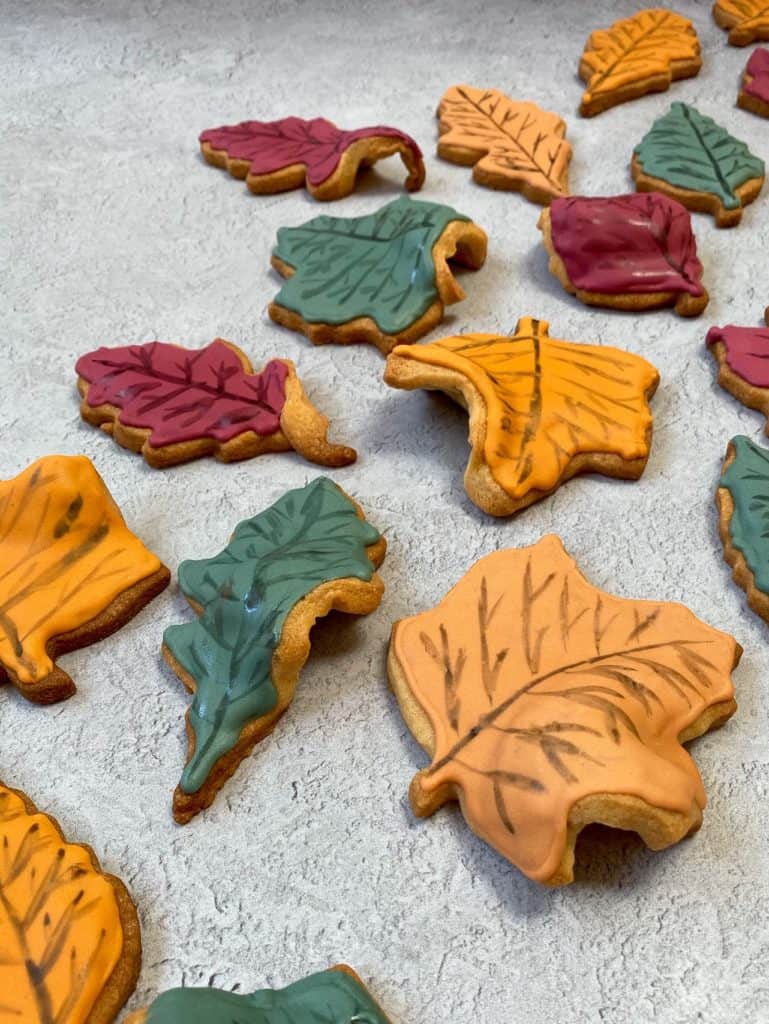
I wanted to create the illusion that the leaf biscuits had fallen down in the wind, so some of them are twisted or bent, rather than just being a flat biscuit. This was actually easier to achieve than you might think, though I did have a mini disaster on my first attempt. My batch of biscuits were chilling in the fridge, minding their own business, when somehow the tray slipped and upended. I didn’t hear any of this, so I innocently opened the fridge to be met with a biscuit disaster scene.
Some were stuck upside down to the milk, some were in the fridge door tray and some had completely folded ….and actually really resembled a scrumpled leaf. So…if anything they were trying their best to help me turn my leaf biscuits into reality… haha
So obviously that wasn’t how I actually created the leaf shapes. Though chilling is still key! Once I’d cut out the leaf shapes, I placed them into the fridge to chill for at least 15 minutes. This helps your biscuits to maintain their shape when baking, which is even more necessary when baking a more intricate design like the leaves.
Then when it came to baking, I tore a few small pieces of baking paper off the roll and scrunched them up into little balls. I placed the balls under about half of the biscuits on the baking tray. I put some directly underneath, some under one side and some under one small edge of the leaf. The biscuits are pretty hard after being chilled, so carefully bend them over the scrunched paper, just enough that they won’t slip off and fall flat onto the tray again.
I planned to take an up-close picture of the uncooked biscuits like this, but annoyingly I forgot. Total fail! But I’m sure you get the gist 🙂
These biscuits aren’t soft at all – they retain a snap even after a week! So you don’t need to worry about leaving the scrunched paper under the biscuits when they’re cooling, just remove and use them on your next batch of biscuits.
Now, onto the icing! Which is probably the lengthiest process time wise, but also quite therapeutic. Its a great bake to create when you’ve got something fun on the TV, and even better if its cold and rainy outside so you feel extra cosy! Though that might just be me…!
How to ice leaf biscuits with royal icing:
So, you’ve got your cooled leaf biscuits ready, now what? To ice a biscuit like this, you need to use royal icing. This is different to regular icing sugar, as it has egg white powder included which helps the icing to set and dry to a hard surface. This is how you can create beautifully layered and intricate biscuit designs. You can buy royal icing already made, which is definitely the easiest route and what I would usually do. However, when I went to make these I couldn’t find any anywhere!
Which in some ways was a good thing, as it gave me a chance to make my own from scratch and I realised just how simple it was. All you need is egg white powder (you get this in little packets, like you would cream of tartar/bicarb) and regular icing sugar. Firstly you need to mix water in with the egg white powder until its frothy and looks like a liquid egg white, then whisk in the icing sugar. It really is as simple as that. The key to icing biscuits however, is getting to the correct ‘flood’ consistency. This is when the icing dissolves into itself in around 10 seconds. You don’t want it to take any longer or shorter than this, as it’ll either spill over the sides of your biscuit or be impossible to spread.
You will need a couple of pieces of equipment to help you flood the biscuits. Four piping bags and a scribe. The piping bags are fairly obvious, this is to pipe an outline on each biscuit before flooding with the icing. The scribe may be a little more confusing. You may be wondering what the hell a scribe even is? Its essentially a small needle type tool, that is really useful when coaxing icing to spread on the biscuit. You could use a cocktail stick or wooden skewer instead, though the scribe is my preferred tool.
Once you’ve iced all the biscuits, you need to let them dry at room temperature. They will set to a hard finish, which will take around an hour. After that you can add the details of the leaf that really brings it alive.
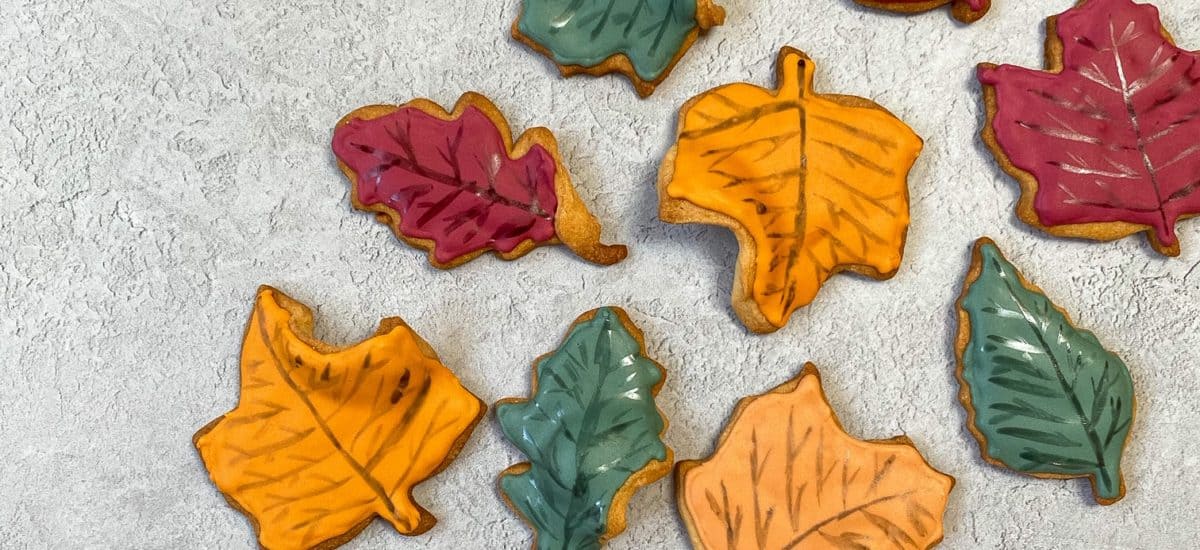
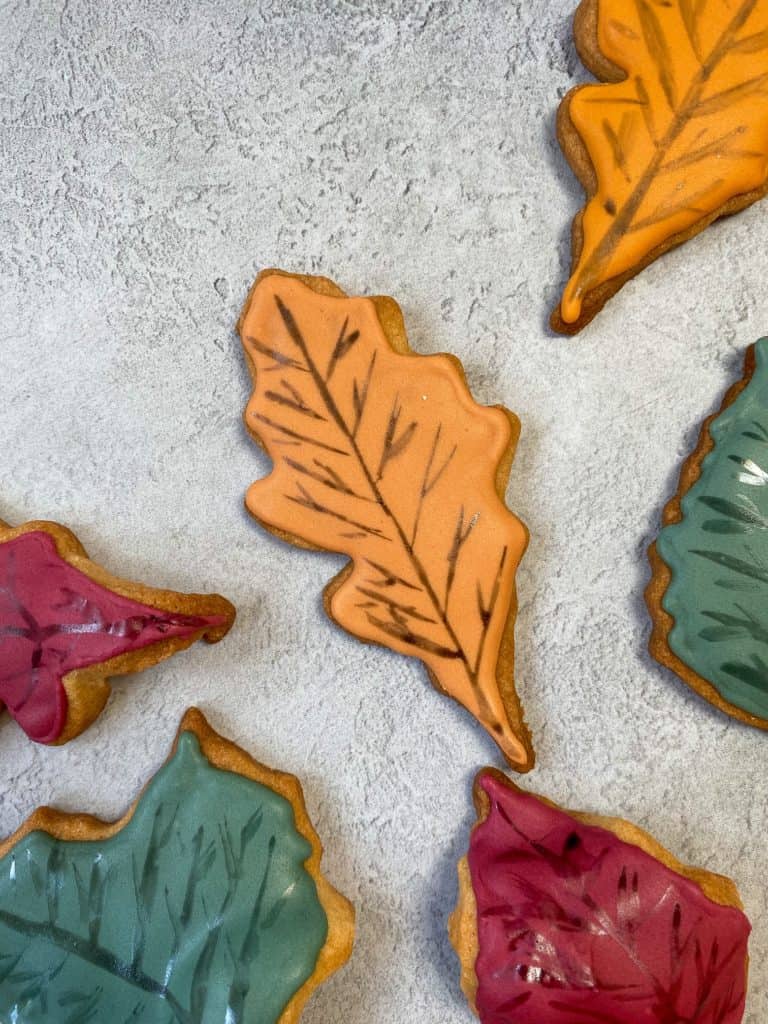
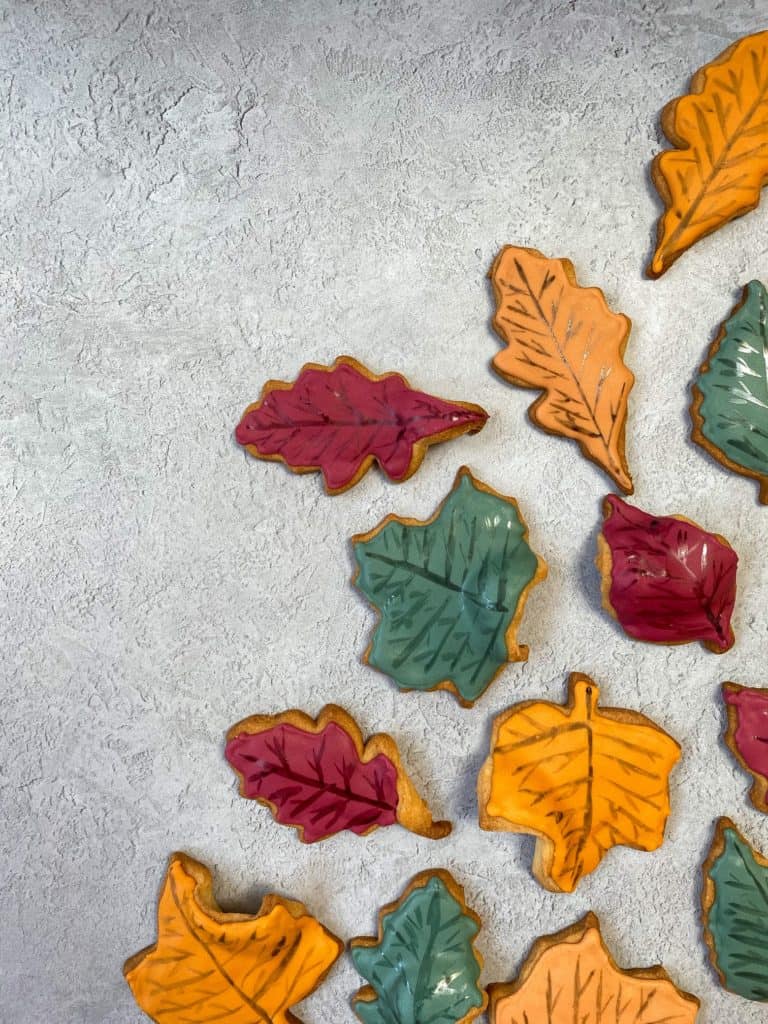
For this, I mixed a little black food colouring with some water and lightly painted on the veins of the leaf. Now I’m no artist, so don’t be nervous of this! The more rustic looking the better in my opinion!
And there you have it, beautiful realistic looking autumn leaf biscuits. Oh and did I mention the biscuits are maple flavoured?? The perfect autumnal treat!
On with the recipe!
Maple Autumn Leaf Biscuits
Ingredients
Biscuits:
- 320 g plain flour
- 150 g caster sugar
- 1/4 tsp salt
- 150 g butter chilled and diced
- 1 large egg
- 45 ml maple syrup
Icing:
- 500 g royal icing sugar (or icing sugar and three sachets of egg white powder)
- 6 tbsp warm water
- gel food colouring leaf colours and black
Instructions
- For the biscuits: Preheat the oven to 180C/160C Fan/Gas Mark 4. Then line one large or three medium baking trays with baking paper and set aside.
- Whisk the dry ingredients together in large bowl, then using your hands rub in the cold butter until it resembles breadcrumbs. In a separate bowl, mix the egg and maple syrup together then pour into the butter mixture. Using your hands, knead until a dough forms.
- Liberally flour your work surface, and tip your dough out. Then using a rolling pin, roll out the dough until roughly 1/2inch thick. Then using your leaf cookie cutters, cut out leaf shapes and place onto the baking trays with a little room around each. Try to only re-roll the dough once if needed. Then place in the fridge to chill for 15 minutes,
- Tear a few scraps of baking paper off and scrunch into small balls. Then remove the chilled baking trays from the fridge and place the paper balls under around half of the biscuits. Place some directly underneath the leaf, some under one edge or side. Then bend the leaves slightly around the paper balls.
- Bake the biscuits for 16mins until lightly golden. Leave the biscuits to cool on the tray for a few minutes, before removing the paper balls and placing the biscuits on a cooling rack to cool completely. Repeat until all the biscuits have been baked.
- For the icing: Mix the warm water with the royal icing sugar in a large bowl, until you reach 'flood' consitency. Check this by holding the whisk up above the bowl and letting the icing drizzle back in. You want the icing to dissolve back into the surface in 10 seconds. If it takes less time than this, add more sugar. If it takes more time than this, add a little more water.
- (If you're making your own royal icing, place the egg white powder into a bowl and mix in 2tbsp of the warm water. It will be slightly lumpy at this stage, then add the remaining 4tbsp warm water and whisk until the mixture is frothy like egg whites. Finally add icing sugar in and whisk again until smooth and at flood consistency.)
- Divide the icing into four bowls and mix in your chosen leaf food colourings to each. Then place each colour icing into a piping bag and snip the very end to create a small opening.
- To decorate: Pipe the outline of your cooled biscuit with one of the coloured icings, then 'flood' liberally and using a scribe (or toothpick) coax the icing to spread evenly, Then place on a cooling rack to dry and harden. Repeat with all biscuits.
- Finally, in a small bowl mix a little black food colouring with a dash of water. Then using a paintbrush, paint veins onto the dry and hard icing. Then leave to set again.