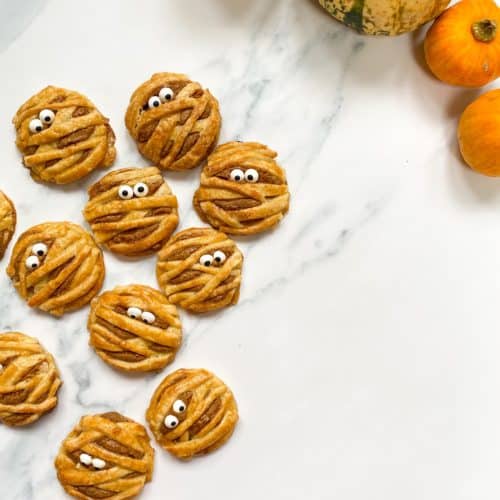
'Mummy' Biscoff Hand Pies
These super cute hand pies are the perfect bake for your Halloween party! Spookily cute, super delicious and so easy to create!
Ingredients
Pastry
- 400 g plain flour
- 1 tsp salt
- 2 tbsp caster sugar
- 200 g unsalted butter cold
- 100-125 ml ice cold water
Filling
- 260 g smooth Lotus Biscoff spread
Glaze
- 1 medium egg beaten
Decoration
- 32 edible eyes
Instructions
- For the pastry: Mix the flour, salt and sugar together in a bowl, then add the chilled butter and rub together between your hands until it resembles breadcrumbs. Slowly add the water until the pastry holds together when squeezed (you may not need all the water). Then tip the dough onto a lightly floured work surface and gently knead together. Divide into two flat discs, one a little larger than the other, wrap them both in clingfilm and chill for 1 hour.
- Preheat the oven to 200C/180C Fan/Gas Mark 6. Then lightly dust the work surface with flour and roll out the larger piece of pastry until it is a few millimetres thick. Using a 7cm cookie cutter, cut out 16 circles and place onto a large baking tray lined with baking paper. Then roll out the smaller piece of pastry until a few millimetres thick and using a knife, cut into strips. Keep the strips uneven (i.e. some wide, some thin) as this will help make the strips look more authentic. Then set aside.
- For the filling: Place the Biscoff spread into a small bowl and mix with a spatula to loosen slightly. Then divide the filling between the 16 circles, placing a blob onto the middle of each.
- For the glaze: Using a pastry brush, lightly dab the beaten egg on the exposed pastry (around the Biscoff blob). Then lay strips of differing sizes in a random pattern over the Biscoff spread, pressing down at the edges to 'seal' the pies. Then trim the edges of the strips so the circle is even. Repeat this for all the pies, then chill in the fridge for 20 minutes.
- Dab the remaining the beaten egg over the tops of the pastry strips and then bake for 20 minutes until golden brown.
- Place the tray on a cooling rack and leave for 2-3 minutes. Then press the edible eyes into each pie, and serve warm.
Notes
Will last for 3-4 days in an air-tight container.