I have a confession.
I am obsessed with watching Instagram videos of cakes. Specifically cakes being lavishly smothered in buttercream, covered in intricately piped buttercream flowers or ganache dripped round the edges. Its taking over my life.
Craig is so sick of watching them over my shoulder, but its my absolute guilty pleasure! Its super satisfying and so therapeutic.
So when it came to making my sisters birthday cake, Instagram was my first source for inspiration. Buttercream flower wreath cakes are all over Instagram, Pinterest, YouTube…you name it! So I thought I’d give it a try. I actually practised the roses on some cupcakes a few weeks back (blog post to come!) and let me tell you it is notttt as easy as people make it look! But practise makes perfect and all that!
I used swiss meringue buttercream for the flowers, the light texture is perfect for this kind of piping. Although in the August weather you do need to work quickly so it doesn’t get too warm, it makes it impossible to pipe the delicate petals then!
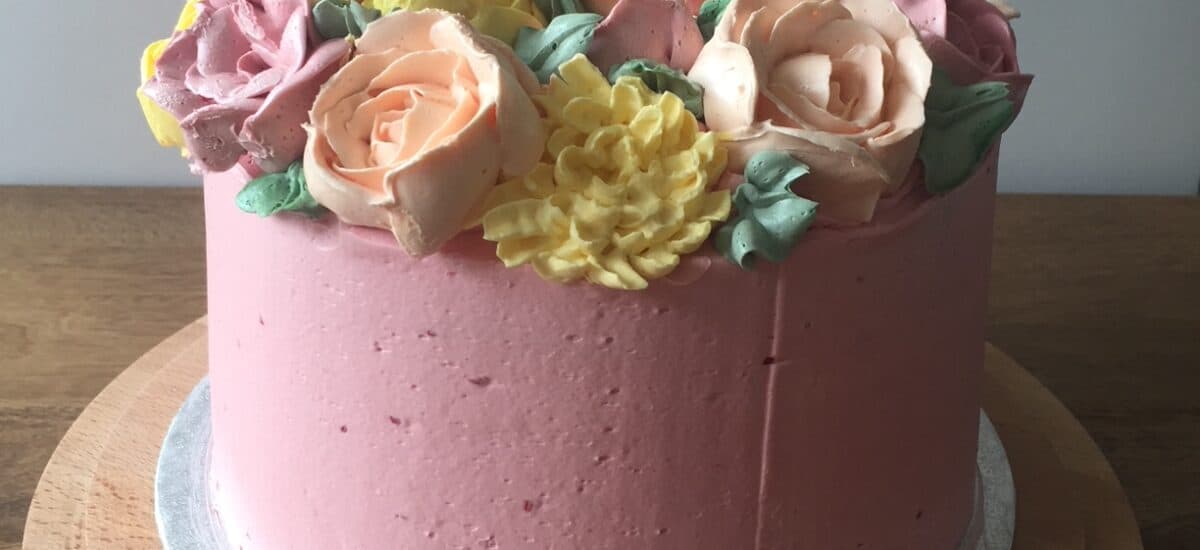
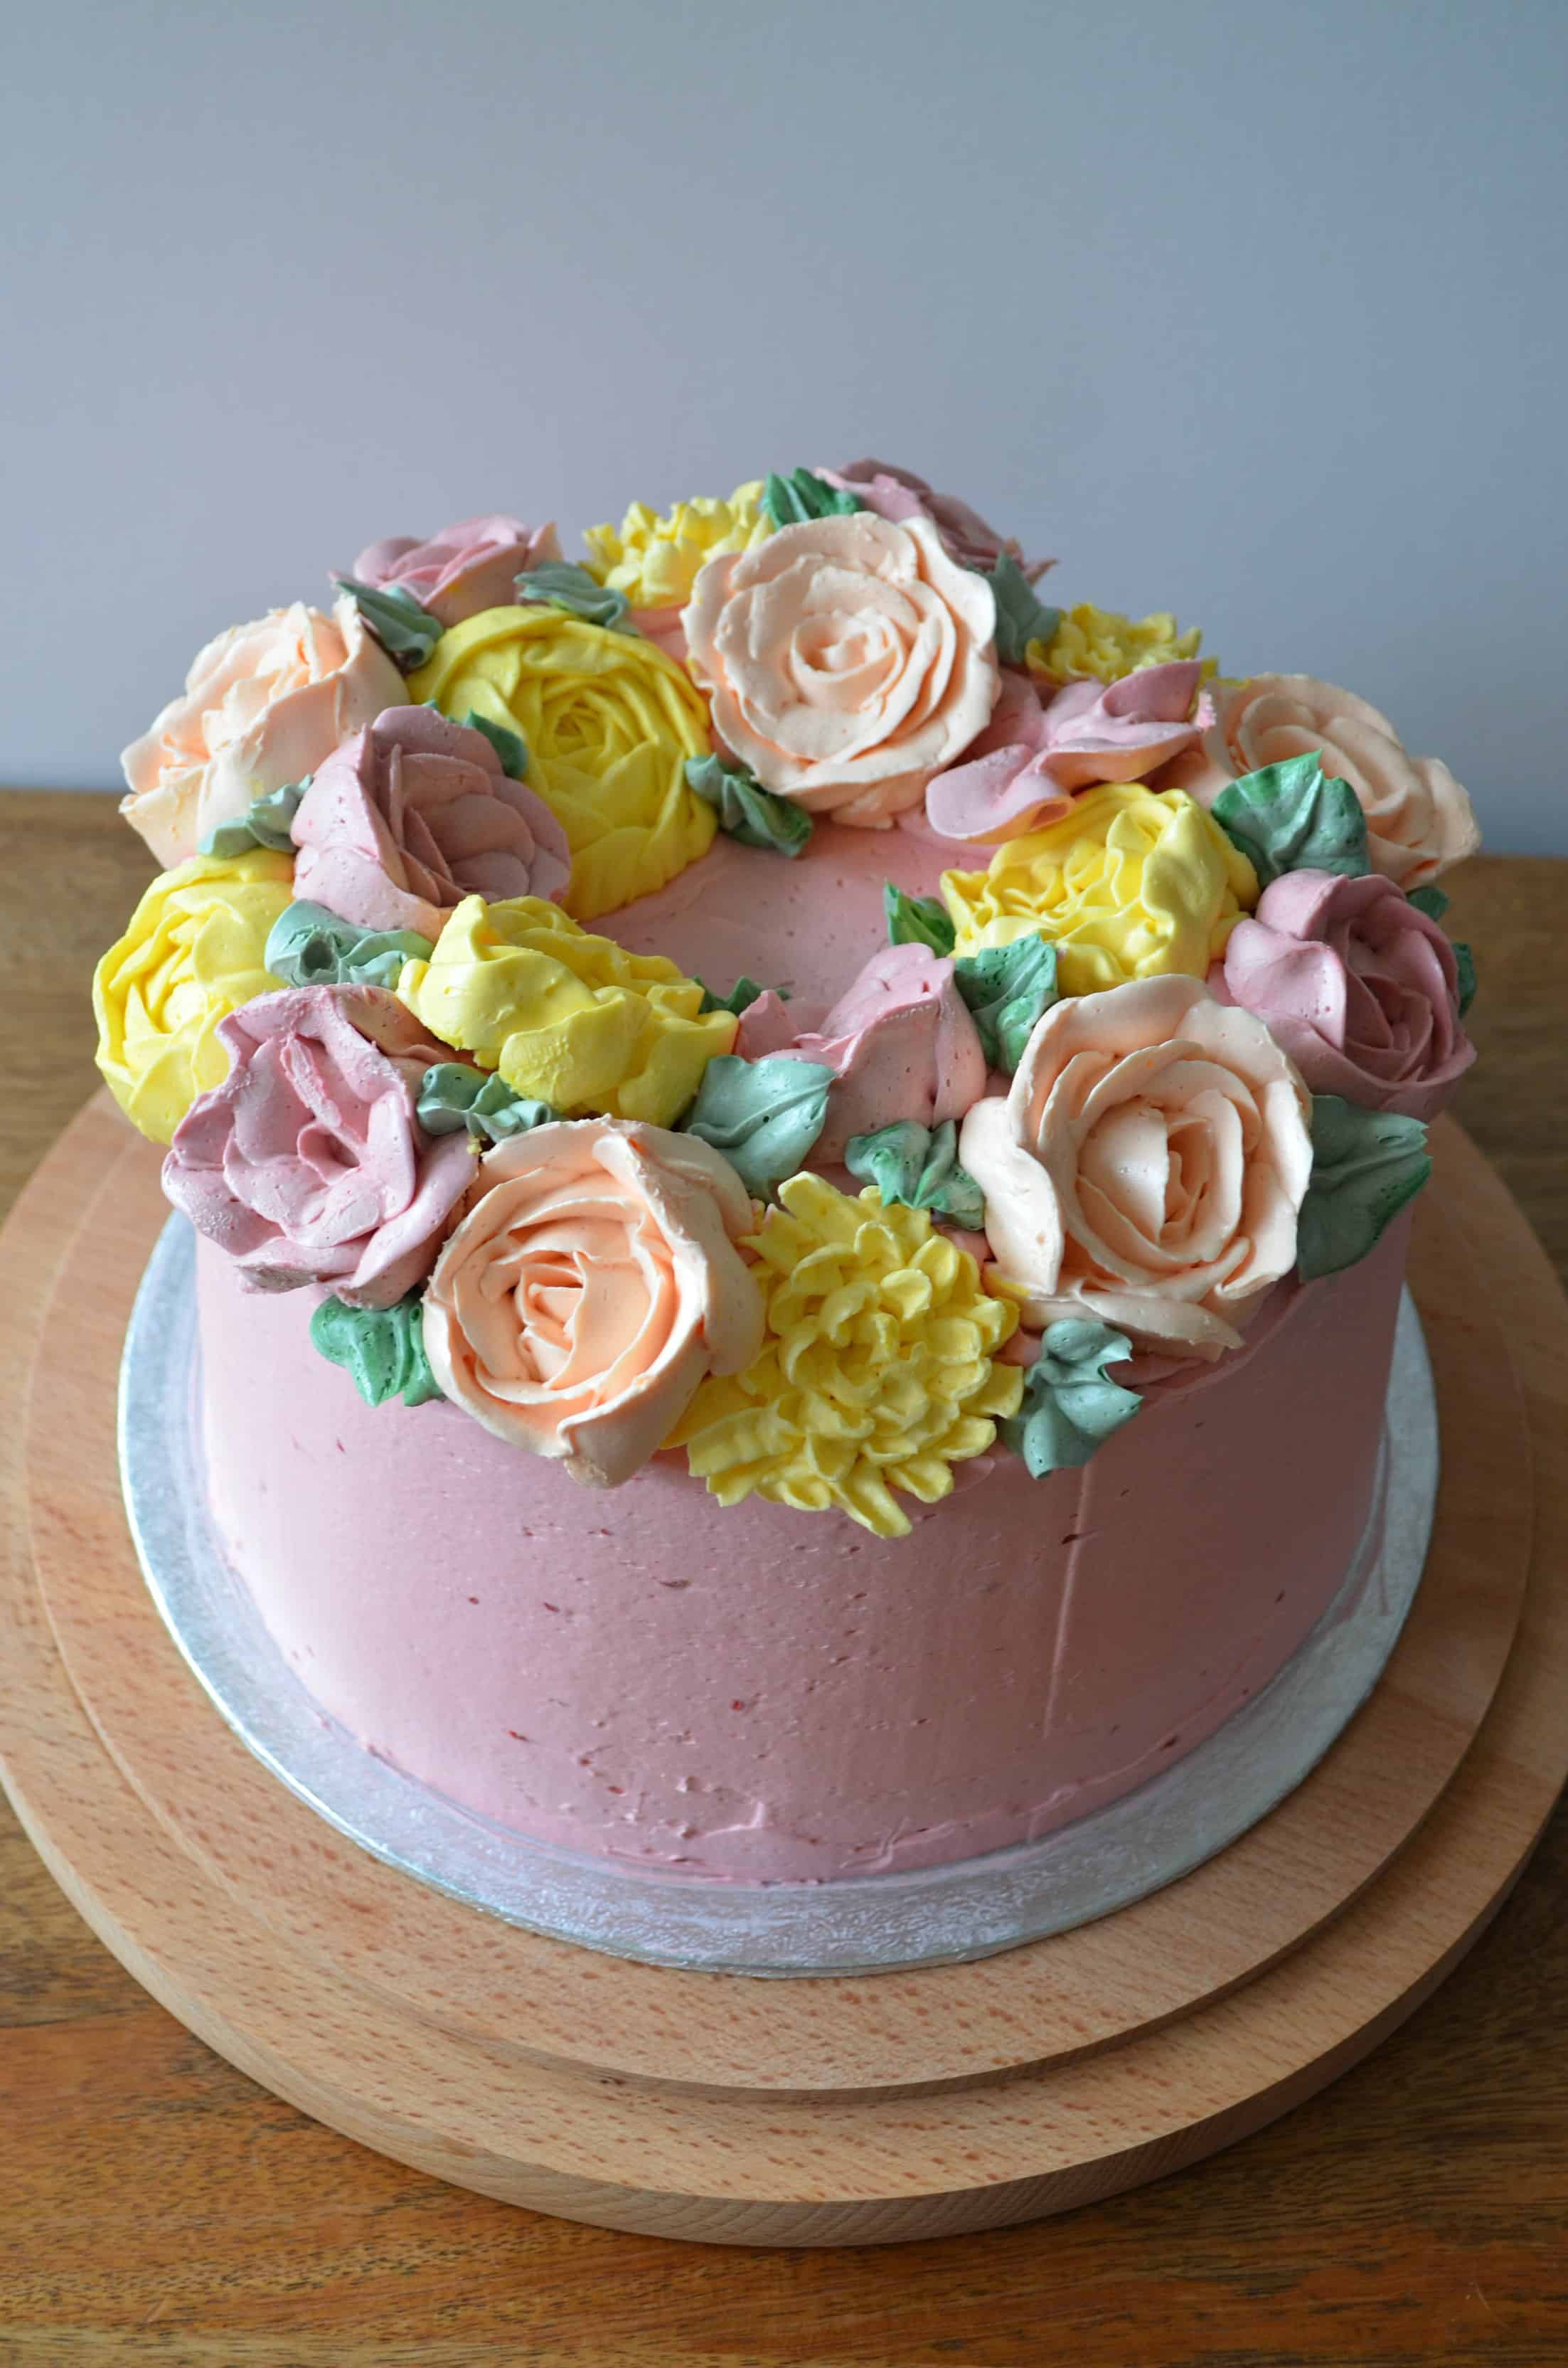
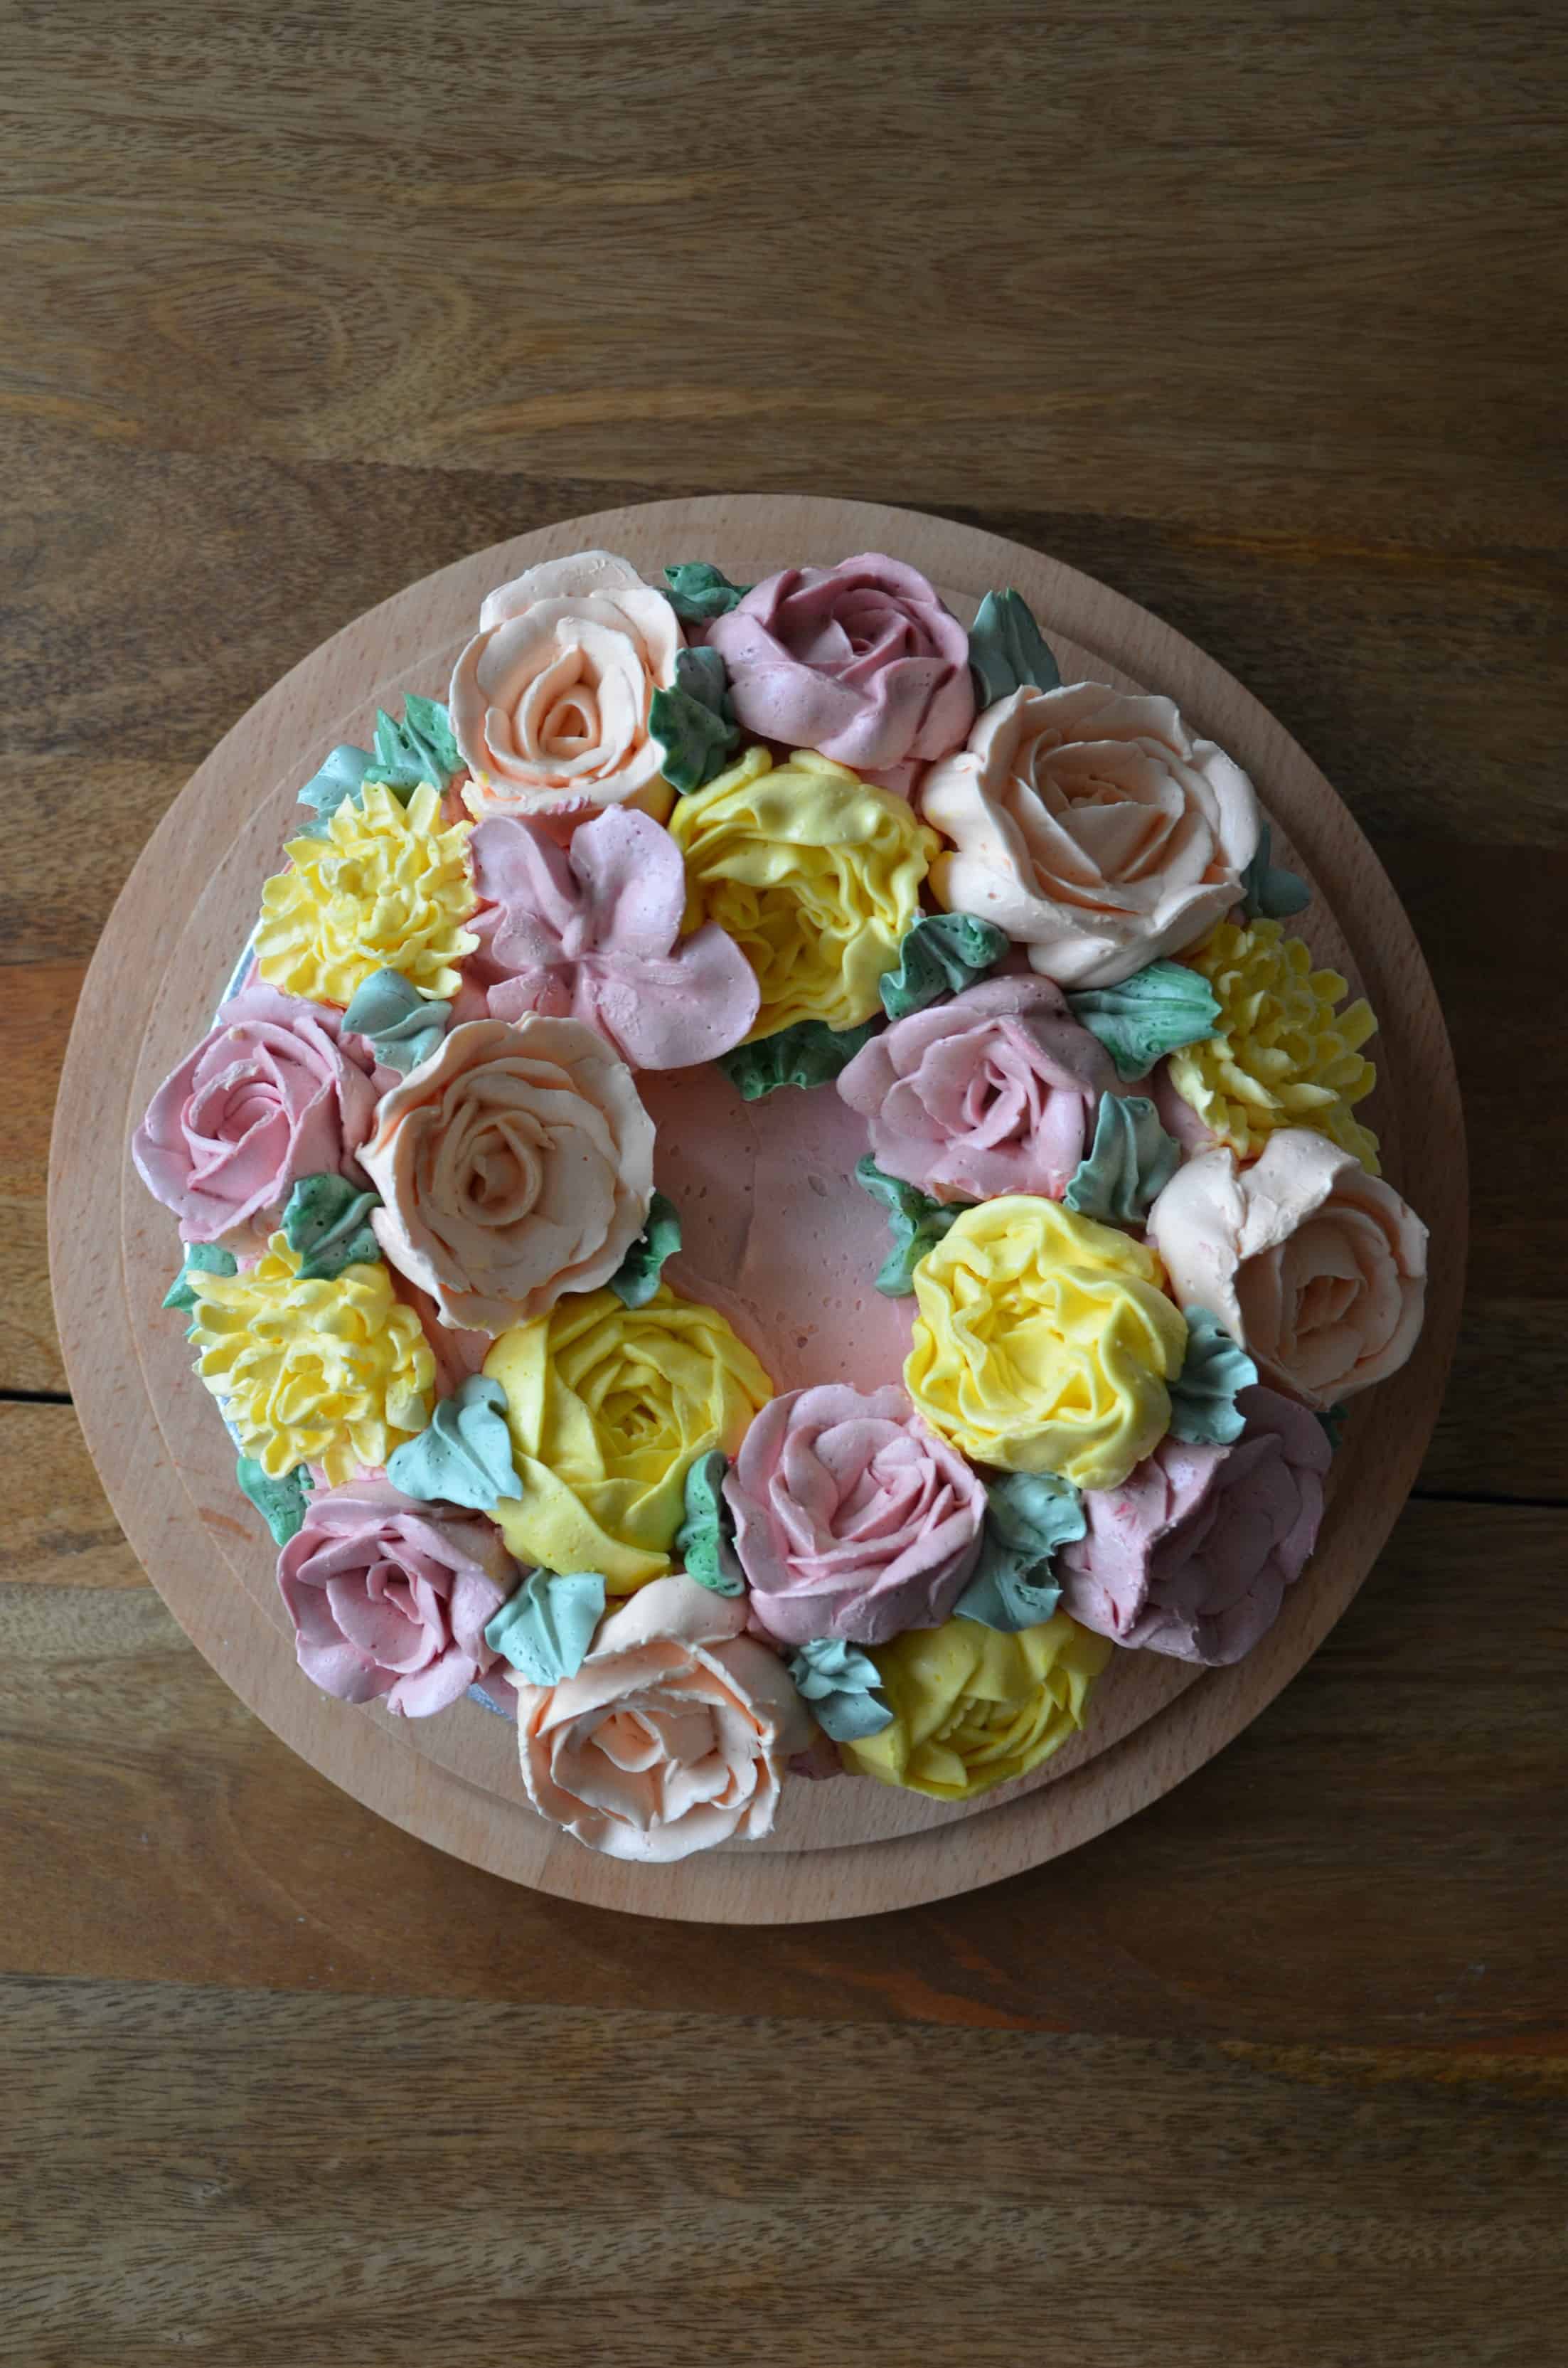
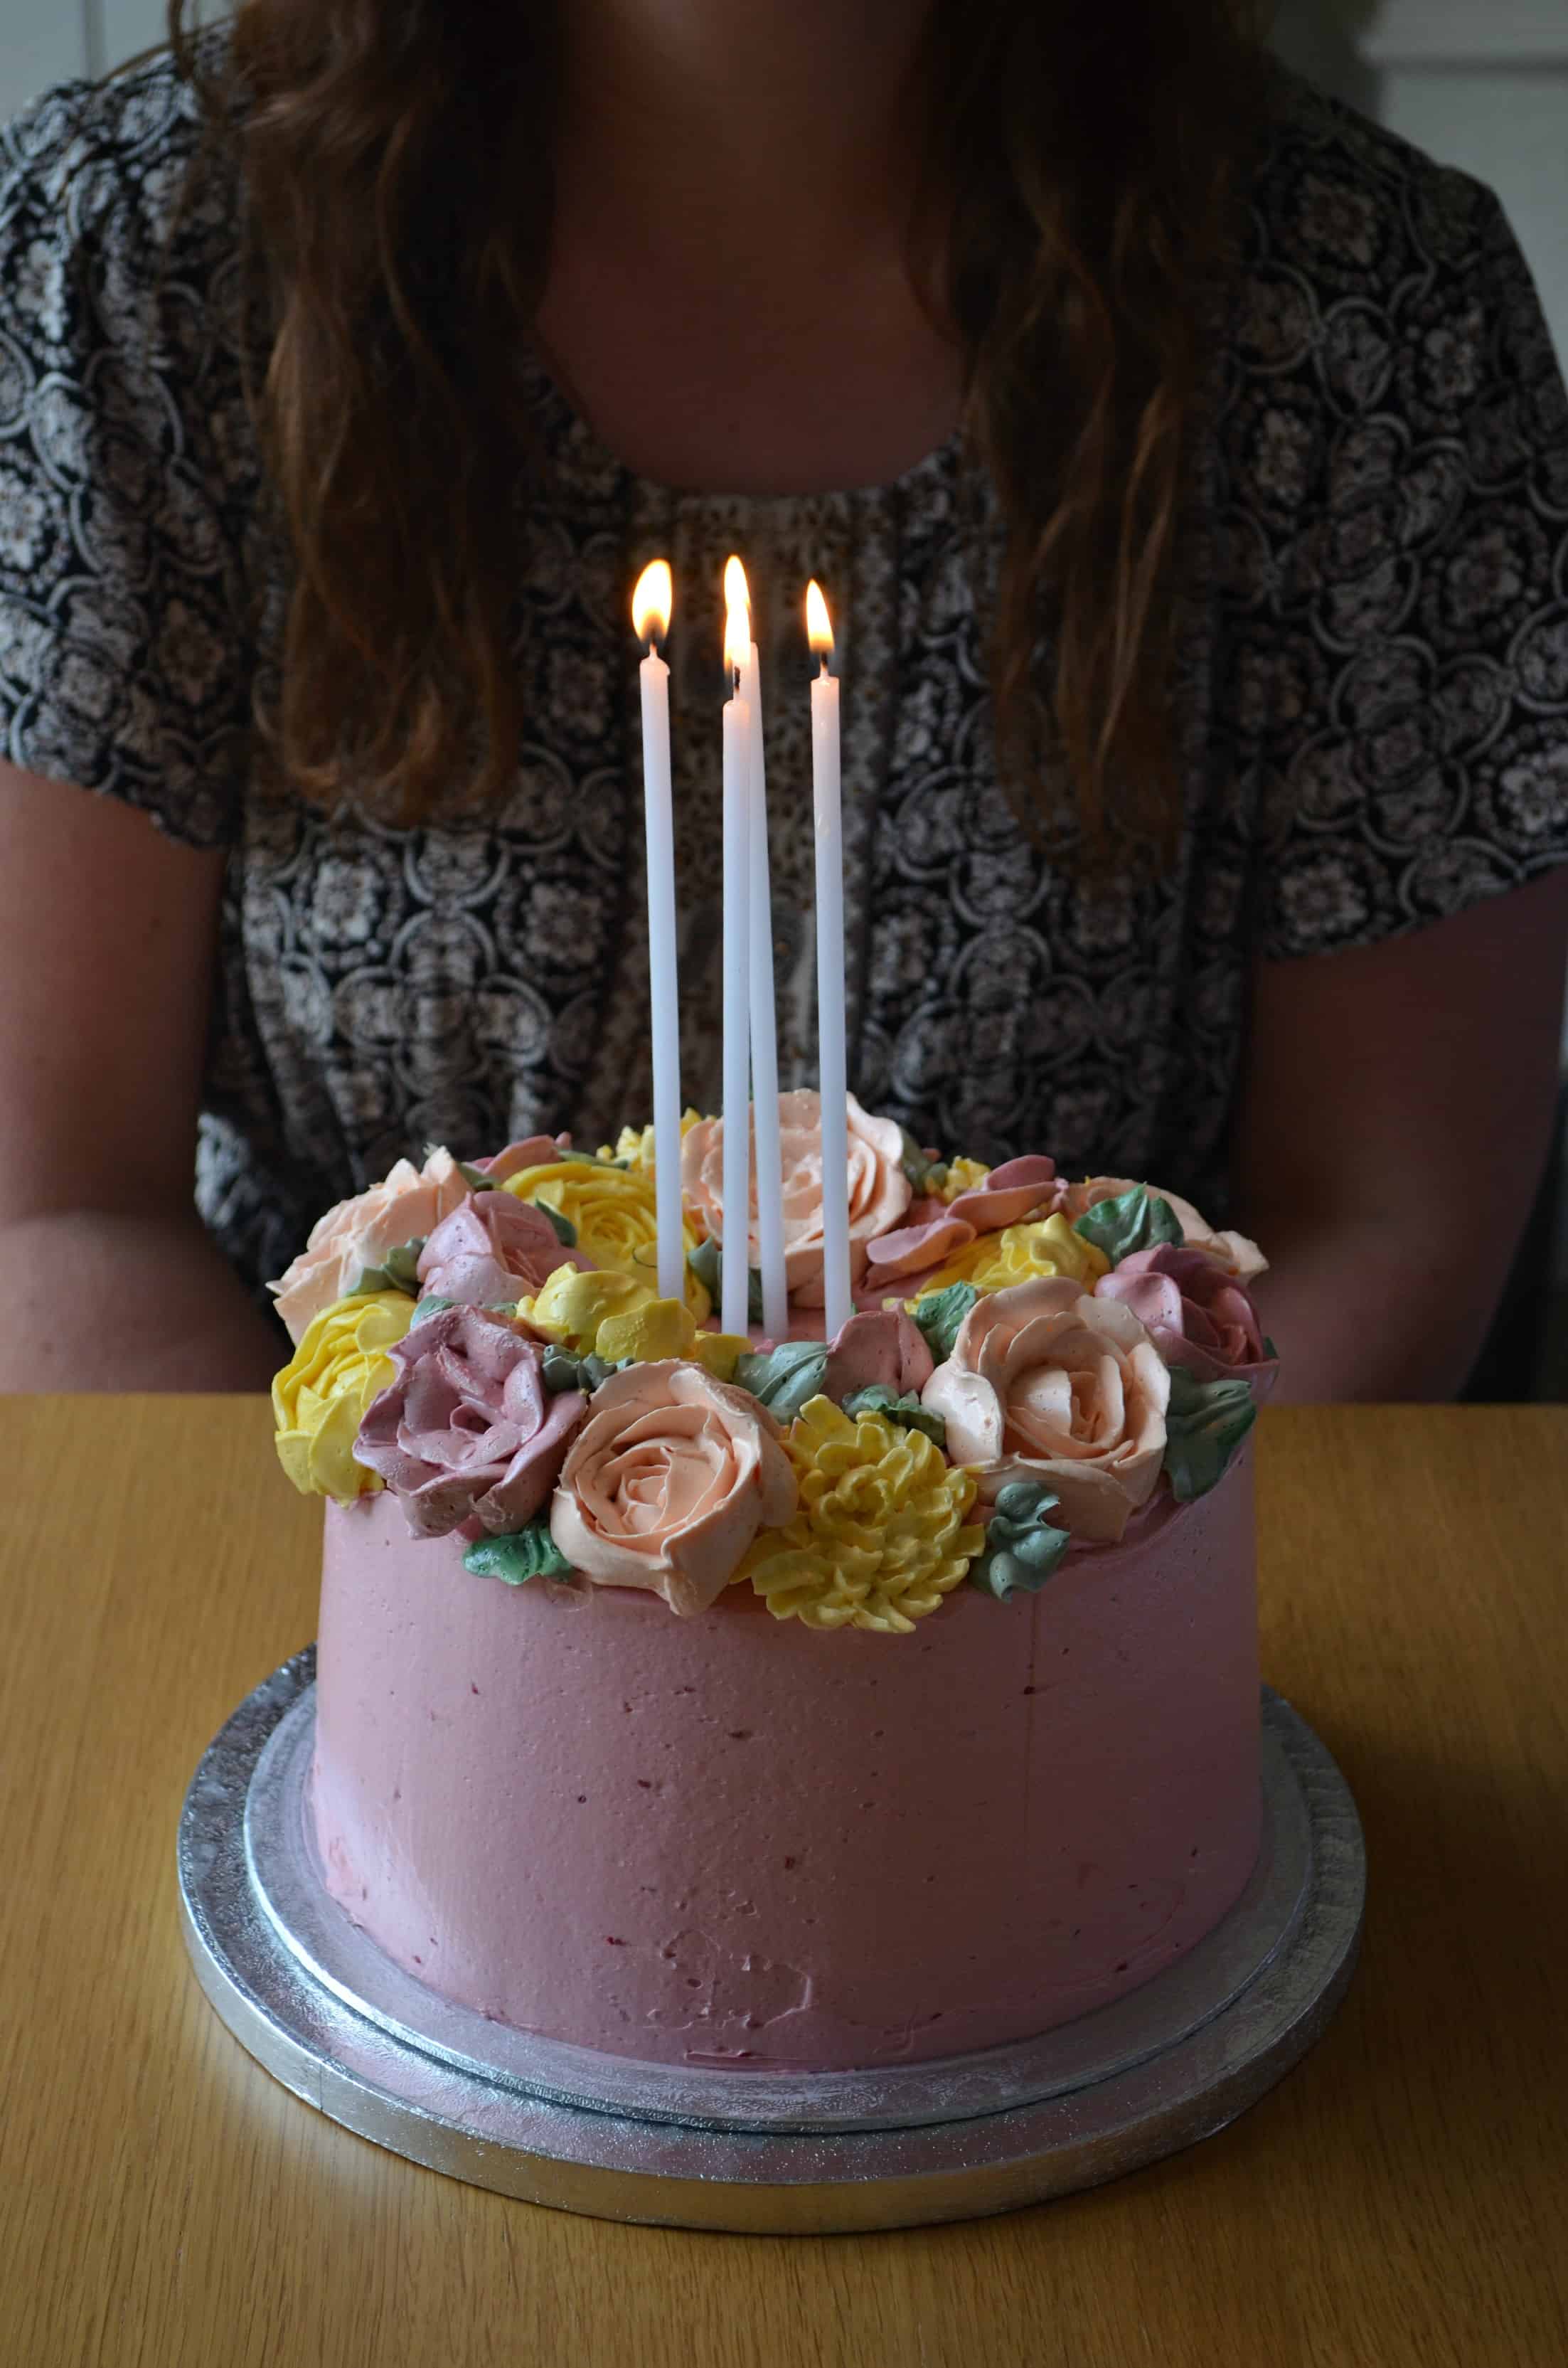
I made about 25 buttercream flowers in total, though I only used 19 in the end. I made roses, ranunculus, chrysanthemums, blossoms and topped them all off with leaves! The leaves were piped direct onto the cake though – thats the fun final touch!
To make the flowers you absolutely need a flower nail. They’re usually included in most piping sets, so you might already have one! If not, you can buy them easily on Amazon. You also need to cut a load of squares out of baking paper, I promise its not as labour intensive as it sounds. Once you have both those things and an array of piping tips you’re all set up!
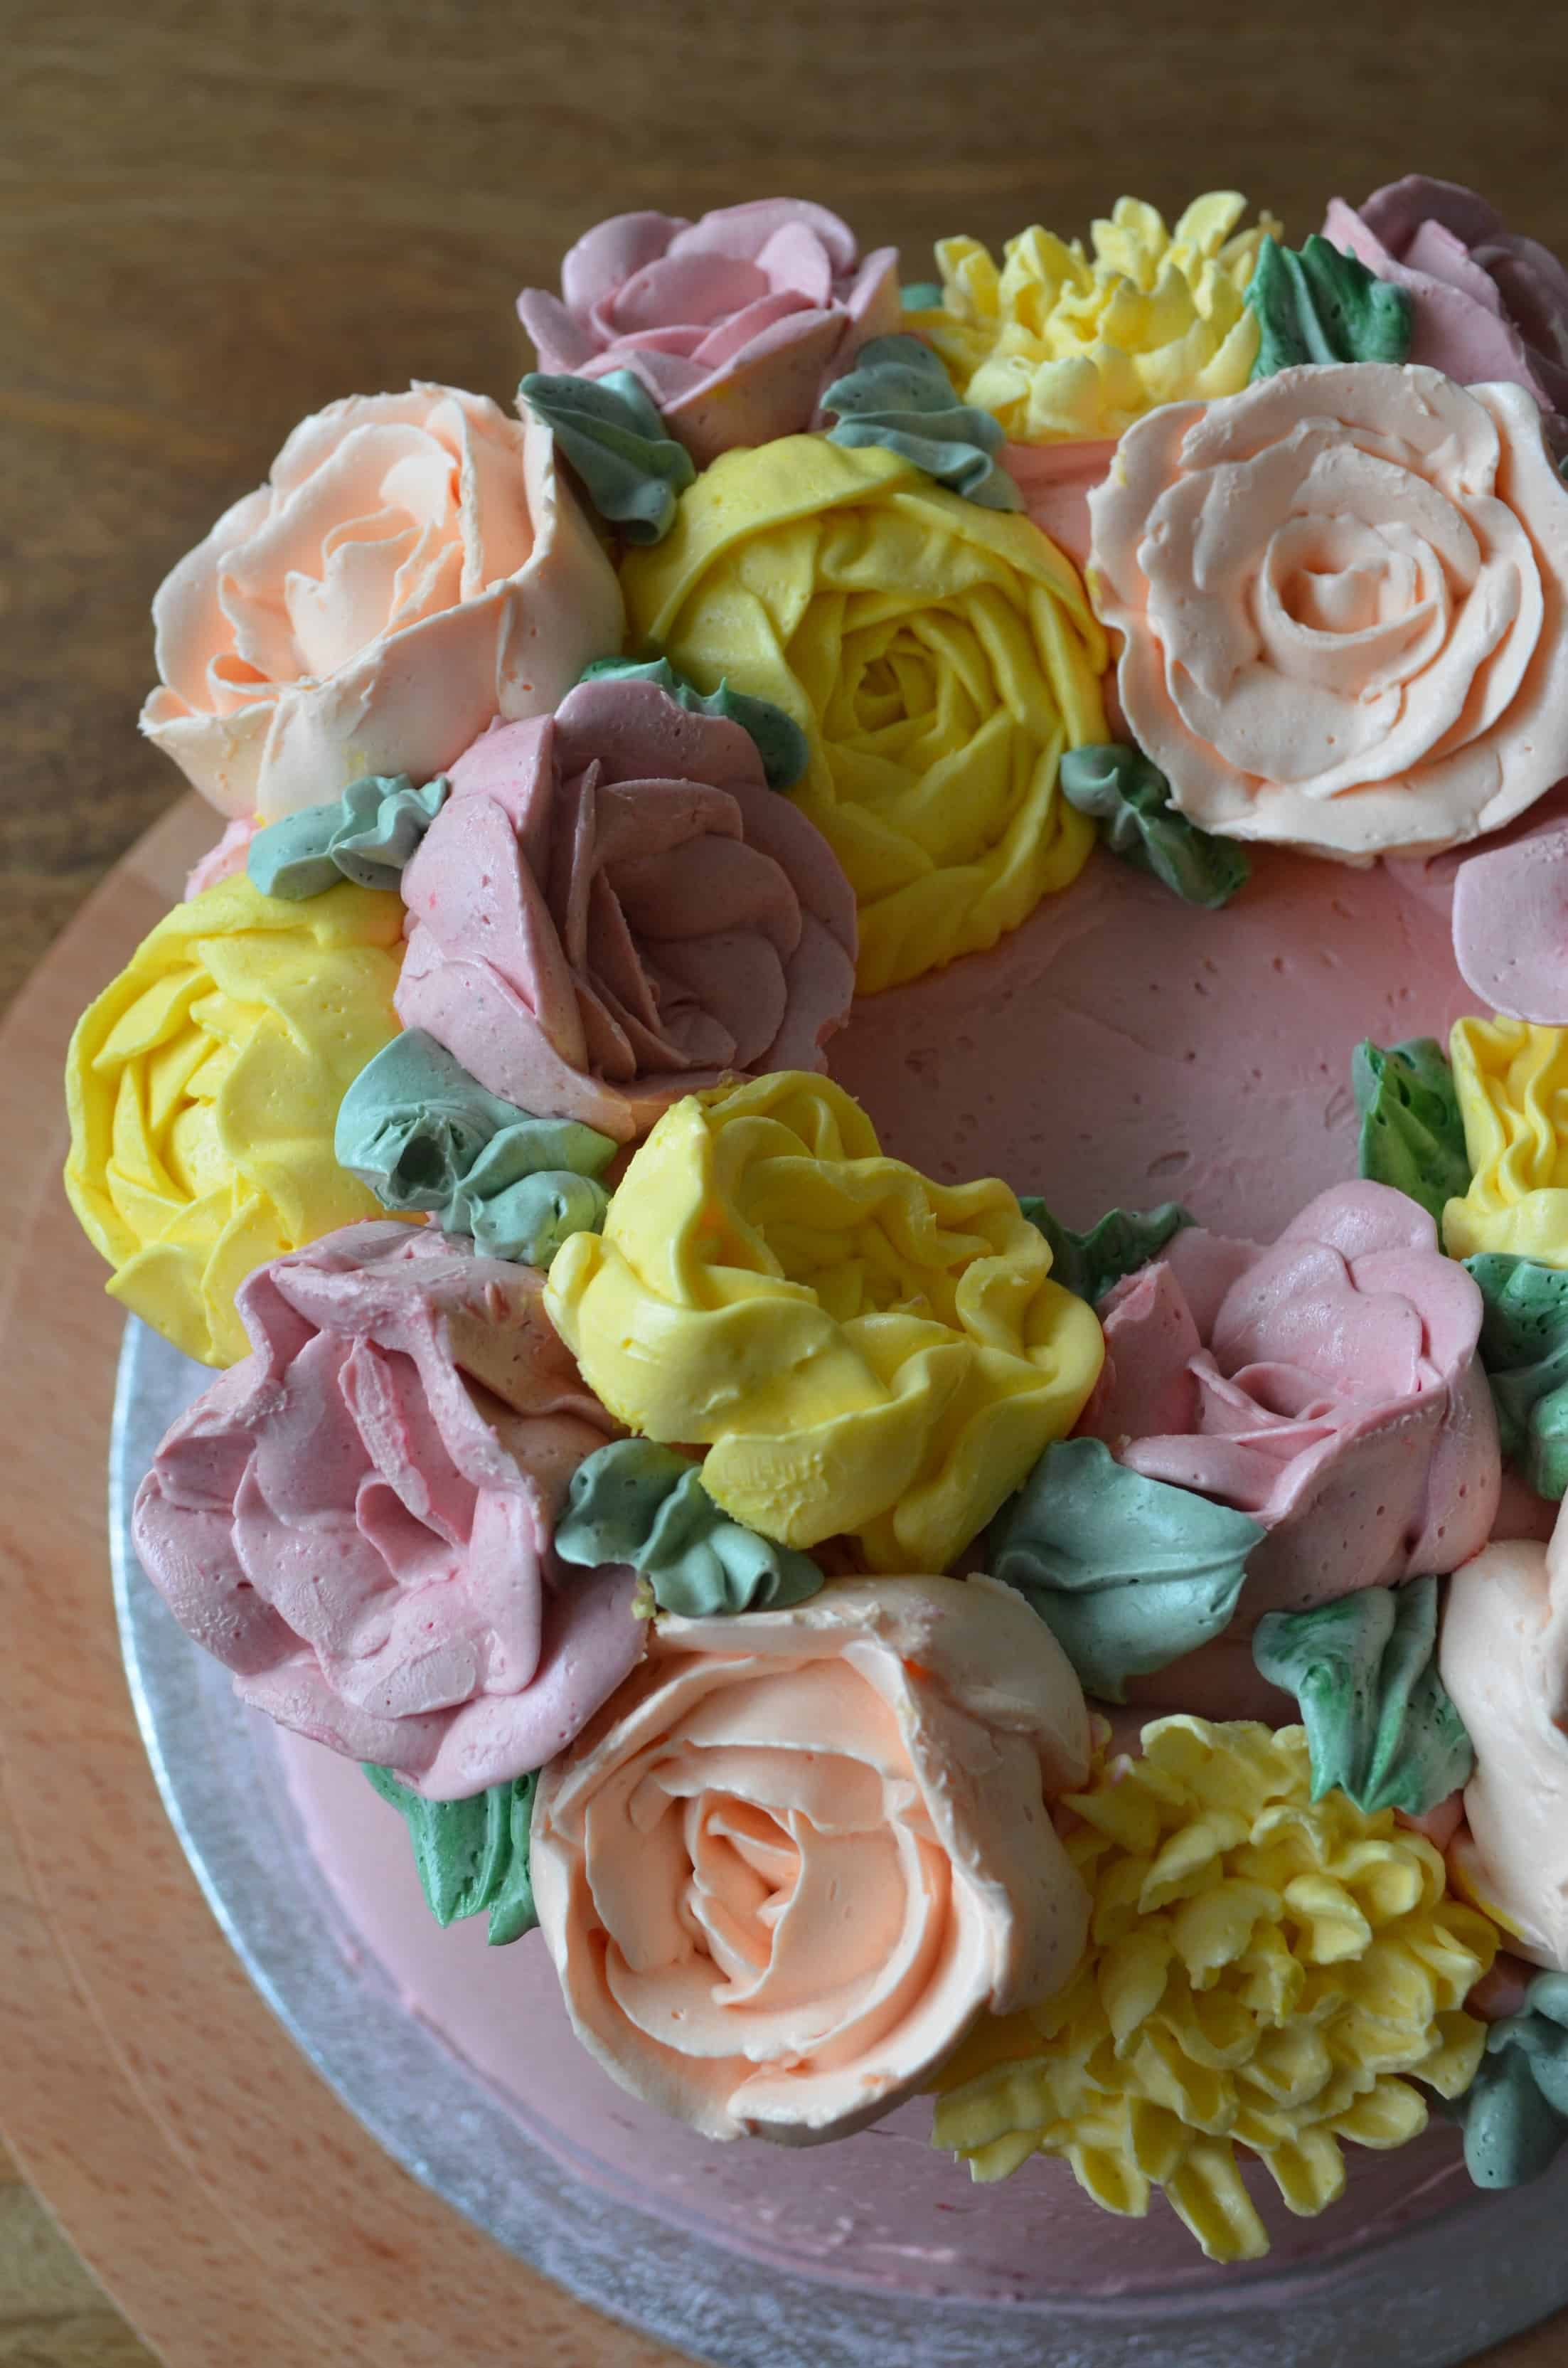
I watched a lot of YouTube videos by Cake Style for amazing tutorials on loads of different buttercream flower types. Once you have the plain roses down you can make quite a few pretty variations, but its the chrysanthemums I struggled with. The tutorials make them look so easy but its definitely not my strong suit, which is annoying because they can look so pretty!
I was pretty pleased with the flowers I created in the end though, and its definitely evoked a passion in me to create more flowery creations! Piping tips wise theres a few you need to have in your repertoire, but if you’re going to get any the Wilton 104 is the one to get. The 104 is what I used to create all the roses, ranunculus and blossoms. You’ll need Wilton tip 81 for the chrysanthemum’s and for the leaves Wilton tip 70.
Honestly though, I was sooo pleased with how it turned out! You know how usually you have the idea for a cake, and then when you come to make it its nothing like the vision? This actually was my vision!! I made it the day before I presented it to my sister though and I had nightmares all night of ridiculous things happening to it. Like the candles causing the whole cake to go up in flames – could that even happen!?
I think i’ve waffled on long enough about the flowers now, you probably want to hear about the actual cake!? It was a white chocolate sponge, with the nicest crumb texture! The recipe I was adapting called for cake flour, which isn’t something I’ve seen in the UK. After a bit of googling it turns out that you can substitute cake flour by the following: for every one cup of plain flour, take two tbsp’s out and replace it with two tbsp’s of corn flour. Cake flour has a lower protein content than regular plain flour, which gives cakes a softer, lighter texture whilst still retaining structure. I think i’m converted.
For the buttercream I decided to pair a classic flavour combination with the sponge; raspberry! I also figured a raspberry swiss meringue buttercream would keep the cake light and not cloying. Especially with all those buttercream flowers on top! Also, if I’m honest the smooth and silky buttercream is just a million times easier to spread on a layer cake.
I followed my swiss meringue buttercream recipe as normal, and then for the last step added fresh raspberry puree that I’d strained. This gives a really fresh flavour, and means the buttercream is food colouring free! I also added freeze-dried raspberries in the layers for an extra raspberry kick – well I say that, thats what I intended to do! But I forgot to do it on the first layer – doh! – so lets all just pretend I did it on both!

Two final notes!
The raspberry SMB recipe errs on the side of caution so you’ll definitely have some left – I had a full tupperware box! But you can pop it in the freezer for up to 6 months – hooray! Just make sure its defrosted and back to room temp before using it.
And finally, I decided to live my Instagram dream and film the assembling of the cake. So if you want to see it all come together, watch below! (Apologies in advance for the slight out of focus :(!)
Buttercream Flower Wreath Layer Cake
Ingredients
Cakes
- 170 g white chocolate
- 345 g cake flour or if you can't find that; 255g plain flour plus 90g corn flour
- 1 1/4 tbsp baking powder
- 3/4 tsp salt
- 172 g unsalted butter room temperature
- 300 g caster sugar
- 6 egg yolks
- 2 tsp vanilla extract
- 300 ml milk
Swiss Meringue Buttercream (for flowers)
- 200 g caster sugar
- 120 ml large egg whites
- 340 g unsalted butter room temperature
- 1 1/2 tsp vanilla extract
- assorted food colouring
Swiss Meringue Buttercream (for cake)
- 240 ml egg whites
- 400 g caster sugar
- 675 g unsalted butter room temperature
- 345 g raspberries (if using frozen raspberries, defrost before using)
- 1 tsp caster sugar or more to taste
- 1/2 tsp lemon juice
- 6 g freeze-dried raspberries one tube from the supermarket
Instructions
- For the cake: Firstly preheat your oven to Gas Mark 4/180C and grease and line three 8" baking tins and set aside. Then using a bain-marie, melt the white chocolate over a low heat and then set aside to cool.
- Sift together all the dry ingredients and set aside. Then, place the butter in a bowl and beat with an electric mixer on a high speed until creamy and light in colour. Add the sugar and continue to mix until fluffy.
- On a medium speed add the egg yolks, vanilla and melted white chocolate. Then with the mixer on low, alternate adding in the dry ingredients and milk in three batches, ending and starting with the dry ingredients.
- Mix until just combined, then pour into the prepared tins. Bake for 20-22 minutes until golden. Leave to cool a little in the tins, and then put them on a cooling rack to completely cool.
- For the buttercream flowers: Whisk together the sugar and egg whites in heat-safe bowl until combined. Then using a bain-marie, heat the mixture, stirring occasionally until it reaches 155-160F on a candy thermometer. The mixture will be very hot and the sugar will have dissolved. Once the mixture has reached the right temperature, take the bowl off the heat and using an electric mixer whisk the mixture on high speed for about 10 minutes until you reach medium-stiff peaks and the mixture has returned to room temperature.
- With the mixer on low, add in the butter a tablespoon at a time ensuring each piece is fully incorporated before adding the next. The butter must be at room temperature for it to be properly incorporated. Once the butter has been mixed in, add the vanilla extract and mix again for a few minutes until the buttercream is silky smooth and light.
- Divide the buttercream into different bowls according to how many different flower/leaf colours you want. Then mix food colouring into each and place each into piping bags. Sset aside the leaf buttercream to use later. Then using a flower nail and piping tips create an array of flowers, on squares of baking paper. Place the squares onto baking trays and place in the freezer while you make the rest.
- For the cake buttercream: Follow the swiss meringue buttercream recipe for the flowers, up to and including adding the butter in. Strain the raspberries through a sieve into a separate small bowl, so you are left with the puree without the seeds.Mix in the sugar and lemon juice, and then pour the mixture into the buttercream.
- Mix this on low at first, and then gradually increase the speed. It may take a few minutes for the puree to combine with the buttercream, so keep mixing until its fully combined.
- For assembly: Place one sponge onto the cake board and spread with a layer of raspberry buttercream and half of the freeze-dried raspberries. Then repeat with the second sponge layer. Then place the final sponge layer on top. Crumb coat the cake with a thin layer of the raspberry buttercream and then place in the fridge for 20 minutes to set.
- Then cover the chilled cake with a thick layer of raspberry buttercream and using a bench scraper, scrape off the excess to leave a smooth exterior.
- Place some of the raspberry buttercream into a piping bag and pipe a ring on top of the cake for the flowers to sit on. This gives the flowers some height, rather than all lying flat on top of the cake. Remove the buttercream flowers from the freezer, and peeling off the baking paper squares arrange them on the cake. Finally, pipe leaves wherever needed on the cake for the finishing touch.